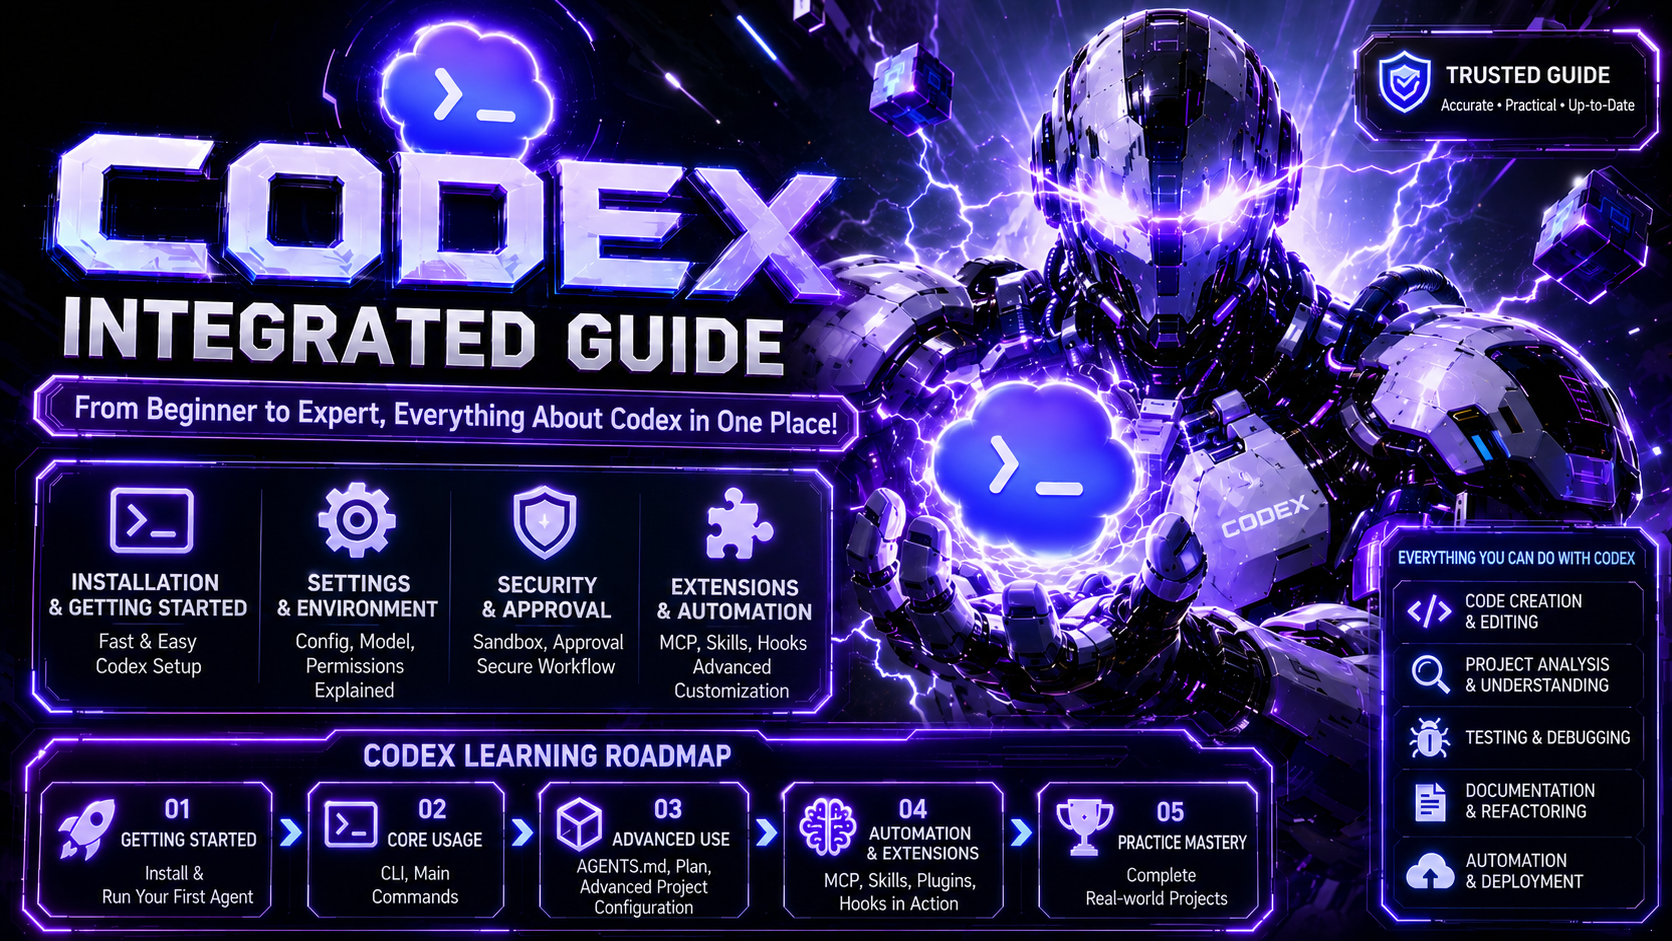
Codex — Practical Guide
A practical, beginner-friendly guide to Codex, OpenAI's official coding agent — all 31 parts. From install and auth to config, models, MCP, Skills, automation, security, and team operations.
0. Before Reading This Guide
01The Purpose of This Guide
This guide enables you to use Codex at the following levels.
Install
→ Log in
→ Run in your project
→ Help it understand the codebase
→ Delegate work safely
→ Review changes
→ Test
→ Automate recurring tasks
→ Manage team rules and security
This is not just a collection of commands—it explains how to weave Codex into your actual development workflow.
02What This Guide Covers
This guide comprehensively covers Codex's core features.
Getting Started
Installation, authentication, first run
Basic Usage
CLI, slash commands, file editing, diff review
Safety Features
sandbox, approval, permission profiles
Configuration
config.toml, profiles, model selection
Extensions
MCP, Skills, Plugins, Hooks
Task Management
Plan Mode, Goal Mode, Session Management
Automation
codex exec, GitHub Action, CI/CD
Advanced Use
Cloud, Desktop App, IDE Extension, Chrome Extension
Operations
Performance tuning, debugging, security, Enterprise deployment
Practical Examples
Workflow Recipes, Migration Guide, Quick Reference Card
03How to Read This Guide
You can read it cover to cover, but it's better to adjust the order based on your goals.
Codex Beginners
Section 0 → 1 → 3 → 4 → 5, then 6, 8, 14
Terminal-Savvy Developers
Section 1 → 2 → 5 → 7, then 9, 13, 24
Ready to Use Immediately
Section 5 → 8 → 14 → 15, then 20, 28, 29
Team Lead
Section 15 → 28 → 29, then 14, 30
Looking to Automate
Section 24 → 29 → 30, then 13, 28
Coming from Another AI Coding Tool
Section 1 → 2 → 29, then 15, 20
04Recommended Learning Order for Beginners
Beginners should read at least in this order.
- Section 0: How to Read This Guide
- Section 1: Codex Essentials
- Section 2: How Codex Works
- Section 3: Installation
- Section 4: Authentication
- Section 5: Your First Session
- Section 8: Frequently Used Slash Commands
- Section 14: Sandbox and Approval
- Section 15: AGENTS.md
05Essential Concepts Every Beginner Must Know
Certain concepts come up frequently when using Codex.
CLI
Way to run Codex from the terminal
TUI
Interactive interface that opens inside the terminal
Session
One ongoing conversation about a task with Codex
Thread
Conversation flow managed continuously
Fork
Copy an existing conversation and continue in a different direction
Sandbox
A safety feature that limits what Codex can access
Approval
A policy where Codex requests user approval before certain actions
AGENTS.md
A rules file that Codex must follow in your project
config.toml
Codex configuration file
Profile
A bundle of settings for different work situations
MCP
Protocol for connecting external services with Codex
Skill
A knowledge package for reusing specific work methods
Hook
Automatic actions that run before or after specific events
Plugin
A package that extends Codex functionality
Plan Mode
Mode that plans first before executing
Goal Mode
Mode for managing ongoing work goals
codex exec
Non-interactive automated execution method
These terms will be explained in more detail later. For now, just remember that these names will come up repeatedly.
065 Essential Things Every Beginner Must Learn First
When you first use Codex, it might seem like there are many features. But you don't need to know everything from the start.
Just start with these 5 things.
1Run Codex in Your Project
2Ask About Project Structure
3Plan Complex Tasks First
4Review Changes
5Use Safe Default Permissions
Learning just these 5 things lets you start using Codex safely.
1. Run Codex in Your Project
cd my-project
codex
2. Ask About Project Structure
Explain this project's structure and how to run it in a way that beginners can understand.
3. Plan Complex Tasks First
/plan I want to refactor the login feature.
Find related files, identify risks, and propose a step-by-step plan first.
4. Review Changes
/diff
5. Use Safe Default Permissions
sandbox_mode = "workspace-write"
approval_policy = "on-request"
07Principle 1. Start with Safe Defaults
Don't start with strong permissions like danger-full-access.
Recommended defaults are:
sandbox_mode = "workspace-write"
approval_policy = "on-request"
This combination lets you work within your current project while requiring user approval for risky actions.
08Principle 2. Don't Execute Large Tasks Right Away
For large tasks, first verify the plan using /plan.
/plan I want to refactor the payment module.
Analyze the current structure and propose a step-by-step change plan first.
It's safer to execute after reviewing the plan.
09Principle 3. Always Review Changes
Even code created by Codex should be reviewed by a human.
/diff
Especially review after these operations:
- Authentication
- Payment
- Database
- Permission handling
- Security configuration
- CI/CD
- Large refactoring
10Principle 4. Run Tests
After changes, run relevant tests.
You can request this inside Codex.
Run tests related to the login API I just modified and summarize the results.
Or run them directly.
npm test
11Principle 5. Document Recurring Instructions in AGENTS.md
Rules you need to repeat should be written in AGENTS.md.
Example:
# AGENTS.md

- Run relevant tests after all changes.
- Preserve existing API response formats.
- Follow TypeScript strict mode standards.
- Add tests for new features.
12Example Standards Used in This Guide
This guide uses the following formats for clarity.
Terminal Commands:
codex
codex "prompt"
codex --profile fast "task"
Configuration (TOML format):
model = "gpt-5.5"
sandbox_mode = "workspace-write"
approval_policy = "on-request"
Commands inside Codex:
/plan Create a step-by-step plan for this task.
13Recommended Default Configuration
Beginners should start with this configuration as a baseline.
model = "gpt-5.5"
model_reasoning_effort = "medium"
sandbox_mode = "workspace-write"
approval_policy = "on-request"
Here's what each setting means:
model = "gpt-5.5"
Use the recommended default model
model_reasoning_effort = "medium"
Balance between speed and accuracy
sandbox_mode = "workspace-write"
Allow read/write in the work folder
approval_policy = "on-request"
Request approval for risky or out-of-scope actions
Just these settings are enough to start.
14Prerequisites for Practice
To practice Codex, it helps to have these.
Node.js / npm
Required if using npm installation method
Git
Needed to review project changes
Code Project
Any git repo works
OpenAI / ChatGPT Account
Login and usage rights required
Terminal
Required for CLI usage
Code Editor
VS Code, Cursor, Windsurf, etc.
It's good to prepare a test project. It's safer not to apply it directly to important production projects from the start.
15Recommended Flow for Your First Practice
It's better to start with a small example project rather than a real production project.
- Navigate to a test project folder
- Run codex
- Request a project structure explanation
- Ask how to run and test the project
- Request a small modification
- Review changes with /diff
- Run tests
- Commit changes or revert them
In the terminal:
cd sample-project
codex
Inside Codex:
Explain the structure, how to run it, and how to test it for someone new to the project.
16Things Beginners Should Never Do
Beginners should avoid the following actions.
Start with danger-full-access
Codex can access the entire system
Make large edits right away in production
Hard to understand scope and risks
Commit without /diff
Can miss unintended changes
Deploy without testing
May not catch errors
Work on team projects without AGENTS.md
Codex may not know team rules
Connect many MCPs at once
Increases complexity and token costs
Give large tasks with vague requests
Results may not match expectations
Section 00 · Wrap-up
What to Remember from This Unit
This section is an orientation before diving into the main Codex content.
Start safely, plan first, review changes, and test.
Beginners should focus on these first:
- CLI execution:
cd project && codex
- Planning:
/plan command
- Review changes:
/diff command
- Safe defaults:
workspace-write + on-request
- Project rules: Write
AGENTS.md
Next Section
Section 1. Codex Essentials
1. Codex Essentials
01What is Codex?
Codex is an integrated coding agent that developers can use from the terminal, desktop app, IDE, cloud, and browser environments.
Codex can do the following:
- Analyze project structure
- Explain code
- Fix bugs
- Add features
- Write tests
- Refactor code
- Review code
- Write documentation
- Run shell commands
- Apply file patches
- Connect external services
- Delegate long-running tasks to the cloud
02Codex Definition for Beginners
An AI development partner that understands my project, finds needed files, creates solutions, and can execute commands.
Codex is not just a chatbot that answers questions about code. It can read the codebase directly, execute commands, modify files, connect to external tools, and even delegate cloud tasks when needed.
In other words, think of it as an agent-based development tool that performs development work together with you, not just "a tool that answers questions."
03Why Codex Isn't Just a Simple Chatbot
Typical AI chatbots respond based on code or descriptions that users paste in. Codex, on the other hand, operates within an actual development environment.
Codex can directly perform these tasks:
# Read project structure
ls
# Run tests
npm test
# Modify specific files
apply patch
# Review changes
git diff
In other words, Codex goes beyond simply saying "fix it this way." It helps with the entire workflow of actually reading files, modifying them, and verifying the changes.
04Core System 1: config.toml
config.toml is the configuration file that determines how Codex operates.
You can configure the following:
Which model to use
Choose which AI model to use
Reasoning strength
Adjust the model's thinking depth
Sandbox mode
Limit access scope
Approval policy
Define which actions require user permission
Basic settings for beginners to remember:
model = "gpt-5.5"
sandbox_mode = "workspace-write"
approval_policy = "on-request"
05Core System 2: Sandbox / Approval
Since Codex can execute actual commands and modify files, safety mechanisms are necessary.
Sandbox
Limit how far Codex can technically access
Approval
Determine when Codex needs user permission before taking actions
Typical sandbox modes:
read-only
Read-only access. Most secure
workspace-write
Can read and write within the current work folder
danger-full-access
Full system access. Use with caution
06Recommended Combination for Beginners
sandbox_mode = "workspace-write"
approval_policy = "on-request"
This combination is practical for real development work while ensuring risky tasks require user approval.
For example, in workspace-write mode, Codex can modify files within the current project folder but cannot freely modify the entire system.
07Core System 3: AGENTS.md
AGENTS.md is a file where you write the work rules that Codex must follow in your project.
Example:
# AGENTS.md

## Development Rules

- Write TypeScript code to strict mode standards.
- Always run npm test after changes.
- Do not arbitrarily change existing public APIs.
- Minimize style changes.
- Add tests for new features.
Simply put, AGENTS.md is a project operations manual you give to Codex.
08Benefits of Good AGENTS.md
With a good AGENTS.md, Codex won't repeat the same mistakes.
It also makes it easier for Codex to work according to your team's methods.
It's the most effective tool for determining Codex's behavior.
09Core System 4: MCP
MCP stands for Model Context Protocol.
With MCP, Codex can connect to external tools and services:
- GitHub
- Figma
- Sentry
- Database
- Internal APIs
- Documentation systems
- Issue trackers
10MCP's Role
If basic Codex is "a tool that reads and modifies my code," then Codex with MCP becomes "an agent that connects external services to complete work."
For example, if Sentry MCP is connected, Codex can review error logs and identify bug causes through a complete workflow.
11Core System 5: Skills
Skills are reusable work knowledge that makes Codex better at specific tasks.
For example, you can create skills like:
- PR review skill
- Test writing skill
- Security check skill
- API documentation skill
- Migration check skill
- Release notes skill
12Benefits of Skills
Skills help you avoid repeating long prompts every time.
For example, instead of saying this every time:
Review this PR. Separate out security issues, performance issues, missing tests, and API compatibility issues.
You can create a PR review skill, and Codex can reuse those guidelines when needed.
13Codex's Main Usage Interfaces
Codex is not a single-purpose tool. You can use the same Codex intelligence across multiple interfaces:
CLI
Terminal-focused development, quick fixes, automation
Desktop App
Manage multiple tasks simultaneously, visual diff review
IDE Extension
Edit directly in VS Code, Cursor, Windsurf
Codex Cloud
Delegate long-running tasks to the cloud
Chrome Extension
Browser-based tasks, admin pages, dashboards
14Recommended Starting Point for Beginners
For beginners, starting with CLI or IDE Extension is easiest.
- If you're comfortable with the terminal, CLI is good
- If you want to use it directly in your code editor, IDE Extension is good
15Codex's Core Workflow
Codex's basic workflow is typically as follows:
- User makes a request
- Codex reviews the current project and settings
- Reads project guidelines like AGENTS.md
- Finds necessary files
- Reads related code
- Plans the work
- Executes shell commands if needed
- Creates file modifications
- Shows the diff
- User reviews
- Runs tests
- Summarizes results
16Codex Execution Example
In the terminal:
cd my-project
codex
Inside Codex, you can make requests like this:
Explain this project's structure to me.
Or:
Add input validation to the login API.
17Reviewing Changes
After work, review changes with this command:
/diff
This is the most important step in Codex's workflow.
18Essential Commands for Beginners
You don't need to memorize all commands at first. These are enough:
/plan
Create a work plan before execution
/diff
Review changes made by Codex
/status
Check current session status
19Key Commands (continued)
/compact
Summarize long conversation to free up context
/resume
Resume previous session
/permissions
Check or change permissions
The most important commands for beginners are /plan and /diff.
20Principle 1: Start with a Plan for Large Tasks
Bad example:
Refactor this entire project for me.
Good example:
/plan I want to refactor the authentication module.
First analyze the current structure and propose risks and a step-by-step plan.
For complex tasks, it's safer to use /plan first.
21Principle 2: Always Review Diffs After Changes
You should always review changes made by Codex:
/diff
Especially review diffs after these operations:
- Authentication-related code changes
- Payment-related code changes
- Database migrations
- Large refactoring
- CI/CD configuration changes
- Security-related fixes
22Principle 3: Put Project Rules in AGENTS.md
Instead of repeating the same instruction, write it in AGENTS.md.
Example:
- Run npm test after all changes.
- Write migration files when changing DB schema.
- Keep existing API response formats intact.
- Write unit tests for new functions.
23Principle 4: Use Appropriate Profiles for Each Situation
Different tasks require different speeds and safety levels.
For example, use fast profile for quick questions, careful for security reviews, and ci for CI automation:
codex --profile fast "Explain this function"
codex --profile careful "Review this authentication logic for security"
codex --profile ci "Analyze why the test failed"
24Principle 5: Manage Context
Codex remembers long conversations, but performance may degrade if the context window fills up.
In such cases, use /compact:
/compact
Or specify just the files you need:
@src/auth/login.ts Focus on this file to review input validation logic.
25Mistake 1: Using danger-full-access From the Start
codex --sandbox danger-full-access
This mode gives Codex very broad permissions. Beginners should avoid using it by default.
Recommendation:
codex --sandbox workspace-write --ask-for-approval on-request
26Mistake 2: Committing Without Reviewing Diff
Code created by Codex should still be reviewed by humans.
Always follow this order:
Request → Generate Changes → /diff Review → Run Tests → Commit
27Mistake 3: Making Vague Requests Too Broadly
Bad example:
Make the code better.
Good example:
Read the login flow in src/auth folder,
and propose a refactoring plan to reduce duplicate validation logic.
28Mistake 4: Using Codex on Team Projects Without AGENTS.md
Work rules are important in team projects.
Without AGENTS.md, Codex may not know your team's style, testing approach, and deployment rules.
29Mistake 5: Connecting Too Many MCPs
More MCP servers mean more tool definitions and potentially higher token costs.
It's best to connect only essential MCPs at first.
30Codex Learning Roadmap
Codex in one sentence:
A multi-surface coding agent that understands your local project and external tools, and performs command execution and file modification within safety boundaries.
Beginners should learn in this order:
Install → Log in → Run CLI → Request project analysis
→ Use /plan → Request code changes → Review with /diff
→ Run tests → Write AGENTS.md → Configure profiles
Section 01 · Wrap-up
Key Takeaways from This Section
- Codex is not a simple chatbot but a coding agent
- Codex can be used on CLI, Desktop App, IDE Extension, Cloud, and Chrome
- To use Codex well, you need to understand
config.toml, Sandbox / Approval, AGENTS.md, MCP, and Skills
- Beginners should start with the
workspace-write + on-request combination
- Plan complex tasks with
/plan first, and always review changes with /diff
- Write project rules in
AGENTS.md
- Manage context with
/compact during long conversations
Next Section
2. Understanding How Codex Works
2. Understanding How Codex Works
01Codex's Overall Architecture
Codex can be understood in 4 main layers.
Codex
├─ Surface Layer
│  ├─ CLI
│  ├─ Desktop App
│  ├─ IDE Extension
│  ├─ Cloud Tasks
│  └─ Chrome Extension
│
├─ Extension Layer
│  ├─ MCP
│  ├─ Skills
│  ├─ Apps
│  └─ Web Search
│
├─ Security Layer
│  ├─ Sandbox
│  └─ Approval Policy
│
└─ Core Layer
   ├─ GPT-5.x-Codex Intelligence
   ├─ Shell Tool
   ├─ Patch Tool
   ├─ Read Tool
   └─ Web Search Tool
Core Layer is the brain, Security Layer is the safety guard, Extension Layer is the expansion mechanism, and Surface Layer is what users see.
02Core Layer: Codex's Brain
Core Layer is the innermost core intelligence of Codex. It's based on the GPT-5.x-Codex model family and understands user requests and plans actual development work.
What Core Layer Handles
- Understand codebase structure
- Read files
- Determine code modification directions
- Generate patches
- Plan shell command execution
- Interpret test results
- Analyze error causes
- Establish refactoring strategies
- Write documentation
- Summarize work
03Core Layer's Thinking Process
Suppose a user requests "Add email format validation to the login API."
Codex's Core Layer doesn't just answer. It typically thinks through the following process:
1. Find where the login API is.
2. Read related route, controller, and service files.
3. Check if existing validation methods are used.
4. Create a solution matching the project style.
5. Find test files if necessary.
6. Create a change patch.
7. Show diff for user review.
In other words, Core Layer is the center of reasoning, judgment, code understanding, and work planning.
04Tools Used by Core Layer
Codex's brain doesn't work alone. It uses several tools to perform necessary tasks.
Shell
Execute terminal commands
Patch
Apply file modifications
Web Search
Search web information when needed
MCP Tools
Connect to external services
Because of this structure, Codex acts like an agent that takes action in actual development environments, not just explaining things.
05Security Layer: Safety Mechanisms
Since Codex can execute actual commands and modify files, safety mechanisms are essential. Security Layer has two components.
Sandbox
Limit where Codex can access
Approval Policy
Determine when specific actions need user permission
06Sandbox Modes
Sandbox limits where Codex can technically access.
Typical sandbox modes:
workspace-write
Can read and write in current work space
danger-full-access
Full system access
Most suitable default for beginners:
sandbox_mode = "workspace-write"
This mode allows real development work while not giving unlimited system access.
07Approval Policy
Approval Policy determines when Codex needs user permission before taking actions.
Typical approval policies:
untrusted
Request approval for most actions besides reading
on-request
Proceed with regular tasks, request approval for risky or out-of-scope actions
never
Proceed without approval requests
Recommended combination for beginners:
sandbox_mode = "workspace-write"
approval_policy = "on-request"
This combination balances work efficiency and safety well.
08OS-Level Sandbox
Codex's sandbox is not just a promise—it uses OS-level restrictions.
Windows
Restricted token-based sandbox
Why this matters: Codex doesn't just promise "we won't do it"—it restricts access permissions at the OS level.
Sandbox is a safety fence around Codex. Even if Codex makes a mistake, it cannot escape the fence.
09Extension Layer Overview
Extension Layer allows Codex to connect to external tools beyond basic functions.
Main components:
- MCP — Connect external services like GitHub, Figma, Sentry
- Skills — Reusable work knowledge for performing specific tasks better
- Apps — Areas connected to ChatGPT connectors
- Web Search — Allow referencing latest internet information
10MCP (Model Context Protocol)
With MCP, Codex can connect to external services.
Connectable services:
- GitHub
- Figma
- Sentry
- Database
- Internal APIs
- Documentation systems
- Issue trackers
Example: If Sentry MCP is connected, Codex can review actual error logs, find related code locations, and propose fixes.
MCP extends Codex from a simple code helper to a development agent connected to external work systems.
11Skills and Apps
Skills are reusable work knowledge that makes Codex better at specific tasks.
Examples of skills you can create:
- Test writing skill
- PR review skill
- Security check skill
- API documentation skill
- Migration check skill
- Release notes skill
Skills are reusable manuals that teach Codex specific work methods.
Apps connect with ChatGPT connectors and let you reference business context outside the codebase.
12Web Search
Web Search lets Codex reference latest internet information.
Useful tasks:
- Check latest library usage
- Review recent API changes
- Search error messages
- Reference official documentation
- Check security advisories
However, not every task needs web search. Many internal code-only tasks work fine with just file reading and shell execution.
13Surface Layer: Where You Use Codex
Surface Layer is where users actually interact with Codex. Codex doesn't provide just one interface.
You can use it across multiple surfaces:
- CLI — From the terminal
- Desktop App — Visual interface
- IDE Extension — Inside the editor
- Cloud Tasks — In remote environment
- Chrome Extension — In the browser
14CLI (Command Line Interface)
CLI is how you use Codex from the terminal.
Basic execution:
codex
Pass a prompt directly:
codex "Explain this project's structure"
CLI is good for:
- Terminal-focused development
- Quick code analysis
- Bug fixing
- Running tests
- Reviewing git diffs
- Automation scripts
- CI/CD integration
CLI is the most basic yet powerful usage method.
15Desktop App
Desktop App lets you use Codex visually.
Features more convenient than CLI:
- Manage multiple tasks simultaneously
- Run each task in separate worktrees
- Review changes visually
- Fork conversations
- Use built-in terminal
- Manage automation tasks
- Use Appshots
- Use Computer Use feature
Desktop App is good for:
Running multiple tasks in parallel
Easy per-task thread management
Visually reviewing diffs in detail
Visual review is convenient
Team members not familiar with Codex
Can use with minimal terminal knowledge
Managing long-running work
Good for separating workflows
16IDE Extension
IDE Extension is how to use Codex inside VS Code, Cursor, Windsurf, and similar editors.
IDE Extension is good for:
- Modifying the currently open file immediately
- Asking while viewing code
- When you need inline edits
- Quick compile → fix → test cycles
- Editor-focused development
IDE Extension is the most natural way for beginners since you can invoke Codex from the editor you're already using.
17Codex Cloud and Chrome Extension
Codex Cloud is running tasks in OpenAI-managed environment rather than locally.
Cloud tasks are good for:
- Long-running refactoring
- Handling multiple issues simultaneously
- Large-scale code changes
- Tasks leading to PR creation
- Work where you can't keep your computer on
- Work that can run independently
Codex for Chrome is suited for browser-based work. You can use it for admin consoles, internal dashboards, CMS content, and ticket systems.
18Usage Recommendation by Surface
Skilled Codex users don't stick to one interface. They choose appropriate surfaces for different task types.
Modify current file
IDE Extension
Large refactoring plan
CLI + /plan
Running multiple tasks in parallel
Desktop App
Browser-based work
Chrome Extension
Codex is more of an integrated development agent with different surfaces for different situations than a single tool.
19Codex's Basic Workflow
Codex's actual workflow usually goes like this:
- User makes a request
- Codex checks the current project and settings
- Reads project guidelines like AGENTS.md
- Finds needed files
- Reads related code
- Creates a work plan
- Executes shell commands if necessary
- Creates file modification proposals
- Shows the diff
- User reviews
- Runs tests
- Summarizes results
20Real Case: Adding Password Validation
Suppose a user requests "Add password length validation to the signup API."
Codex typically checks:
- Where is the signup API route?
- Where is validation logic currently?
- Is password policy already defined?
- Where are test files?
- What's the error response structure?
- What tests should run after changes?
After this process, Codex creates a solution.
21AGENTS.md: Project Guideline File
Codex uses AGENTS.md as important guidelines if it exists.
Example AGENTS.md content:
# AGENTS.md

- Run npm test after all changes.
- Write code to TypeScript strict mode standards.
- Don't break existing API response formats.
- Add tests for new features.
Then Codex references these rules when working. You don't need to repeat instructions.
AGENTS.md is the key mechanism that makes Codex act appropriately for your project.
22Codex's Configuration Priority
Codex reads configuration from multiple locations. Priority is:
- CLI options passed when running
- Project configuration file
- User configuration file
- System configuration file
- Codex defaults
Example:
codex -m gpt-5.4 "Review this code"
In this case, gpt-5.4 is used for that session.
Options specified directly when running have highest priority.
23Context Management
Codex uses conversation history, read files, command results, and project guidelines as context.
But context has limits. Long conversations or many files can fill the context window.
Command to use then:
/compact
/compact summarizes long conversations to free up context space.
Also, specifying just needed files helps Codex work more efficiently:
@src/auth/login.ts Check login validation logic in this file.
Smaller work scope means Codex works more accurately.
24Recommended Understanding Order for Beginners
You don't need to memorize the entire structure from day one. Understand in this order:
- Run Codex from CLI or IDE
- Understand that Codex can read and modify files
- Understand that sandbox and approval are safety mechanisms
- Build habits of working safely with /plan and /diff
- Tell it project rules via AGENTS.md
- Configure basic behavior with config.toml
- When needed, extend with MCP and Skills
- Separate large work with Desktop App or Cloud
Just these three things are enough at first:
Codex reads code. Codex can execute commands. Codex moves safely within sandbox and approval boundaries.
25Beginner Real-World Scenario
Situation
You received a new project you've never seen. You don't know where to start.
Run Codex
cd my-project
codex
First Request
Explain the overall structure of this project so a beginner can understand.
Summarize main folders, how to run it, how to test, and key entry points.
26Beginner Scenario (continued)
Next Request
/plan Analyze how the login feature works in this project.
Find related files and create a plan that explains the data flow step-by-step.
Change Request
If the login API doesn't have email format validation, add it.
First check the existing validation style and apply it the same way.
Review Changes
/diff
Run Tests
Run related tests and summarize the results.
This flow is Codex's most basic usage pattern.
Section 02 · Wrap-up
What to Remember from This Section
Codex is an integrated development agent made up of 4 layers: Core, Security, Extension, and Surface.
- Core Layer is Codex's brain, handling code understanding and work planning.
- Security Layer ensures safety with sandbox and approval.
- Extension Layer expands with MCP, Skills, Apps, and Web Search.
- Surface Layer provides diverse interfaces: CLI, Desktop App, IDE Extension, Cloud, and Chrome.
- Define project rules with
AGENTS.md and config.toml.
- Beginners should start with CLI or IDE.
Next Section
Section 3. Installing Codex
3. Installing Codex
01What to Check Before Installation
Check these items before installing Codex.
Operating System
Supports macOS, Linux, Windows
Terminal
macOS Terminal, iTerm2, Linux shell, Windows PowerShell, etc.
Git
Required for reviewing project changes
npm
Required if installing via npm
Homebrew
Required if installing via Homebrew on macOS
Authentication Info
ChatGPT account or API Key (required for Codex authentication)
Codex CLI is a coding agent that runs on your local terminal and can read, modify, and execute commands within your chosen directory.
02Recommended Installation Method for Beginners
Beginners should start based on their operating system:
macOS
Standalone installer or Homebrew
Linux
Standalone installer or npm
Windows
PowerShell installer or npm
Simple criteria:
macOS / Linux → standalone installer
Windows → PowerShell installer
Already have Node.js → npm
Use Homebrew frequently on macOS → Homebrew
03macOS / Linux: Official Standalone Installer
On macOS or Linux, you can use the official installer.
curl -fsSL https://chatgpt.com/codex/install.sh | sh
This method installs Codex CLI without needing npm or Homebrew.
After installation, run this command in the terminal:
codex
On first run, you'll see a login prompt.
04Unattended Install
For environments like CI, remote servers, or automation where interactive input is not possible:
curl -fsSL https://chatgpt.com/codex/install.sh | CODEX_NON_INTERACTIVE=1 sh
CODEX_NON_INTERACTIVE=1 is an environment variable to reduce interactive prompts during installation.
05Windows: PowerShell Installer
On Windows, you can install from PowerShell.
powershell -ExecutionPolicy ByPass -c "irm https://chatgpt.com/codex/install.ps1 | iex"
After installation, run this in PowerShell:
codex
Windows has native PowerShell support for Codex, and you can also use WSL2 if a Linux native environment is needed.
06Installing via npm
If you already have Node.js and npm installed, you can install via npm.
npm install -g @openai/codex
After installation, run:
codex
npm method is a universal way to install on macOS, Linux, and Windows.
To update, use:
npm install -g @openai/codex@latest
07Installing via Homebrew
On macOS with Homebrew, you can install with:
brew install --cask codex
After installation, run:
codex
Updates typically go like this:
brew update
brew upgrade --cask codex
08Installing via winget
On Windows, you can also install using winget.
winget install OpenAI.Codex
However, the latest official Codex CLI quickstart explicitly recommends PowerShell installer for Windows. Windows beginners should use this method first:
powershell -ExecutionPolicy ByPass -c "irm https://chatgpt.com/codex/install.ps1 | iex"
If using winget, verify after installation:
codex --version
09Direct Binary Download
If you can't use npm, Homebrew, or installers, download platform-specific binaries directly from GitHub Releases.
macOS Apple Silicon / arm64
codex-aarch64-apple-darwin.tar.gz
macOS Intel / x86_64
codex-x86_64-apple-darwin.tar.gz
Linux x86_64
codex-x86_64-unknown-linux-musl.tar.gz
Linux arm64
codex-aarch64-unknown-linux-musl.tar.gz
After download, extract, rename the executable to codex, and add it to PATH.
10Direct Binary Download · Installation Example
tar -xzf codex-x86_64-unknown-linux-musl.tar.gz
mv codex-x86_64-unknown-linux-musl codex
chmod +x codex
sudo mv codex /usr/local/bin/
Verify installation:
codex --version
11Verifying Installation
After installation, check that Codex installed correctly:
codex --version
If successful, you'll see the version number.
codex-cli 0.136.0
Then run Codex:
codex
On first run, a login screen appears.
12Upgrading Codex
Codex updates frequently. New versions include model support, sandbox improvements, permissions, hooks, plugins, desktop integration, and bug fixes, so upgrade regularly.
Upgrade standalone installer
curl -fsSL https://chatgpt.com/codex/install.sh | sh
Upgrade npm
npm install -g @openai/codex@latest
Upgrade Homebrew
brew update
brew upgrade --cask codex
Verify after upgrade
codex --version
13Shell Completions Setup
Shell completions let you autocomplete Codex commands in the terminal.
bash
codex completion bash > /etc/bash_completion.d/codex
If you have permission issues, use sudo:
codex completion bash | sudo tee /etc/bash_completion.d/codex
zsh
mkdir -p ~/.zsh/completions
codex completion zsh > ~/.zsh/completions/_codex
14Shell Completions Setup (continued)
If your ~/.zshrc doesn't have the completion path, add this:
fpath=(~/.zsh/completions $fpath)
autoload -Uz compinit
compinit
Apply:
source ~/.zshrc
fish
mkdir -p ~/.config/fish/completions
codex completion fish > ~/.config/fish/completions/codex.fish
Apply:
source ~/.config/fish/config.fish
15First Run After Installation
After installation, navigate to your project folder:
cd my-project
Run Codex:
codex
On first run, you'll see a login prompt. For beginners, ChatGPT account login is recommended. API key method is also available, but some features may differ, so ChatGPT login is simplest initially.
16Pros and Cons by Installation Method
Standalone installer
Simplest, no npm needed | Recommended for macOS/Linux beginners
PowerShell installer
Windows official quickstart method | Recommended for Windows users
npm
Cross-platform, easy updates | Recommended for Node.js developers
Homebrew
Easy management on macOS | Recommended for macOS developers
winget
Windows package management | Recommended for advanced Windows users
Direct binary download
No package manager needed | Recommended for restricted servers/advanced users
17Troubleshooting PATH Issues
If codex command isn't recognized after installation, it's usually a PATH issue.
Error example:
codex: command not found
Windows PowerShell:
codex : The term 'codex' is not recognized
Check with:
which codex
Windows PowerShell:
where.exe codex
View current PATH:
echo $PATH
Windows PowerShell:
$env:Path
18Installation Security Notes
Since Codex accesses authentication tokens and project code, installation source is critical. Only use official sources:
Official OpenAI documentation
Official openai/codex GitHub repository
Official npm package @openai/codex
Official installer URL
Recently, malicious npm packages targeting Codex developers have been reported stealing auth tokens.
Avoid similarly-named unofficial packages during installation.
Bad examples:
npm install -g codex
npm install -g codex-ui
npm install -g codexui-android
Recommended:
npm install -g @openai/codex
19Basic Commands to Try Right After Installation
After installation, verify in this order:
codex --version
codex
Run from project folder:
cd my-project
codex
Or run as one-liner:
codex "Explain this project's structure"
20Troubleshooting ① · ②
Problem 1. Cannot find codex command
Symptom:
command not found: codex
Solution:
codex --version
which codex
echo $PATH
If using npm, reinstall:
npm install -g @openai/codex@latest
Problem 2. npm permission error
Symptom:
EACCES: permission denied
Simplest workaround is using standalone installer:
curl -fsSL https://chatgpt.com/codex/install.sh | sh
21Troubleshooting ③ · ④
Set npm global prefix
mkdir -p ~/.npm-global
npm config set prefix '~/.npm-global'
Add to shell config file:
export PATH="$HOME/.npm-global/bin:$PATH"
Apply:
source ~/.zshrc
Or:
source ~/.bashrc
Problem 3. Windows PowerShell execution policy issue
Check current policy:
Get-ExecutionPolicy
Install command temporarily uses ByPass:
powershell -ExecutionPolicy ByPass -c "irm https://chatgpt.com/codex/install.ps1 | iex"
22Troubleshooting ⑤
Problem 4. Installed but no login screen appears
Check version first:
codex --version
Run again:
codex
If still problematic, it might be an existing config or auth file issue. See the next section on authentication.
Problem 5. Old version runs instead
Multiple installations might have old Codex in PATH first.
Check:
which codex
codex --version
Windows:
where.exe codex
codex --version
Clean up duplicates, then reinstall or upgrade.
23Installation Checklist for Beginners
You're done once you've checked all these:
□ Check OS
Chose installation method for my OS
□ Official source
Used only official installation commands
□ Verify version
codex --version works
□ Project folder
Can run codex from project folder
□ Login screen
Login screen appears on first run
□ npm package name
If npm install, verified package is @openai/codex
□ Unofficial packages
Didn't install unofficial Codex-like packages
Section 03 · Wrap-up
What to Remember from This Section
Codex can be used on macOS, Linux, and Windows. Recommended installation method varies by OS.
- macOS/Linux beginners: Standalone installer is simplest
- Windows beginners: PowerShell installer recommended first
- Node.js developers: npm installation (
npm install -g @openai/codex)
- macOS Homebrew users:
brew install --cask codex
After installing, verify with codex --version, and avoid installing unofficial packages with similar names.
Next Section
Section 4. Authenticating Codex
4. Authenticating Codex
01Authentication Methods at a Glance
Here are the main authentication methods available in Codex.
Device Auth
Remote servers, environments where browser auto-launch is difficult —
codex login --device-auth
API Key
API-based usage, automation, separate key management environments —
codex login --with-api-key
Access Token
Advanced environments using already-issued access tokens —
codex login --with-access-token
For beginners, ChatGPT OAuth login is recommended.
02Logging In with ChatGPT Account
This is the most basic authentication method.
Run the following command in the terminal:
codex login
A browser will open—log in with your ChatGPT account. After logging in, return to the terminal and you can use Codex.
Check login status:
codex login status
If you're properly logged in, your current authentication mode will be displayed.
03Why ChatGPT Login Is Recommended
For first-time users, ChatGPT account login is easier than API Key.
Simple setup
Just log in through the browser
Less risk of key exposure
You don't handle API Key directly
Connected to account plan
You can use account permissions: Plus, Pro, Business, Enterprise, etc.
Easy integration with Desktop App and Cloud features
Suitable for account-based features
04Logging In with Device Auth
In environments where the browser doesn't open automatically, you can use Device Auth.
For example, it's useful in these situations:
- Remote servers
- SSH access environments
- Headless servers
- Development environments without a browser
- Terminal-only environments
Command:
codex login --device-auth
Running this command displays an authentication URL and code in the terminal. You can then open the URL in another device or browser and enter the code to log in.
05Device Auth Flow
The Device Auth process works as follows.
1Run codex login --device-auth on a remote server
2Terminal displays authentication URL and code
3Open the URL in your local browser
4Enter the code
5Log in with ChatGPT account
6Codex authentication on remote server completes
06Logging In with API Key
You can also authenticate Codex using an API Key. According to the official CLI reference, API Key is passed via stdin.
Example:
printenv OPENAI_API_KEY | codex login --with-api-key
Or you can enter it directly.
codex login --with-api-key
In this case, the terminal waits for you to input the API Key.
Security note: Avoid putting API Key directly in commands.
07API Key Input Methods
Bad example — exposing key in command:
codex login --with-api-key sk-...
Recommended method — using environment variables and stdin:
export OPENAI_API_KEY="sk-..."
printenv OPENAI_API_KEY | codex login --with-api-key
This method is safer because the key doesn't remain in terminal history.
08When API Key Login Is Suitable
API Key login is appropriate for these situations.
CI/CD automation
Authentication possible without browser login
Server environments
Environment variable management is easier than account OAuth
Organization-level API usage management
Can be managed by API billing
SDK / automation scripts
Suitable for token-based execution flows
However, beginners risk exposing API Key while managing it directly, so ChatGPT OAuth login is recommended initially.
09Logging In with Access Token
In advanced environments, you can also pass an access token via stdin.
printenv CODEX_ACCESS_TOKEN | codex login --with-access-token
This method is used in automation environments that already securely issue and manage access tokens, rather than for general beginners.
Beginners typically don't need to use this method.
10Checking Login Status
To check if Codex is currently logged in, use the following command:
codex login status
This command displays your current authentication mode and returns exit code 0 if credentials exist.
Automation script example:
if codex login status >/dev/null 2>&1; then
  echo "Codex is logged in"
else
  echo "Codex is not logged in"
fi
Even beginners should run this command first if problems occur.
11Logging Out
To remove saved authentication credentials, use the following command:
codex logout
codex logout removes saved API keys and ChatGPT authentication information.
Logout is recommended in these situations:
Used on a shared computer
Protect your account
Before returning company equipment
Remove authentication information
When switching to another account
Prevent existing authentication conflicts
When replacing API Key
Remove old key
12Configuring Credential Storage Method
Codex must save authentication information so you don't have to log in again next time. The credential storage method can be set with cli_auth_credentials_store in config.toml.
file
Store credentials in a file
keyring
Use operating system keychain or secure storage
auto
Use keyring if possible, fall back to file if not
For beginners, auto is recommended. For company equipment where security is critical, consider using keyring.
13Enforcing Login Method
In organization or team environments, you may want to restrict login methods. This is possible with the forced_login_method setting in config.toml.
Enforce ChatGPT login only:
forced_login_method = "chatgpt"
Or you can mandate API Key method only:
forced_login_method = "api"
This setting is more important for teams, companies, and enterprise environments than for individual beginners.
14Difference Between MCP OAuth and Codex Login
Two kinds of authentication can appear in Codex.
Codex Login
Permission to use Codex CLI itself
MCP OAuth Login
Permission to use a specific MCP server or external service
To log in to Codex itself:
codex login
To log in to an MCP server:
codex mcp login <server-name>
Beginners should complete Codex login first and cover MCP later in the external service integration section.
15Cautions When Using Multiple Accounts
If you use both personal and company accounts, authentication conflicts can occur.
Recommended method:
Personal projects → Personal ChatGPT account
Company projects → Company workspace account
Automation / CI → API Key
When switching accounts, follow this sequence:
codex logout
codex login
codex login status
16Authentication and Plan Permissions
When you log in with a ChatGPT account, available Codex features may vary depending on your account plan and organization settings.
Factors that affect availability:
- Subscription plans: Plus / Pro / Business / Enterprise / Edu, etc.
- Organization admin settings
- Available models
- Cloud work availability
- Usage limits
- Team security policies
Exact limits and available features can vary depending on account status and organization settings, so if there are problems, check your login status first.
17Security Notes for Authentication Information
API Keys and access tokens should be treated similarly to passwords.
Never do:
- Commit API Key to GitHub
- Paste API Key in README
- Share API Key directly on Slack, Discord, etc.
- Enter key in ways that remain in terminal history
- Log in to suspicious Codex-like packages from unknown sources
When using API Key as an environment variable, add .env to .gitignore so it doesn't get committed to git:
.env
.env.local
*.key
18Troubleshooting Authentication
Problem 1. Codex keeps asking to log in even though I've logged in
First, check the status:
codex login status
If it says there's no login information, log in again. If it persists, log out and log in again:
codex logout
codex login
Problem 2. Browser won't open
In environments where browser auto-launch doesn't work, use Device Auth:
codex login --device-auth
19Troubleshooting Authentication (Continued)
Problem 3. Cannot log in from a remote server
On SSH servers or headless environments, use the following method:
codex login --device-auth
Or API Key method:
printenv OPENAI_API_KEY | codex login --with-api-key
Problem 4. API Key doesn't work
Check: Is the environment variable name correct? • Is the actual value not empty? • Are there no spaces before or after the key? • Is the key not revoked or rotated? • Is API usage allowed in your organization?
echo "$OPENAI_API_KEY"
20Troubleshooting Authentication (Additional)
Problem 5. A different account is logged in
Check the current status:
codex login status
Remove existing authentication:
codex logout
Log in again:
codex login
Problem 6. Authentication fails in CI
In CI, usually register the API Key as a secret, then pass it via stdin:
printenv OPENAI_API_KEY | codex login --with-api-key
21Authentication Checklist for Beginners
- Codex installation is complete
codex --version outputs normally- Ran
codex login
- Completed ChatGPT account login in browser
- Verified login status with
codex login status
- Run
codex logout after use on a shared computer
- If using API Key, don't expose it in terminal or Git
- On remote servers, use
codex login --device-auth
22Recommended Authentication Flow
For beginners, proceed in this order:
codex --version
codex login
codex login status
codex
For remote servers, use this flow:
codex --version
codex login --device-auth
codex login status
codex
For automation environments, use this flow:
printenv OPENAI_API_KEY | codex login --with-api-key
codex login status
23Continuing Your Work After Switching Accounts
When one account's usage runs out, you can log in with another account and keep working with your existing context. The key point is that typing /logout inside Codex ends the current session. So instead of swapping accounts in place, you save the session, log in with the new account, and then resume.
First check the session ID, then switch accounts from a regular terminal.
# 1. Check the current session ID inside Codex
/status
# If you didn't note it, check the sessions folder directly
ls ~/.codex/sessions/

# 2. Exit Codex, then log out from a regular terminal
codex logout

# 3. Log in with the other account you will continue on
codex login
Note: Run codex logout from a regular terminal outside Codex. Typing /logout inside Codex ends the current session immediately—that is expected behavior.
24Resuming an Existing Session
Once logged in with the new account, move to your existing project folder and resume the session. There are three ways, depending on your situation.
# Move to your existing project folder
cd /path/to/your/project

# Resume the most recent session right away
codex resume --last

# Resume a specific session by its ID
codex resume <SESSION_ID>

# Pick directly from the full session list
codex resume --all
Your work context carries over through the local session record, and Codex runs under the usage, permissions, and plan of the newly logged-in account. If sessions get tangled, codex resume --all lets you choose the right one directly—the safest option.
Policy Note
Using multiple accounts to get around usage limits may violate the service policy. Use only accounts you are authorized for, within normal bounds.
Section 04 · Wrap-up
What to Remember from This Unit
Codex requires authentication after installation. For beginners, codex login with ChatGPT account is the simplest method. In server environments where you can't open a browser, use codex login --device-auth, and in automation environments, pass API Key via stdin.
Check login status with codex login status, log out with codex logout, and never expose API Keys and access tokens in code repositories or chat.
Next Section
Section 5. Quick Start: Starting Your First Session
5. Quick Start: Starting Your First Session
01Goals of the First Session
In your first session, you only need to learn the following flow.
- Move to the project folder.
- Run Codex.
- Have it explain the project structure.
- Request a small task.
- Review the changes.
- Run tests if needed.
- End the session.
You don't need to attempt large refactoring or automation from the start. The goal of the first session is to get a feel for how Codex works in your project.
02Prerequisites
First, you need to have the following items ready.
Codex Installation
codex --version
Codex Login
codex login status
Git Project
A project with .git folder
Terminal
macOS Terminal, iTerm2, Linux shell, PowerShell, etc.
Code Editor
VS Code, Cursor, Windsurf, etc.
Verify installation and login:
codex --version
codex login status
If installation and login are working properly, you can start your first session.
03Navigate to Project Folder
Codex understands your project based on the folder where your terminal is located. First, navigate to your project folder.
cd ~/my-project
For a Git project, you can verify it like this:
git status
If it's a normal project, your current branch and change status will be displayed.
On branch main
nothing to commit, working tree clean
For beginners, it's better to start practice on a test project or personal project, not a critical production project.
04Running Codex
Run Codex from your project folder.
codex
An interactive Codex screen will open inside your terminal. This screen is usually called TUI, short for Terminal UI.
Once Codex is running, you can make requests in natural language.
Explain what this project structure is like.
For the first request, it's better to have it read and explain the project rather than request code changes.
05First Request: Have It Explain Project Structure
Enter your first request like this:
Explain this project's structure in a way that beginners can understand.
Organize the main folders, how to run it, testing methods, and core entry points.
Codex usually checks the following:
- Project configuration files like package.json, pyproject.toml, Cargo.toml
- README
- Main folders like src, app, lib, test
- Execution scripts
- Test scripts
- Framework structure
- Core entry points
At this stage, focus on understanding the project without modifying files.
06Examples of Good First Questions
Here are examples of good first questions for understanding your project.
Technology Stack
Explain what technology stack this project is built with.
Local Execution
Tell me the sequence to run this project locally.
Running Tests
Find what command runs tests.
Role-based Organization
Organize core folders and files by their roles.
07Second Request: Ask for a Small Task
Once you understand the project structure, request a small task. For the first time, safe documentation edits or minor code improvements are good choices.
If README doesn't have a local execution method section, add one.
Or:
Check how input validation is done in the login API,
and if changes are needed, explain what should be changed first.
For beginners, the first task should have a small change scope and low risk.
08Recommended First Tasks
README improvements
Low risk and easy diff review
Finding test commands
Understand project without code changes
Explaining specific functions
Safe since it's reading-focused
Adding small validation
Good for learning the code modification flow
Improving comments
Small change scope
Requests to avoid from the start:
- Refactor the entire project for me.
- Completely rewrite the architecture.
- Fix all tests and deploy too.
In the first session, small and clear tasks are best.
09Complex Tasks Start with /plan
If a task is even slightly complex, don't execute it directly—use /plan.
/plan I want to add input validation to the login API.
Find related files, check existing validation methods and test locations,
then propose a step-by-step work plan first.
/plan makes Codex organize its approach before modifying files.
Small tasks affecting 1-2 files → can request directly / Tasks likely changing 3+ files → use /plan first
10When /plan Is Useful
Multiple files may change
Must check scope first
Don't know existing structure well
Can modify wrong files
Authentication, payment, permission tasks
High risk
Refactoring
Must predict impact scope
Adding tests
Must see existing test structure first
11Intervening While Codex Works
You can correct direction even while Codex is working.
Not that file—focus on src/auth/login.ts.
If you want to change test scope:
Instead of all tests, run only login-related tests first.
If you want to reduce scope:
For now, just analyze—don't modify code.
Beginners should understand that Codex doesn't always perfectly match your intent on the first try, and you can keep adjusting direction during work.
12Reviewing Changes: /diff
If Codex modifies files, you must review the changes.
/diff
/diff shows changes Codex made in the current session. Items to check:
Changed files
Did only intended files change?
Change scope
Too much code change?
Existing behavior
Existing APIs or UIs not broken?
Tests
Related tests added or modified?
Security
Sensitive information not exposed?
Style
Matches project code style?
If Codex modifies files, always check /diff.
13When to Always Check /diff
Especially check /diff after these tasks:
- Authentication logic modification
- Payment logic modification
- Permission handling modification
- Database schema changes
- Environment variable changes
- CI/CD configuration changes
- Large refactoring
The most important habit for beginners is this:
If Codex modifies files, always check /diff.
14Running Tests
After reviewing changes, run related tests. You can have Codex find the test command.
Find the command to run related tests in this project.
Or request directly:
Run tests related to the part I just modified and summarize the results.
Example test commands:
npm test
pytest
pnpm test
cargo test
go test ./...
When tests fail, it's better to have Codex analyze the cause first rather than immediately asking to fix it.
15Requesting Work Summary
When work is done, request a summary from Codex.
Summarize the changes in this session.
Organize changed files, key modifications, tests run, and remaining TODOs.
Good summary format:
Changed files:
- src/auth/login.ts
- src/auth/login.test.ts

Key changes:
- Added email format validation
- Return 400 response for invalid email input
- Preserved existing error response format

Tests:
- Ran npm test -- login
- All related tests passed
This summary is also useful when writing commit messages or PR descriptions.
16Ending the Session
When work is done, exit Codex.
/quit
Or:
/exit
Return to the terminal and check Git status.
git status
git diff
Review the changes again and commit if needed.
git add .
git commit -m "Add login email validation"
Beginners should thoroughly review changes made by Codex before committing.
17Complete First Session Example Flow
Here's a complete example of a first session.
cd ~/my-project
codex
Inside Codex, enter:
Explain this project's structure in a way that beginners can understand.
Organize main folders, how to run it, testing methods, and core entry points.
Request a small task:
If README doesn't have a local execution method section, add one.
Write it to match the existing README style.
Review changes:
/diff
Verify and summarize, then exit:
18Starting with a One-Line Command
Codex can start without opening an interactive TUI, directly passing a prompt.
codex "Explain this project's structure"
Or:
codex "Analyze why the test failed"
This method is useful for quick questions. However, beginners should start with interactive mode.
codex
In interactive mode, it's easier to follow what files Codex reads and what tasks it's trying to accomplish.
19Sample Prompts to Try in First Session (1)
Understanding the Project
You can use these prompts right in your first session:
Explain the entire structure of this project.
Organize main folders and files by their roles.
Find and explain step-by-step how to run this project locally.
Tell me the testing execution method and main test folders.
Understanding Code
Trace how the login feature works through which files.
Explain the flow from API request to response in this project.
Find where the database connection configuration is.
20Sample Prompts to Try in First Session (2)
Safe Modifications
If README doesn't have an installation method section, add one.
Keep the existing tone and format.
/plan I want to add input validation to the signup API.
Find existing validation patterns first and propose a work plan.
If there's no unit test for this function, propose a test addition plan first.
Verification
Run tests related to the part I just modified.
If there are test failures, analyze the cause but don't fix immediately—tell me the fix plan.
Review if this change risks breaking existing behavior.
21Prompts to Avoid in First Session
Avoid requests that are too broad or vague.
Bad examples:
Improve this entire project for me.
Make all code quality good.
Optimize the architecture yourself.
Fix all tests and deploy too.
These requests have overly broad change scope and Codex may move in unintended directions.
Good examples:
/plan Analyze the login flow in src/auth and
propose a refactoring plan to reduce duplicate validation logic.
Don't modify code yet.
Improve only the local execution method section in README.
Keep the format and don't change code.
22Recommended Safety Settings for First Session
For the first session, this combination is recommended:
sandbox_mode = "workspace-write"
approval_policy = "on-request"
workspace-write
Allow read/write centered on current project
on-request
Request user approval for risky or out-of-scope actions
If you want to start more cautiously, you can run in read-only mode:
codex --sandbox read-only
Read-only mode is suitable for project analysis, structure explanation, and code review. If you want to actually modify files, use workspace-write.
codex --sandbox workspace-write --ask-for-approval on-request
23Things to Check After First Session
After your first session ends, check the following:
git status
git diff
Check:
- Did only intended files get modified?
- Were unnecessary files created?
- Did lock files change unexpectedly?
- Did test or build result files end up in commits?
- Was sensitive information added?
Revert unnecessary changes:
git checkout -- path/to/file
Delete unnecessary new files:
rm path/to/file
24First Session Checklist for Beginners
Project navigation
Moved to project folder
Status check
Verified current status with git status
Structure explanation
Requested project structure explanation
Small task
Requested one small task
Plan first
Used /plan for complex tasks
diff review
Reviewed /diff after changes
Testing/verification
Verified related tests or verification method
Work summary
Requested work summary
Exiting
Exited with /quit or /exit
Final check
Rechecked git status and git diff from terminal
Section 05 · Wrap-up
What to Remember from This Unit
The goal of the first session is to learn the Codex usage flow. You don't need to know all complex features from the start.
Navigate to project folder → run codex → request structure explanation → request small task → review /diff → run tests → exit
As you repeat this flow, remember these:
- First work should focus on understanding the project, not code modification
- For complex tasks, verify the plan first with
/plan
- Always check
/diff after file modifications
- Recheck git status and git diff from terminal even after session ends
Next Section
Section 6. Codex Core Interfaces
6. Codex Core Interfaces
01Interfaces at a Glance
Codex is not a tool used in just one interface. You can use the same Codex agent across CLI, Desktop App, IDE Extension, Cloud, Chrome Extension and other interfaces.
CLI
Run Codex from the terminal
Desktop App
Manage multiple tasks visually
IDE Extension
Use Codex directly in your editor
Codex Cloud / Web
Delegate time-consuming tasks to the cloud
Chrome Extension
Web tasks requiring logged-in browser state
02Getting Started Guide for Beginners
Beginners don't need to use all interfaces from the start. Begin with CLI or IDE Extension, then expand to Desktop App or Cloud as work grows.
The most important thing is to establish a workflow that safely completes small tasks from start to finish.
03Interface Selection Criteria
For starters, choose based on these criteria:
Want to work quickly from the terminal
→ CLI

Want to see and edit code in the editor
→ IDE Extension

Want to run multiple tasks simultaneously and see diffs visually
→ Desktop App

Want to delegate long-running tasks
→ Codex Cloud / Web

Need to work on logged-in websites or admin pages
→ Chrome Extension
In practice, you'll mix these based on the situation.
04Real-World Usage Example
You might use it like this:
1. Analyze codebase structure with CLI
2. Modify current file with IDE Extension
3. Run large refactoring in parallel with Desktop App
4. Delegate long-term work to Cloud
5. Verify logged-in dashboard with Chrome Extension
05CLI: Terminal-Centered Interface
CLI is Codex's most basic usage method. Run the following command from your project folder:
codex
Or pass a starting prompt directly:
codex "Explain this project structure"
06When CLI Is Good
CLI works well in these situations:
Quick code analysis
Run immediately from terminal
Small bug fixes
Quickly verify change scope
Running tests
Naturally connects with shell commands
Checking git diff
Fits terminal workflow
Automation
Can connect with codex exec
CI/CD
Suitable for non-interactive execution
Server environments
Usable without GUI
07How to Start with CLI
Beginners should start with this flow:
cd my-project
codex
Enter inside Codex:
Explain this project's structure and how to run it.
For complex tasks, plan first:
/plan I want to add input validation to the login API.
Find related files and propose a work plan.
Review changes after modification:
/diff
08CLI Interactive TUI
When you run codex, an interactive screen opens inside the terminal. This is called TUI, or Terminal UI.
In TUI, you can:
Natural language requests
Instruct Codex on tasks
File references
Attach files with @
Shell commands
Execute with !command format
Slash commands
Use /plan, /diff, /status, etc.
Intervening mid-work
Adjust direction while working
Reviewing diffs
Check changes
Changing models
Switch models mid-session
09CLI TUI Example
Real usage example:
@src/auth/login.ts Explain the login flow in this file.
!npm test
/status
10Frequently Used Commands in CLI
Commands beginners should learn first:
/plan
Plan before execution
/status
Check current session status
/compact
Summarize long conversation
/permissions
Check or adjust permissions
/resume
Resume previous session
Just learning these three initially is enough:
/plan
/diff
/status
11Desktop App: Task Management Interface
The Desktop App is a visual interface for using Codex. If CLI is terminal-centered, the Desktop App is more like an operations command center for managing multiple Codex tasks.
Key advantages of Desktop App:
- Multi-tasking: Manage multiple Codex threads simultaneously
- Worktree isolation: Use isolated Git worktree per task
- Inline diff review: Review changes within the app
- Integrated terminal: Use terminal per thread
- Conversation forking: Clone conversations to experiment in other directions
- Automations: Automate repetitive tasks
- Appshots: Share screen state with Codex
- In-app browser: View web app screens alongside feedback
- Computer Use: Support GUI app manipulation tasks
12When Desktop App Is Good
Multiple tasks in parallel
Manage separately per thread
Large refactoring
Visually track work flow
Want to review diffs easily
Git change review is easy
Running Codex tasks in parallel
Can use worktree isolation
Team unfamiliar with terminal
GUI is more accessible
Manage automation tasks
View flow within the app
Suitable task examples:
- Authentication module refactoring
- Old API migration
- Multiple GitHub issues simultaneously
- Documentation cleanup and test improvement in parallel
- Visually review changes before PR
13Can I Start with Desktop App Before CLI?
Yes, you can.
If you're unfamiliar with terminals, Desktop App might be more convenient. However, considering development automation and CI/CD, learning CLI eventually is good.
Recommended order:
Comfortable with terminal
→ Start with CLI

Prefer editor and GUI
→ Start with IDE Extension or Desktop App

Want to delegate multiple tasks simultaneously
→ Use Desktop App

Want to automate
→ Learn CLI and codex exec
14IDE Extension: Using Codex Inside Your Editor
IDE Extension is the way to use Codex inside editors like VS Code, Cursor, and Windsurf.
Codex IDE Extension has these characteristics:
- Available in VS Code, Cursor, Windsurf and compatible editors
- Uses the same agent as Codex CLI
- Shares the same configuration
15When IDE Extension Is Good
Edit while viewing current file
Directly use editor context
Inline edit needed
Good for file location-centered tasks
Function-level modification
Quickly apply small changes
Fix test failures immediately
Good for compile-test loop
Questions during code review
Can explain based on selected code
Beginners prefer editor over terminal
Lower barrier to entry
Example requests:
Make exception handling in this function more robust.
Find duplicate logic in current file and clean it up.
Add tests for this component.
16Difference Between IDE Extension and CLI
Execution location
CLI
IDE Extension
Execution location
Terminal
Code editor
Advantages
Fast, strong in automation
Easy to work while viewing code
File selection
@file, search-centered
Current open file and selection-centered
Test execution
Naturally connects with shell commands
Connects with editor workflow
Recommended tasks
Repo analysis, automation, diff review
Current file modification, inline edit
Beginner difficulty
Requires terminal experience
Relatively easier
IDE Extension is good for modifying "the code you're currently viewing", while CLI is good for "analyzing the entire project or automating".
17Codex Cloud / Codex Web: Cloud Task Interface
Codex Cloud or Codex Web is the way to delegate tasks to Codex in a cloud environment rather than your local computer.
Codex Cloud characteristics:
- Perform background tasks in its own cloud environment
- Parallel tasks possible
18When Cloud Is Good
Long-running tasks
Don't need to wait locally
Multiple issues
Good for parallel delegation
Large refactoring
Can separate into independent tasks
PR creation
Can connect work results to PR
Reduce local resource burden
Run in cloud environment
Background tasks
Can proceed while doing other work
Suitable tasks:
- Clean up all old tests
- Migrate deprecated API usage
- Triage multiple GitHub issues
- Update entire documentation
- Fix large number of type errors
- Repetitive code style cleanup
19Cautions When Using Cloud
Cloud is powerful, but beginners don't need to delegate all tasks to Cloud initially.
Cloud is suitable for tasks meeting these conditions:
- Requirements are clear.
- Task scope is independent.
- User doesn't need to continuously intervene mid-work.
- Results can be reviewed via diff or PR.
- Failure doesn't stop local development flow.
Conversely, it's better to do these initially with local CLI or IDE:
- Requirements change frequently
- Sensitive authentication/payment logic modification
- Fine-grained UI adjustment
- User must continuously guide direction
- Analyzing new codebase
20Chrome Extension: Browser-Based Interface
Codex Chrome Extension is the interface to use when Codex needs to read or manipulate websites using Chrome.
Codex Chrome Extension characteristics:
- Can work on sites requiring logged-in browser state
- Supports LinkedIn, Salesforce, Gmail, internal tools, etc.
21When Chrome Extension Is Good
Verify logged-in site
Use existing browser session
Admin page tasks
Web UI manipulation needed
SaaS tool verification
Can work screen-based without API
Internal dashboard inspection
Login state and UI context needed
CMS content verification
Web page-based modification flow
Bug reproduction
Can verify actual browser screen
Suitable tasks:
- Verify settings in admin console
- Check error status in internal dashboard
- Review text in CMS pages
- Reproduce bugs in logged-in web app
- Verify data in Salesforce-like SaaS
22Difference Between In-app Browser and Chrome Extension
Codex has both the Desktop App's in-app browser and Chrome Extension.
Location
In-app Browser: Inside Codex App
Chrome Extension: User's Chrome
Suitable tasks
In-app Browser: Local dev server, public page preview
Chrome Extension: Logged-in sites, internal tools
Login state
In-app Browser: Limited
Chrome Extension: Use user's browser state
Beginner usage
In-app Browser: For web UI feedback
Chrome Extension: For actual web work automation
Simply put:
Want to view my built web app screen with Codex
→ In-app Browser

Codex needs to work on actually logged-in site
→ Chrome Extension
23Computer Use: When GUI Tasks Are Needed
Computer Use is a feature for when Codex needs to view and manipulate graphical interfaces.
Computer Use characteristics:
- Can view and manipulate macOS or Windows graphical user interfaces
- Good for tasks where command-line tools or structured integrations alone are insufficient
Suitable tasks:
- Verify bugs that only appear in desktop apps
- Browser-based manual configuration tasks
- GUI settings changes
- Data source verification without plugins or API
- Check UI behavior while viewing screen
Beginners don't need to use Computer Use initially. First learn CLI, IDE, and Desktop App, then use Computer Use when GUI tasks are absolutely necessary.
24Recommended Interfaces by Task
Project structure analysis
CLI
Current file modification
IDE Extension
Large refactoring
CLI /plan or Desktop App
Multiple parallel tasks
Desktop App
Delegating long-term work
Codex Cloud
PR creation work
Codex Cloud or Desktop App
Web app screen review
Desktop App In-app Browser
Work on logged-in site
Chrome Extension
GUI app manipulation
Computer Use
Automation script
CLI codex exec
CI/CD connection
CLI codex exec
25Recommended Learning Order for Beginners
Beginners should learn in this order:
- Have CLI explain project structure
- Learn
/plan and /diff in CLI
- Try modifying current file with IDE Extension
- Visually view changes in Desktop App
- Delegate small independent tasks to Cloud
- Use Chrome Extension when needed
Most important is creating a workflow that safely completes small tasks from start to finish, not using all interfaces from the start.
26CLI vs Desktop App Selection Criteria
Can finish quickly from terminal?
CLI
Multiple tasks simultaneously?
Desktop App
Want to see Git diff visually?
Desktop App
Will run as automation script?
CLI
Team unfamiliar with terminal?
Desktop App
Want fine-grained control?
CLI
Summary:
Fast direct development work
→ CLI

Manage multiple tasks and review visually
→ Desktop App
27Using IDE and CLI Together
In practice, using IDE and CLI together is good.
Example flow:
- Analyze entire project structure with CLI
- Open related files in IDE
- Modify functions at function-level with IDE Extension
- Run tests with CLI
- Review diff with CLI or Desktop App
- Commit with Git
Real command example:
codex "Find how login feature works through which files"
Open related files in IDE:
Strengthen input validation in this function to match existing style.
Back to CLI:
npm test
git diff
This way, you divide overall analysis to CLI, fine-grained modifications to IDE, and verification back to CLI.
28Safety Tips per Interface
CLI
- Initially use workspace-write + on-request
- Use /plan for complex tasks first
- Always check /diff after changes
Desktop App
- Clearly divide task scope per thread
- Don't merge parallel task results all at once
- Check changes per worktree
IDE Extension
- Start by modifying only current file
- Use selection-based requests
- Check editor diff after changes
Codex Cloud
- Write requirements clearly
- Delegate only independent tasks
- Always review result PR or diff
Chrome Extension
- Carefully select allowed sites
- Manually verify sensitive page tasks
- Be aware you're using logged-in browser state
29Common Interface Usage Mistakes for Beginners
Delegating large tasks to Cloud from start
Result review can be difficult
Committing without checking /diff in CLI
Can miss unintended changes
Running too many parallel tasks in Desktop App
Merge conflicts and review burden increase
IDE viewing only current file, ignoring structure
Can miss impact scope
Granting Chrome Extension too many site permissions
Security risk increases
Using Computer Use unnecessarily
GUI manipulation may have low predictability
Beginners should apply the same principle across all interfaces: "make small requests, check diff, test".
30Interface Selection Summary
CLI
The foundation. Quickly analyze, modify, and test from terminal.

Desktop App
Manage multiple tasks, worktrees, visual diffs, automation.

IDE Extension
Fast editing centered on current file and selection.

Codex Cloud / Web
Delegate long independent tasks to background.

Chrome Extension
Browser tasks on logged-in sites or internal tools.

Computer Use
Tasks requiring viewing and manipulating GUI apps.
Section 06 · Wrap-up
What to Remember from This Unit
Codex can be used from multiple interfaces: CLI, Desktop App, IDE Extension, Cloud, and Chrome Extension.
- CLI is foundational and strong in automation.
- Desktop App is good for managing multiple tasks in parallel and visually reviewing diffs.
- IDE Extension is good for modifying current files directly in your editor.
- Codex Cloud is good for delegating long independent tasks to background.
- Chrome Extension is suitable for logged-in websites and internal tool tasks.
- In-app Browser is good for web app preview and visual feedback; Chrome Extension is better for logged-in tasks.
- Beginners start with CLI or IDE Extension and expand to Desktop App and Cloud as needed.
Next Section
Section 7. CLI Basics
7. Basic CLI Usage
01Basic CLI Execution
The most basic command is:
codex
Run it from your project folder.
cd ~/my-project
codex
This opens an interactive Codex conversation screen in your terminal. You can request tasks from Codex in natural language.
Examples:
Explain the structure of this project.
Analyze which files the login feature goes through.
Find the cause of the failing test.
02Run with One-Line Prompt
You can also open the interactive screen and send your first request at the same time.
codex "Explain this project's structure"
Or:
codex "Analyze why the tests are failing"
This approach is good for quick questions or one-off tasks.
codex "Read package.json and tell me the run and test commands for this project"
However, beginners are recommended to open the interactive screen with just codex and proceed from there. It's easier to follow what Codex is doing in interactive mode.
03Why You Should Run from Your Project Folder
Codex understands the project based on your current terminal location.
Good example:
cd ~/projects/my-app
codex
Bad example:
cd ~
codex
Running from outside the project makes it hard for Codex to find relevant files. Always verify your location before running Codex.
pwd
Check if it's a Git project.
git status
It's good to develop a habit of checking git status before running Codex.
04Specifying the Model
You can specify which model to use when running Codex.
codex -m gpt-5.5
Or specify it along with the prompt:
codex -m gpt-5.5 "Analyze the authentication structure of this project"
-m is the short form of --model.
codex --model gpt-5.5 "Review this code"
Model selection affects task difficulty and cost.
Simple questions
Fast model
General code edits
Default model
Complex debugging
Strong reasoning model
Security review
High reasoning effort
Large-scale refactoring
Strong model + /plan
Beginners can just use the default model at first.
05Setting Reasoning Effort
Codex lets you set how deeply the model should reason.
codex -c model_reasoning_effort="medium"
For complex issues, you can increase it:
codex -c model_reasoning_effort="high" "Find the cause of this race condition"
For security audits or complex architecture analysis:
codex -c model_reasoning_effort="xhigh" "Review this authentication module for security vulnerabilities"
However, higher reasoning effort uses more tokens and costs. A good beginner default is:
model_reasoning_effort = "medium"
06Specifying Sandbox Mode
Sandbox settings are important because Codex can read and modify real files.
codex --sandbox workspace-write
You can also run in read-only mode:
codex --sandbox read-only
There's also full access mode:
codex --sandbox danger-full-access
However, beginners should avoid using danger-full-access.
read-only
Read-only (for analysis and review)
workspace-write
Read/write in workspace (recommended default)
danger-full-access
Full system access (not recommended)
07Setting Approval Policy
The approval policy determines when Codex asks for user approval.
codex --ask-for-approval on-request
When used together with sandbox:
codex --sandbox workspace-write --ask-for-approval on-request
untrusted
Request approval for most non-read operations
on-request
Proceed with normal work, request approval for risky tasks
never
Proceed without requesting approval
The recommended beginner combination lets you work on actual tasks while stopping for confirmation on risky operations.
08When You Just Want to Analyze Safely
If you're seeing a project for the first time, starting in read-only mode is a good idea.
codex --sandbox read-only
In this mode, you can make requests like:
Explain this project's structure.
Analyze which files the login feature uses.
Find how to run tests.
Review potential security issues without modifying code.
Read-only mode is safe for beginners since Codex can't modify files.
09Attaching Files: @
In the TUI, use @ to find and attach files to the Codex conversation.
@src/auth/login.ts Explain the login flow in this file.
Or:
@package.json Explain the scripts in this project.
Specifying files clearly helps Codex answer more accurately.
Good example:
@src/api/users.ts Find areas in this file where input validation is insufficient.
Bad example:
Find problems in the entire project.
The narrower the scope, the better Codex's results.
10Running Shell Commands: !
In the TUI, add ! to execute shell commands directly.
!npm test
!git status
!pnpm lint
!pytest
This feature is useful for running commands directly during a Codex conversation and checking results.
!git diff
!npm run test:unit
Note that command execution is subject to sandbox and approval settings. Risky commands may trigger approval requests.
11Opening External Editor
When you need to write a long prompt in the TUI, you can open an external editor. Ctrl+G is the shortcut to open the editor set in \$VISUAL or \$EDITOR.
Usage flow:
- Press Ctrl+G in Codex TUI
- External editor opens
- Write your long instructions
- Save and close
- Input appears in Codex input field
Useful for writing lengthy task instructions.
12Searching Previous Input History
In Codex TUI, you can recall previously entered prompts. Usually arrow keys browse draft history.
↑ Previous input
↓ Next input
Ctrl+R is used to search previous prompts and slash command history.
Ctrl+R
You can then find and reuse previous /plan, /diff, task requests, etc.
13Giving Additional Instructions While Codex Works
You can adjust direction while Codex is working. For example, if Codex is looking at the wrong file:
Focus on src/auth/login.ts instead, not that file.
If you want to narrow the scope:
This time, just analyze without modifying code.
If you want to change the test scope:
Run only login-related tests first instead of all tests.
The key point is that you don't have to hand off the work and abandon it—you can keep adjusting direction in the middle.
14Editing Previous Message
Press Escape twice to edit the previous message.
Use cases:
- Your last instruction was too vague
- You typed the filename wrong
- You want to change from "fix it" to "just plan it"
- You want to add more test scope
Example:
Original input: Fix the login feature.
After edit: /plan Analyze the login feature's input validation flow, propose what needs fixing and a test plan first. Don't modify code yet.
Beginners should correct vague requests right away.
15Starting a New Conversation
To start a new conversation within the same Codex session, use /new.
/new
Use cases:
- Starting completely different work
- Context has become too complex
- Trying experimental requests in a different direction
Then your new request: Explain the deployment structure of this project.
16Resuming Previous Session
If you want to reopen a saved conversation, use /resume.
/resume
Or you can use resume options when running CLI.
Useful situations:
- Continuing work from yesterday
- Reopening a debugging session that was paused
- Doing follow-up work based on previous analysis
However, when continuing an old session, code state may have changed, so verify first.
Check the current git state and what files changed since the last session.
17Forking a Conversation
If you want to continue the current conversation in a different direction, use /fork.
/fork
Example use case:
Keep the current refactoring direction A and also compare with a more conservative direction B
Fork copies existing conversation context and continues in a new thread. Beginners don't need to use it often at first, but it's useful for comparing alternatives.
18Changing Model: /model
You can change models in the middle of a session too.
/model
Use cases:
- Switch to a faster model for simple tasks
- Switch to a stronger model for difficult bugs
- When you want to reduce costs
- When you need deep reasoning like security review
You can also specify the model when running CLI.
codex -m gpt-5.5
During a session, use /model.
19Summarizing Long Conversations: /compact
When conversation gets long, context can fill up. Use /compact in this case.
/compact
/compact summarizes long conversation content to free up context space.
Use cases:
- When you've done long debugging
- When you've read many files
- When you want to continue follow-up work in the same session
- When Codex seems to be missing context
Beginners can use /compact in the middle of long work and then request: "Based on the summary of work so far, proceed with just the next step."
20Reviewing Changes: /diff
If Codex modified files, you must check with /diff.
/diff
Things to check:
- Did only the intended files change?
- Is the change scope not too broad?
- Were tests added?
- Is existing API response not broken?
- Was sensitive information not added?
- Are there unnecessary lock file changes?
Beginner principle: If Codex modified something, always check /diff.
21Requesting Code Review: /review
If you want to review the current working tree, use /review.
/review
Use cases:
- Review changes made by Codex
- Review code I modified directly
- Check before opening a PR
- Verify security, performance, and test gaps
More specific example:
/review Focus on security issues, missing tests, and API compatibility in these changes.
22Checking Current Status: /status
To check the current session state, use /status.
/status
What you can check varies by version and environment, but generally includes:
- Model in use
- Token/context usage
- Current sandbox mode
- Approval policy
- Git branch
- Session settings
It's good to develop a habit of checking /status first when problems arise.
23Checking Permissions: /permissions
To check or adjust Codex permissions, use /permissions.
/permissions
Use cases:
- When Codex can't modify files
- When command execution is blocked
- When network access is needed for tasks
- When you want to check and verify sandbox/approval state
Beginners should check current state first before raising permissions arbitrarily. If asked for risky permissions, verify the reason before deciding to grant them.
24Checking Apps and MCP
To check external tools connected to Codex, use:
/mcp
/apps
/mcp is used to check configured MCP tools. /apps is used to explore ChatGPT connectors.
Beginners don't need to know about MCP or Apps at first. Learn them later when you need to connect external tools.
25Checking Skills
To check available skills or invoke them, use /skills.
/skills
Skills are useful for standardizing repetitive tasks. For example:
- PR review
- Test writing
- Security checks
- Documentation writing
- Release notes writing
A good flow is to request directly via prompt at first, and manage as skills when patterns repeat.
26Checking Plugins
To check or manage installed plugins, use /plugins.
/plugins
Plugins are a system for extending Codex functionality. Beginners should first learn the basics, then use only plugins needed for the team or project.
27Difference Between Direct Shell Commands and Codex Requests
In the TUI, you can either run shell commands directly or request Codex to execute them.
Direct execution:
!npm test
Request from Codex:
Find and run the relevant tests, then summarize the results.
!npm test
User specifies the command directly
Natural language request
Codex finds appropriate commands and executes
Beginners find it easier to have Codex find commands at first.
28Relationship Between CLI Options and config
Codex reads config.toml settings, but you can override values via CLI options.
For example, even if config has a default model:
model = "gpt-5.5"
Specifying a different model at runtime makes the CLI option take priority for that execution.
codex -m gpt-5.4 "Review this code"
Inline config override is also possible.
codex -c model_reasoning_effort="high" "Analyze this bug"
Nested settings can also be specified.
codex -c 'sandbox_workspace_write.network_access=true' "Install dependencies"
Remember for beginners: Options you give directly at runtime take priority over config.
29Running with Profile
You can use profiles, which are bundles of settings for different task types.
codex --profile fast "Explain this function"
codex --profile careful "Security review of this auth logic"
codex --profile ci "Analyze why this test failed"
Profiles will be covered in detail in the configuration section later, but the basic concept is:
fast
Quick questions, simple edits
careful
Security, architecture, complex debugging
30Example: Read-Only Code Review Run
If you want to analyze a new project safely without modifications:
codex --sandbox read-only
Inside Codex:
Analyze the authentication flow in this project.
Don't modify code, just identify security risks.
Or in one command:
codex --sandbox read-only "Analyze the authentication flow and list security risks without modifying code."
31Example: General Development Work Run
For everyday development, this combination works well:
codex --sandbox workspace-write --ask-for-approval on-request
Inside Codex:
/plan I want to add password length validation to the signup API.
Check existing validation patterns and test locations, then propose a plan first.
After confirming plan: Proceed with the plan.
After changes: /diff
Testing: Run relevant tests and summarize results.
32Example: Quick Question Run
Simple questions can be handled in one command:
codex "Explain the scripts in package.json"
codex "Find the command to run the dev server in this project"
codex "Summarize the role of the src/auth folder"
This approach is fast, but interactive TUI is better for long tasks.
33Safe CLI Working Routine for Beginners
Beginners should repeat this routine:
- Check git status
- Run codex
- Request project or task scope explanation
- Use /plan if complex
- Approve changes
- Check /diff
- Run tests
- Request work summary
- /quit
- Verify git status and git diff in terminal again
Actual command flow:
git status
codex
Inside Codex: /plan I want to add email validation to the login API. Check existing code style and test locations first.
After changes: /diff
After exiting: git status, git diff
34Common Beginner Mistakes in CLI
Running codex outside project
Hard to find relevant files
Requesting large tasks right away
Change scope becomes too broad
Requesting refactoring without /plan
Can be modified in wrong direction
Committing without /diff
Can miss unintended changes
Abusing danger-full-access
Risk to entire system
Skipping test execution
Can miss change errors
Using vague prompts
Results may not match expectations
35Good CLI Prompt Example ①
Project analysis
Explain this project's structure so beginners can understand.
Organize the main folders, how to run it, how to test it, and key entry points.
Feature flow analysis
Trace which files a login request goes through until the response comes out.
Explain without modifying code.
36Good CLI Prompt Example ②
Safe refactoring plan
/plan I want to reduce duplicate validation logic in the src/auth folder.
Organize existing structure, impact scope, and test plan first.
Don't modify files yet.
Small edit
If README doesn't have a local run section, add one.
Keep existing style and format.
Test execution
Find and run test commands related to the changes I just made,
and analyze failures if there are any.
37Bad CLI Prompt Examples
Avoid requests with broad and vague scope like these:
Fix all the code.
Make this project better.
Refactor everything.
Optimize it however you want.
Better approach:
/plan Propose a way to reduce duplicate error handling logic in the src/api folder.
Explain impact and test plan first, don't modify code yet.
38Basic CLI Commands Summary
codex "prompt"
Run with initial prompt
codex -m model-name
Specify model
codex --sandbox read-only
Run read-only
codex --sandbox workspace-write
Allow workspace writes
codex --ask-for-approval on-request
Request approval when needed
codex --profile fast
Use profile
codex -c key=value
Temporary config override
39Basic TUI Controls Summary
!command
Execute shell command directly
Ctrl+G
Open external editor
Ctrl+R
Search previous input
Esc twice
Edit previous message
Section 07 · Wrap-up
What to Remember from This Unit
CLI is Codex's most basic and powerful usage method. Run codex from your project folder to open an interactive TUI where you can work with terminal and project files together.
3 key things beginners must remember:
Run from project folder → Start with /plan if complex → Review with /diff after changes
All advanced features (profile, MCP, plugin) can be learned later. Getting comfortable with the basic flow is most important.
Next Section
Section 8. Complete Slash Commands Guide
8. Complete Slash Commands Guide
01What Are Slash Commands?
Slash Commands are commands in Codex interactive CLI starting with /.
/plan
/diff
/status
If regular prompts are "requesting Codex in natural language", Slash Commands are commands for quickly executing session control, model changes, permission checks, diff review, work planning, review, and configuration checking.
02Main Slash Commands List
Slash Commands are typically used for:
Check session status
/status
Summarize conversation
/compact
Check permissions
/permissions
Beginners only need to learn these 5: /plan, /diff, /status, /permissions, /quit.
03Basic Slash Command Usage
Typing / in Codex TUI shows the available commands list.
Solo execution example
/diff
Execution with description example
/plan I want to improve the error handling structure of the payment module.
Propose impact scope and step-by-step plan first.
Some commands run standalone, others accept descriptions after them.
04Slash Command Full List (1/2)
/quit, /exit
Exit Codex (high importance)
/new
Start new conversation (medium)
/resume
Resume previous conversation (medium)
/fork
Branch current conversation to new thread (medium)
/model
Change model (high)
/compact
Summarize long conversation (high)
/diff
Review changes (very high)
05Slash Command Full List (2/2)
/review
Code review (high)
/plan
Plan work before execution (very high)
/goal
Manage ongoing work goals (medium)
/vim
Switch Vim edit mode (low)
/hooks
Explore and switch hooks (medium)
/mention
Attach files (medium)
/init
Generate AGENTS.md scaffold (high)
06Slash Command Full List (3/3)
/status
Check session status (very high)
/permissions
Check and adjust permissions (very high)
/personality
Adjust response style (low)
/mcp
Check MCP tools (medium)
/apps
Explore ChatGPT connectors (low)
/ps
Check background terminals (medium)
/skills
Check and invoke skills (medium)
07Remaining Slash Commands
/plugins
Manage plugins (medium)
/title
Set terminal window title (low)
/config
Check current config (high)
/statusline
Set TUI footer (low)
/feedback
Send logs and feedback (low)
08/quit or /exit
Exits the Codex CLI.
/quit
or
/exit
Both end the session.
Use cases
- When work is done
- When you want to return to terminal
- When you want to exit and verify git status directly
After exiting, it's good to verify changes again in terminal:
git status
git diff
09/new
Starts a new conversation within the current Codex session.
/new
Use cases
Starting completely different work
Prevents previous context from interfering
Conversation became too long
Reorganizes into new flow
Want to try experimental requests
Separates from existing work flow
Note: /new doesn't undo Git changes. File modifications persist, so verify with /diff or git diff if needed.
10/resume
Reopens a previously saved conversation.
/resume
Use cases
- Continuing work from yesterday
- Reopening paused debugging session
- Doing follow-up work based on previous analysis
After resuming, verify code state hasn't changed:
Check the current git state and what files changed since the last session.
11/fork
Branches current conversation to a new thread.
/fork
/fork is used when you want to experiment in a different direction while maintaining current conversation context.
Usage examples
- Compare refactoring approach A and B
- Keep current plan but review alternative approaches
- Try new experiments while preserving existing flow
Beginners don't need to use it often at first, but it's useful for comparing alternatives.
12/model
Changes the model for the current session.
/model
Use cases
Simple questions
Switch to fast model
Complex bug analysis
Switch to strong model
Security review
Use high-reasoning model
Cost reduction
Use cheaper model
Beginners can just use the default model at first.
13/compact
Summarizes long conversation content to free up context space.
/compact
Codex uses conversation content, read files, command output, and work plans as context. When conversation gets long, context fills up and Codex may miss previous content.
Use cases
- After long debugging session
- After reading many files
- When continuing follow-up work in same session
14/diff
Reviews changes made in the current session.
/diff
One of the most critical commands for beginners. If Codex modifies files, you must run /diff.
Things to check
Changed files
Did only intended files change?
Change scope
Is there too much code changed?
Logic
Does it preserve existing behavior?
Tests
Were tests added or modified?
15/diff Follow-up Usage
After reviewing changes, you can request more from Codex:
Review if there are unnecessary changes in this diff.
Keep only the README edits from these changes and revert the code changes.
Common follow-up requests
- Summarize this change as a commit message
- Write a PR description based on this diff
- Review if this change could break existing behavior
16/review
Reviews the current working tree or changes.
/review
Use cases
- Check before opening a PR
- Review Codex-made changes
- Review code I modified directly
- Check for security issues
You can make more specific requests too:
/review Focus on security issues, missing tests, and existing API compatibility in these changes.
17/plan
Plans work before modifying files directly.
/plan I want to add input validation to the login API.
Find related files, check existing validation patterns and test locations,
then propose a step-by-step plan first.
/plan is the most critical command for beginners. For complex work, verify the plan before executing.
18/plan Usage Guidelines
When should you use /plan?
Multiple files will change
Understand scope first
Unfamiliar codebase
Understand structure first
Auth/payment/permission work
High risk
Large-scale refactoring
Broad impact
Beginner guideline
Use /plan first if 3+ files will likely change.
19/goal
Creates or manages ongoing work goals.
/goal
/goal is used to create, pause, resume, or delete maintained work goals.
Use cases
- Running large refactoring in multiple stages
- Maintaining work goals across session
- Tracking progress over multiple turns
Beginners should learn /plan first and use /goal when long-term work is needed.
20/vim, /hooks, /mention
/vim
Switches Vim edit mode in TUI composer.
/vim
For users familiar with Vim key bindings.
/hooks
Explores or switches Codex lifecycle hooks. Manages automatic actions that run before or after specific events.
/mention
Attaches files to conversation.
@src/auth/login.ts Explain the login flow in this file.
21/init
Creates AGENTS.md scaffold for the project.
/init
AGENTS.md is a file where you write rules Codex should follow in the project.
Content that can be included
# AGENTS.md

## Development Rules

- Run tests after code changes.
- Keep existing public API behavior.
- Follow the existing code style.
- Add tests for new behavior.
/init is very useful when first using Codex in a project.
22/status
Checks current session status.
/status
Things you can check
- Current model
- Reasoning effort
- Sandbox mode
- Approval policy
- Git branch
- Token/context usage
- Remote connection status
One of the first things to check when problems arise.
23/permissions
Checks or adjusts current permissions and approval settings.
/permissions
Use cases
- When Codex can't modify files
- When command execution is blocked
- When network access is needed for tasks
- When you want to verify permissions before risky work
Beginners should check status first with /permissions before raising permissions arbitrarily. Verify reason if asked for risky permissions.
Don't use danger-full-access as a beginner default.
24/personality, /mcp, /apps
/personality
Adjusts Codex communication style. Options include friendly, pragmatic, none and similar styles.
/mcp
Checks configured MCP tools. Manages connections with external tools like GitHub, Figma, Sentry, databases etc.
/apps
Explores ChatGPT connectors or connectable apps. Check status of connected external business tools.
25/ps, /skills, /plugins
/ps
Shows background terminals. Use when Codex is running background terminal tasks.
/skills
Checks available skills or invokes them. Skills are reusable work knowledge that help Codex perform specific tasks better.
/plugins
Explores and manages installed plugins. Check installed plugins, enable/disable, explore marketplace plugins.
26/title, /config, /statusline
/title
Sets terminal window title.
/title auth-refactor
Useful when multiple Codex sessions are open to distinguish windows.
/config
Prints current applied config values and sources. Check what config is active and detect user/project config conflicts.
/statusline
Sets TUI footer. Organize information like model, context, git branch nicely.
27/feedback, /logout
/feedback
Sends logs and feedback to Codex maintainers.
/feedback
Use to report Codex bugs or unusual behavior. Verify no sensitive info is included before sending.
/logout
Logs out from Codex.
/logout
or from terminal:
codex logout
28Slash Commands Beginners Must Learn First
You don't need to learn all commands from the start. Start with these 7:
/plan
Don't execute complex tasks immediately, plan first
/diff
Review what Codex changed
/status
Check current session status
/permissions
Check permissions and sandbox status
/compact
Organize long conversation
29Beginner Basic Routine
Most work is safe if you follow this routine:
1/plan Verify work plan
2/diff Review changes
3/review Review changes in detail
4/status Check status if problems arise
5/quit Exit
30Slash Command Recommendations by Task Type
Analyzing new project
/plan, /status
Small code edit
/diff, /review
Large refactoring
/plan, /goal, /compact, /diff
Security check
/review, /permissions, /plan
Long debugging
/compact, /status, /ps
Fixing permission issues
/permissions, /config
Checking external tools
/mcp, /apps
31Good /plan Usage Example
Authentication refactoring
/plan I want to refactor the login flow in the src/auth folder.
Analyze current structure, duplicate logic, risks, and test plan first.
Don't modify code yet.
Adding tests
/plan I want to add tests for the signup API.
Check existing test structure first,
then propose what cases should be added.
32Good /review Usage Example
General review
/review
Security-focused review
/review Focus on auth bypass, missing permission checks,
and sensitive data exposure risks.
Test-focused review
/review Focus on insufficient testing
and missing edge cases.
33Good /diff Follow-up Request Example
After viewing /diff, you can request more:
Find unnecessary changes in this diff.
Summarize these changes as a commit message.
Write a PR description based on this diff.
Tell me which parts of this change need testing.
Review if these changes could break existing behavior.
34Combining Slash Commands and Regular Prompts
Bad example
/plan
/review
Good example
/plan I want to organize the error handling in the payment module.
Analyze current structure, propose change scope and test plan first.
/review Focus on security issues, performance degradation,
and missing tests in these changes.
Commands work alone, but results improve when you add criteria.
35Slash Command Cautions
1. /new doesn't undo changes
/new only starts a new conversation. File changes persist, verify with /diff or git diff.
2. /compact is not a silver bullet
/compact summarizes long conversation but some details may compress. Keep important requirements in AGENTS.md or separate docs.
3. Don't arbitrarily raise permissions at /permissions
When Codex requests more permissions, verify the reason and check if narrower permissions solve it.
36More Cautions
4. /review doesn't replace human review
/review is powerful but final review should be human. Especially for auth, payment, security, database changes.
5. /goal is for long-term work
Simple work needs only /plan. Use /goal when multi-stage long-term goals exist.
37Slash Command Real Routine - Safe Code Editing
Basic routine
/plan Create work plan
→ Verify plan
→ Proceed with edits
→ /diff
→ /review
→ Run tests
→ Summarize
→ /quit
Specific example
/plan I want to add email format validation to the login API.
Check existing validation patterns and test structure first.
38Slash Command Real Routine - Debugging and Setup
Long debugging routine
/status
→ /plan
→ Analyze possible causes
→ Run tests
→ /compact
→ Make fixes
→ /diff
→ /review
Project initial setup routine
/init
→ Edit AGENTS.md
→ /config
→ /permissions
→ /status
39Slash Command Quick Reference
/new, /resume, /fork
Manage conversations
/model, /compact
Session settings
/diff, /review, /plan
Core work commands
/goal, /vim, /hooks
Advanced features
/mention, /init
Project management
/status, /permissions, /config
Status checks
/personality, /mcp, /apps
External connections
/ps, /skills, /plugins
Tool management
/title, /statusline
UI settings
/feedback, /logout
Account management
Section 08 · Wrap-up
What to Remember from This Unit
Slash Commands are powerful tools for controlling sessions, reviewing code, and planning work in Codex CLI.
The most critical for beginners is the /plan → /diff → /review routine. These three alone enable safe and efficient work.
Next Section
Section 10. Model Selection Guide
9. Understanding config.toml
01Codex Configuration Priority
Codex interprets settings in this order. Higher positions have higher priority.
1
CLI flags, --config — Temporary settings applied only for this run
2
Project .codex/config.toml — Settings for current project or subdirectory only
3
--profile profile file — Settings for specific work mode
4
User config — Personal default settings
5
System config — System-wide default settings
6
Built-in defaults — Codex built-in defaults
For example, even if you set a default model in ~/.codex/config.toml, running with CLI options wins for that execution:
codex --model gpt-5.5
Or override any key directly:
codex --config model='"gpt-5.5"'
codex --config sandbox_workspace_write.network_access=true
--config values parse as TOML, not JSON. Be careful with string quoting.
02User Config
User config is personal default settings.
Default location:
~/.codex/config.toml
Codex CLI and IDE extensions share the same config layer. So default model, approval policy, sandbox settings, and MCP server settings configured in CLI can apply the same way in IDE extensions.
User config typically contains:
model = "gpt-5.5"
approval_policy = "on-request"
sandbox_mode = "workspace-write"
web_search = "cached"
model
Default model to use
approval_policy
How to request approval before commands
sandbox_mode
File system and network access scope
web_search
Web search usage method
[mcp_servers.*]
MCP server connection settings
[features]
Feature flag settings
approval_policy can use untrusted, on-request, never, and sandbox_mode can use read-only, workspace-write, danger-full-access.
03Project Config
Project config applies only to specific repos or subdirectories.
Location:
<repo>/.codex/config.toml
Codex traverses from project root to current directory looking for .codex/config.toml. When same key appears multiple times, the config closest to current directory wins. However, project config only loads when project is trusted. In untrusted projects, project .codex/ layer, project hooks, and rules are ignored.
Example:
my-app/
  .codex/config.toml
  frontend/
    .codex/config.toml
If current location is my-app/frontend, frontend/.codex/config.toml is closer so applies first for same keys.
Project config should contain only project work methods:
model_reasoning_effort = "high"
approval_policy = "on-request"
sandbox_mode = "workspace-write"

[sandbox_workspace_write]
network_access = false
Settings bound to machine or personal accounts like provider, auth, telemetry, notification may be ignored in project config.
04System Config
System config applies system-wide defaults. Unix location:
/etc/codex/config.toml
Priority is lower than User config. When system admin sets defaults, users can override same keys in ~/.codex/config.toml and User config wins.
System config is "common defaults" rather than "forced policy".
Example:
approval_policy = "on-request"
sandbox_mode = "workspace-write"

[sandbox_workspace_write]
network_access = false
For values organizations must block, use requirements.toml instead of System config.
05Managed requirements.toml
requirements.toml is not a regular config file but admin-enforced constraints. Even if users specify different values in config.toml, profiles, or CLI options, when conflicting with requirements, Codex restores compatible values and notifies user.
Can restrict values like:
allowed_approval_policies = ["untrusted", "on-request"]
allowed_sandbox_modes = ["read-only", "workspace-write"]
allowed_web_search_modes = ["disabled", "cached"]
Example above blocks:
approval_policy = "never"
sandbox_mode = "danger-full-access"
web_search = "live"
Requirements layer priority:
1
Cloud-managed requirements
2
macOS MDM requirements_toml_base64
3
System requirements.toml
Important: requirements.toml sets "allowed range" rather than "configured values".
06Understanding CODEX_HOME
CODEX_HOME is Codex's local state root directory. Default:
~/.codex
Usually contains:
~/.codex/
  config.toml
  auth.json
  history.jsonl
  log/
  sessions/
  skills/
You can set CODEX_HOME via environment variable, but the target directory must pre-exist.
mkdir -p ~/.codex-work
CODEX_HOME=~/.codex-work codex
Then Codex uses instead of default ~/.codex/config.toml:
~/.codex-work/config.toml
Useful in practice for separating accounts, organizations, and test environments.
07Basic config.toml Structure
In TOML, writing root keys first then tables is more readable. Basic structure:
# 1. Root settings
model = "gpt-5.5"
model_reasoning_effort = "medium"
approval_policy = "on-request"
sandbox_mode = "workspace-write"
web_search = "cached"

# 2. Sandbox detail settings
[sandbox_workspace_write]
network_access = false
writable_roots = []

# 3. Environment variable pass policy
[shell_environment_policy]
inherit = "core"
include_only = ["PATH", "HOME", "USER", "SHELL"]

# 4. Feature flags
[features]
hooks = true
undo = true

# 5. MCP server config example
[mcp_servers.context7]
command = "npx"
args = ["-y", "@upstash/context7-mcp"]
enabled = true
Common values:
approval_policy
"on-request" — Ask user when needed
sandbox_mode
"workspace-write" — Allow writes in workspace
web_search
"cached" — Cache-based web search
model_reasoning_effort
"medium" or "high" — Reasoning strength
sandbox_workspace_write.network_access
false — Block network in sandbox
08Minimal Config for Beginners
Start without opening too much:
model = "gpt-5.5"
approval_policy = "on-request"
sandbox_mode = "workspace-write"
web_search = "cached"

[sandbox_workspace_write]
network_access = false
Intent is simple:
on-request
Ask on risky or out-of-scope work
workspace-write
Can work within project
network_access = false
Prevent arbitrary network access
web_search = "cached"
Enable basic search but limit live fetch
Beginners should avoid danger-full-access and approval_policy = "never" combo.
09Recommended Config for Professionals
Professionals want both productivity and safety:
model = "gpt-5.5"
model_reasoning_effort = "high"
approval_policy = "on-request"
sandbox_mode = "workspace-write"
web_search = "cached"
hide_agent_reasoning = true

[sandbox_workspace_write]
network_access = false
writable_roots = []

[shell_environment_policy]
inherit = "core"
include_only = [
  "PATH", "HOME", "USER", "SHELL",
  "LANG", "LC_ALL", "TERM"
]

[features]
hooks = true
undo = true
shell_snapshot = true

[mcp_servers.context7]
command = "npx"
args = ["-y", "@upstash/context7-mcp"]
enabled = true
startup_timeout_sec = 10
tool_timeout_sec = 60
Professional guidelines:
Default workspace-write
Enable project work but block full system
Approval on-request
Explicitly verify risky work
Network blocked by default
Enable per-project or approval-based
MCP in User config priority
Provider/auth is more stable in user config than project config
Project differences in .codex/config.toml
Separate only per-repo reasoning strength and sandbox by repo
10Config Conflict: Step 1 (CLI Options)
When settings don't apply as expected, check in this order:
Step 1: Check if CLI options were given
CLI options and --config have highest priority.
codex --model gpt-5.5
codex --config sandbox_mode='"read-only"'
Test without options:
codex
11Config Conflict: Step 2 (Project Config)
Step 2: Check project config in current directory
Nearby .codex/config.toml takes priority over user config.
pwd
find .. -path "*/.codex/config.toml" -print
If project is untrusted, project config may be ignored. Check trusted status too.
12Config Conflict: Step 3 (Profile)
Step 3: Check if --profile is used
Using profile overlays this file on top of user config:
~/.codex/<profile-name>.config.toml
Example:
codex --profile deep-review
After Codex 0.134.0, uses separate profile-name.config.toml files instead of [profiles.name] in config.toml.
13Config Conflict: Step 4 (CODEX_HOME)
Step 4: Verify actual CODEX_HOME
Changing CODEX_HOME changes which config file is read:
echo $CODEX_HOME
If empty, default is:
~/.codex/config.toml
If set, check:
$CODEX_HOME/config.toml
14Config Conflict: Step 5 (Requirements)
Step 5: Check requirements policy
Even after all config changes, management policy might be blocking:
Check file:
/etc/codex/requirements.toml
On Windows:
%ProgramData%OpenAICodex
equirements.toml
Check especially:
allowed_approval_policies = ["on-request"]
allowed_sandbox_modes = ["workspace-write"]
allowed_web_search_modes = ["disabled", "cached"]
Requirements is unyielding by users. On conflict, Codex restores compatible values.
15Config Conflict: Step 6 (Project Ignored Keys)
Step 6: Check if project config uses ignored keys
Some keys in project .codex/config.toml are always ignored:
Keys to avoid in project:
openai_base_url = "..."
model_provider = "..."
notify = [...]
profile = "..."
[model_providers.foo]
[otel]
Put these in user config:
~/.codex/config.toml
16Config Conflict: Step 7 (TOML Syntax)
Step 7: Verify TOML syntax
Common mistakes:
# Wrong: string quotes missing
model = gpt-5.5

# Correct
model = "gpt-5.5"
# Wrong: mixing root keys under table confuses
[sandbox_workspace_write]
network_access = false

model = "gpt-5.5"
For readability, write root keys first then [table].
Section 09 · Wrap-up
What to Remember from This Unit
config.toml sets Codex default behavior. Most basic location is ~/.codex/config.toml, and per-project differences go in <repo>/.codex/config.toml.
Priority flows top to bottom and is strong. CLI options are strongest, project config beats user config. Organization security policy is managed via requirements.toml, and these values can't be bypassed by normal config.
CLI options → Project settings → Profiles → User settings → System settings → Built-in defaults
Next Section
Section 10. Model Selection Guide
10. Model Selection Guide
01First, Clarification: Models and Reasoning Effort Are Different
In Codex, these two settings are different.
model = "gpt-5.5"
model_reasoning_effort = "xhigh"
model specifies which AI model to use. model_reasoning_effort specifies how deeply that model should think.
So, "using Codex 5.5 xhigh" precisely means:
Use the gpt-5.5 model while raising reasoning effort to xhigh.
02Current Model List to Use as Baseline in Codex
The models covered as core in the current Codex guide are:
gpt-5.5
Default recommended model. Complex coding, computer use, knowledge work, research
gpt-5.4
Recommended model. Performance and cost balance
gpt-5.4-mini
Recommended model. Fast and cheap routine coding, subagents
gpt-5.3-codex
Codex-specialized model. Code review, cloud work, professional agentic coding
gpt-5.3-codex-spark
Research preview. Pro users' near-instant coding iteration
gpt-5.2
Alternative model. Previous generation replacement
03gpt-5.5: Default Recommended Model
gpt-5.5 is the primary model you should choose first in Codex. It's the latest frontier model suitable for complex coding, computer use, knowledge work, and research workflows.
Recommended situations:
Large feature implementation
Plan, modify, verify flow is stable
Refactoring
Must view multiple files and dependencies together
Bug tracking
Root cause analysis and fix strategy needed
Document, spreadsheet, slide generation
Knowledge work quality is good inside Codex
Tasks involving browser or app interaction
Good for computer use and tool use
Solving uncertain problems
High-level reasoning required
Recommended setting:
model = "gpt-5.5"
model_reasoning_effort = "medium"
On difficult tasks you can raise to xhigh, but it's better to use xhigh only for work where mistakes are costly, like large refactoring, long-term planning, complex debugging, and security reviews.
04gpt-5.4: Balance of Cost and Performance
gpt-5.4 is a cost and performance balance model one step below gpt-5.5. As a professional workhorse frontier model, it combines stronger reasoning, tool use, and agentic workflow capability with the coding ability of gpt-5.3-codex.
Recommended situations:
General feature addition
Don't need gpt-5.5 level
Medium-scale bug fixes
Cost and quality balance
Repetitive code modifications
Sufficient quality and better usage efficiency
Test enhancement
Lower burden on large-scale work
Quick experimentation
Can save advanced model usage
Configuration example:
model = "gpt-5.4"
model_reasoning_effort = "medium"
05gpt-5.4-mini: Fast Routine Work and Subagent Model
gpt-5.4-mini is suitable for lightweight and fast work. It's a fast and efficient mini model fit for responsive coding tasks and subagents, providing higher usage limits in routine local messages.
Recommended situations:
Simple function modification
No need for heavy reasoning
Type error fixes
Narrow scope
Document phrasing fixes
Can be processed quickly
Test name changes
Simple repetitive work
Subagent parallel exploration
Good cost and speed efficiency
Simple pattern changes across many files
Prevent advanced model waste
Configuration example:
model = "gpt-5.4-mini"
model_reasoning_effort = "low"
Beginners can remember: "simple work with mini, complex work with 5.5".
06gpt-5.3-codex: Code Review, Cloud Work, Professional Coding Model
gpt-5.3-codex is, as its name suggests, a Codex-specialized model. It's the industry-leading coding model for complex software engineering, and its coding ability is reflected in gpt-5.4. Cloud tasks and code reviews run on gpt-5.3-codex.
Recommended situations:
PR review
Core model of Codex code review
Cloud task
Directly connected to cloud work
Complex codebase analysis
Strong in agentic coding
Long-running tasks
Specialized in code change flow
Test failure analysis
Good for code-centric judgment
Configuration example:
model = "gpt-5.3-codex"
model_reasoning_effort = "high"
07gpt-5.3-codex-spark: Ultra-Fast Research Preview Model for Pro
gpt-5.3-codex-spark is not so much a "highest quality model" but a special model for fast coding iteration. It's a text-only research preview model optimized for near-instant, real-time coding iteration and is provided to ChatGPT Pro users.
Recommended situations:
Real-time code ideas
Response speed is critical
Small modification iteration
Fast round-trip is key
UI text, simple code sketches
Speed over deep reasoning
Prototype exploration
Immediacy is important
Execution example:
codex -m gpt-5.3-codex-spark
Spark is a research preview, guided for Pro users only, and is a model chosen for fast iteration inside Codex rather than a generally used model in APIs.
08When do gpt-5.2 and Legacy Models Show Up?
gpt-5.2 is currently classified as an alternative model in Codex model documentation. It's a previous generation general-purpose model that can be used as an alternative choice for difficult debugging or agentic tasks requiring deep contemplation.
But there's no need to make it a central model for beginner guides.
Also, names like gpt-5.1-codex-mini shouldn't be included in the current table of contents. In the full API model list, GPT-5.1 Codex mini is marked as deprecated.
Summary:
gpt-5.4
Secondary core model
gpt-5.4-mini
Core model for lightweight work
gpt-5.3-codex
Core Codex-specialized model
gpt-5.3-codex-spark
Pro research preview with separate explanation
gpt-5.2
Brief explanation as alternative
gpt-5.1-codex-mini
Removed from table of contents as legacy/deprecated
09xhigh is Not a Model Name but Reasoning Intensity
Using gpt-5.5 and xhigh together is a very powerful combination in practice.
model = "gpt-5.5"
model_reasoning_effort = "xhigh"
This combination is good for:
Large-scale refactoring
Review scope more deeply
Complex bug analysis
Narrow down root cause candidates more persistently
Security review
Reduce likelihood of omission
Architecture design
Tradeoff review is important
Migration planning
Must consider stages and risks together
Long document generation
Maintaining structure and consistency is important
Conversely, xhigh may be overkill for these tasks:
Simple type errors
low or medium
Adding small functions
medium
Organizing imports
minimal or low
10Model Selection Table by Task Type
Analyzing unfamiliar codebase
gpt-5.5 + high
Large refactoring planning
gpt-5.5 + xhigh
Complex bug fixes
gpt-5.5 + high or xhigh
General feature addition
gpt-5.5 or gpt-5.4 + medium
Simple code fixes
gpt-5.4-mini + low
Adding tests
gpt-5.4 or gpt-5.4-mini + medium
PR review
gpt-5.3-codex + high
Codex Cloud task
gpt-5.3-codex + default
Fast code iteration
gpt-5.3-codex-spark + default
Documentation and guides
gpt-5.5 + high
Security review
gpt-5.5 + xhigh
Subagent parallel exploration
gpt-5.4-mini + low or medium
11Beginner Recommended Combinations
Beginners should avoid changing models too much from the start. One combination is enough:
model = "gpt-5.5"
model_reasoning_effort = "medium"
This combination offers the best balance of quality, speed, and cost.
If you want to be safer:
model = "gpt-5.5"
model_reasoning_effort = "high"
For truly critical work:
model = "gpt-5.5"
model_reasoning_effort = "xhigh"
Beginner recommendation rule is simple.
Important code change
gpt-5.5 + high
High cost of failure
gpt-5.5 + xhigh
Light repetitive work
gpt-5.4-mini + low
12Professional Recommended Combinations
Professionals should split profiles by task type.
For basic work
model = "gpt-5.5"
model_reasoning_effort = "medium"
For deep analysis
model = "gpt-5.5"
model_reasoning_effort = "xhigh"
For fast routine work
model = "gpt-5.4-mini"
model_reasoning_effort = "low"
For code review
model = "gpt-5.3-codex"
model_reasoning_effort = "high"
For cost-saving general work
model = "gpt-5.4"
model_reasoning_effort = "medium"
13Setting Default Model in config.toml
Set the default model in ~/.codex/config.toml.
# ~/.codex/config.toml

model = "gpt-5.5"
model_reasoning_effort = "medium"
If you want to use it strongly like your style:
# ~/.codex/config.toml

model = "gpt-5.5"
model_reasoning_effort = "xhigh"
However, handling all work with xhigh can increase response time and usage consumption. xhigh is described as for the most difficult asynchronous agentic tasks or evals testing model intelligence limits.
Example professional profile:
# ~/.codex/deep.config.toml

model = "gpt-5.5"
model_reasoning_effort = "xhigh"
Execution:
codex --profile deep
14Changing Models in CLI and IDE
In the CLI, use -m or --model to start a new session with a specific model.
codex -m gpt-5.5
codex -m gpt-5.4
codex -m gpt-5.4-mini
codex -m gpt-5.3-codex
In the CLI you can use -m or --model flag, and during an active CLI session you can switch models with the /model command. In IDE extensions, use the model selector below the input box.
In an active session:
/model
Override just once:
codex --model gpt-5.5
To override reasoning effort one-time too:
codex -m gpt-5.5 -c model_reasoning_effort='"xhigh"'
15How to Choose Based on Cost, Speed, Quality
Model selection can be judged in this order:
Step 1: Is it critical work?
If critical, use gpt-5.5.
model = "gpt-5.5"
model_reasoning_effort = "high"
More critical:
model = "gpt-5.5"
model_reasoning_effort = "xhigh"
Step 2: Is it repetitive work?
If repetitive and simple, use gpt-5.4-mini.
model = "gpt-5.4-mini"
model_reasoning_effort = "low"
Step 3: Is it code review or cloud work?
For code review and cloud tasks, gpt-5.3-codex is important.
Step 4: Is speed the top priority?
If you're a Pro user and need near-instant coding iteration, consider gpt-5.3-codex-spark. Spark is not Fast mode but a separate model, provided as a research preview.
Step 5: Want to run faster?
Fast mode is not a separate model but a speed setting that runs supported models faster. Fast mode currently supports gpt-5.5 and gpt-5.4 and consumes more credits.
In the CLI:
/fast on
/fast off
/fast status
You can also set it as a default in config.
service_tier = "fast"

[features]
fast_mode = true
Section 10 · Wrap-up
Most Codex work starts with gpt-5.5. Use gpt-5.4-mini for lightweight repetitive work, and gpt-5.3-codex is important for code review and cloud work. xhigh is not a model name but reasoning intensity.
Next Section
Section 11. Reasoning Effort
11. Reasoning Effort
01What is Reasoning Effort?
Reasoning effort is a setting that determines how deeply the model should think before generating an answer.
If choosing a model in Codex is deciding "who will work," reasoning effort is deciding "how carefully they will work."
For example:
model = "gpt-5.5"
model_reasoning_effort = "xhigh"
This means "use the gpt-5.5 model at the highest reasoning intensity."
02How Reasoning Models Work
Reasoning models use internal reasoning tokens to decompose problems, review multiple approaches, and plan tool use before writing the final answer. This is especially suitable for complex problem-solving, coding, scientific reasoning, and multi-step agentic workflows.
The important point is that these reasoning tokens are not shown directly to users. However, according to API documentation, reasoning tokens consume context window space and are charged as output tokens.
So, raising reasoning effort usually creates these changes:
Quality
Can improve on complex tasks
Cost
May increase due to reasoning tokens
Stability
Planning, review, tool use may become more careful
Over-reasoning
May become unnecessarily long on simple tasks
03Codex Config Key: model_reasoning_effort
The default reasoning intensity in Codex is set in config.toml.
model_reasoning_effort = "medium"
According to Codex configuration reference, model_reasoning_effort supports these values. However, xhigh support varies by model.
minimal
low
medium
high
xhigh
Basic example
model = "gpt-5.5"
model_reasoning_effort = "medium"
Deep analysis example
model = "gpt-5.5"
model_reasoning_effort = "xhigh"
04minimal: Think Little and Be Fast
minimal is the lowest reasoning effort in Codex config.
Recommended situations:
Simple text edits
No deep judgment needed
Organizing imports
Rule-based work
Short explanation requests
Fast response is important
Finding simple file location
Search is more important than reasoning
Fixed format conversion
Almost no creative judgment
Example
model = "gpt-5.4-mini"
model_reasoning_effort = "minimal"
However, if code changes connect to actual file edits, it's safer to use at least low.
05low: Light Reasoning Work
low is suitable for fast work, but causes a bit more thinking than minimal.
Recommended situations:
Modifying small functions
Simple context judgment needed
Type error fixes
Error cause confirmation needed
Changing test names
Simple but prevent mistakes
Code style cleanup
Rule application focused
Document summary
Compression more important than deep analysis
In practice, low is good for "light but annoying if wrong." The gpt-5.4-mini + low combination is especially good for fast iteration or subagent work.
06medium: Default Recommended Balance Point
medium is the most reasonable default for most users.
The GPT-5.5 documentation states that the default reasoning effort is medium, and it's the balance point between quality, reliability, latency, and cost.
Recommended situations:
General feature addition
Moderate planning and implementation needed
Normal difficulty bug fixes
Root cause analysis needed
Writing tests
Code understanding and validation needed
Writing documentation
Structuring needed
Work on new projects
Too low may miss things
Beginner basic recommendation
model = "gpt-5.5"
model_reasoning_effort = "medium"
07high: Complex Coding and Analysis
high is a setting that makes the model solve complex problems more carefully.
Recommended situations:
Feature addition spanning multiple files
Impact scope review needed
Analyzing test failure causes
Need to compare root cause candidates
Refactoring planning
Structural judgment needed
Code review
Need to check for omissions and side effects
API design
Interface and extensibility judgment needed
Pre-deployment review
Cost of mistakes is high
Example
model = "gpt-5.5"
model_reasoning_effort = "high"
08xhigh: Deepest Reasoning for Highest Difficulty Work
xhigh is the strongest reasoning intensity.
The GPT-5.5 documentation says to use high or xhigh when quality improvement justifies added latency and cost. In particular, xhigh is suitable for the most difficult asynchronous agentic tasks or evals testing model intelligence limits.
Recommended situations:
Large-scale refactoring
Review entire structure and side effects
Security review
Reduce omission risk
Complex incident analysis
Compare multiple root cause candidates
Architecture design
Review pros, cons, and future extensibility
Migration planning
Stage-by-stage risk management
Long document and guide writing
Maintain structural consistency
Critical automation design
Cost of failure is high
However, xhigh is not always the right answer. The GPT-5.5 documentation explains that higher reasoning effort is not always better, and over-exploration or quality degradation can occur if the criterion is weak or tool access is open.
09Difference Between none and minimal
In the API documentation, GPT-5.5 reasoning effort values are none, low, medium, high, xhigh.
But in Codex config.toml's model_reasoning_effort values are:
minimal
low
medium
high
xhigh
So in Codex config files, use minimal.
API reasoning.effort values
none, low, medium, high, xhigh
Codex model_reasoning_effort values
minimal, low, medium, high, xhigh
As a Codex user, remember to use minimal as the baseline in config.toml.
10Plan Mode-Specific Setting: plan_mode_reasoning_effort
Plan Mode often needs deeper reasoning than general answers. So Codex has a separate Plan Mode override: plan_mode_reasoning_effort.
Example
model = "gpt-5.5"
model_reasoning_effort = "medium"

# Think deeper in /plan mode
plan_mode_reasoning_effort = "high"
This setting is quite useful in practice. Work fast on general tasks, deliberate on planning.
Recommended combinations:
General effort
Plan Mode effort
Use case
medium
high
General professionals
high
xhigh
Careful design and review focus
xhigh
xhigh
Maximum caution mode
11Difference from reasoning_summary
model_reasoning_summary is different from model_reasoning_effort.
model_reasoning_effort
Determines how deeply the model thinks
model_reasoning_summary
Determines how much reasoning-related summary to show
According to Codex configuration reference, model_reasoning_summary values are:
auto
concise
detailed
none
Example
model = "gpt-5.5"
model_reasoning_effort = "high"
model_reasoning_summary = "concise"
Beginners usually prefer the default auto or concise concise. Showing reasoning summary in detail does not make the model think deeper. The setting that makes it think deeper is model_reasoning_effort.
12Difference from verbosity
model_verbosity is also different from model_reasoning_effort.
model_reasoning_effort
Depth of thinking
model_verbosity
Length and detail of final answer
For example, this setting means "think deeply but answer briefly."
model = "gpt-5.5"
model_reasoning_effort = "xhigh"
model_verbosity = "low"
Conversely, this setting means "think moderately and explain in detail."
model = "gpt-5.5"
model_reasoning_effort = "medium"
model_verbosity = "high"
Practical combinations:
Deep judgment + short conclusion
xhigh + low verbosity
Learning explanation
medium/high + high verbosity
Code review
high + medium verbosity
Documentation writing
high + high verbosity
13Impact on Token Cost and Speed
Raising reasoning effort may increase internal reasoning tokens. According to API documentation, reasoning tokens are not visible to users but consume context window and are charged as output tokens.
So this formula applies:
Higher reasoning effort
= Deeper review possible
= Longer wait time possible
= Higher token usage possible
However, GPT-5.5 has improved to produce stronger results with fewer reasoning tokens at the same reasoning effort compared to previous models.
Practical guide:
Must finish quickly
minimal or low
Quality and speed balance
medium
Important code change
high
High cost of failure
xhigh
14Recommended Settings by Task Type
Recommended reasoning effort varies by task type.
Organizing imports
minimal
Fixing small functions
low
Resolving type errors
low or medium
Adding general features
medium
Analyzing unfamiliar codebase
high
Multi-file refactoring
high or xhigh
15Beginner Recommended Settings and Professional Profiles
Beginner basic settings:
model = "gpt-5.5"
model_reasoning_effort = "medium"
model_reasoning_summary = "auto"
model_verbosity = "medium"
Recommended professional profile setup:
For basic work
medium + plan_mode high
For deep analysis
xhigh + xhigh
For fast work
gpt-5.4-mini + low
For code review
gpt-5.3-codex + high
Maximum caution mode
gpt-5.5 + xhigh
Beginners need to remember only one standard.
minimal = fastest / low = light work / medium = default recommended / high = complex work / xhigh = highest difficulty with high cost of failure
Section 11 · Wrap-up
What to Remember from This Unit
Reasoning effort is a setting that determines "thinking depth" of the model. In Codex, the basic key is model_reasoning_effort, and available values are minimal, low, medium, high, xhigh.
Beginner recommendation:
model = "gpt-5.5"
model_reasoning_effort = "medium"
plan_mode_reasoning_effort = "high"
The one principle to remember: if the task is simple, set it low; if complex and high cost of failure, set it high.
Next Section
Section 12. Understanding Codex Costs
12. Understanding Codex Costs
01One-Sentence Summary of Codex Cost Structure
Codex costs work as follows: Consume included usage from your ChatGPT plan first, then when you exceed the limit, additional costs are charged via credits or API token billing. Codex is included in Free, Go, Plus, Pro, Business, Edu, and Enterprise plans, but usage limits and additional billing methods vary by plan.
ChatGPT login usage = plan included usage + credits if needed
API Key usage = OpenAI API token billing
Business/Enterprise = seat + workspace credits + admin spend control
02Codex Inclusion by ChatGPT Plan
Free
Limited inclusion (Codex credits not available for purchase, Plus upgrade encouraged)
Go
Lightweight work inclusion (Codex credits not available for purchase, Plus upgrade encouraged)
Plus
Included (can purchase credits if exceeded), about 30,000 KRW/month
Pro 5x
5x Plus usage, about 150,000 KRW/month
Pro 20x
20x Plus usage, about 300,000 KRW/month
Business
Included as standard seat or Codex seat
Enterprise / Edu
Contract-based, flexible pricing or per-seat usage limit
API Key
Separate from subscription, API token billing
03Free / Go
Codex is included in both Free and Go. Free is for exploring quick coding tasks, and Go is for lightweight coding tasks.
Free
0 KRW/month, limited Codex experience
Go
About 12,000 KRW/month, lightweight Codex work
The important limitation is that Free and Go users cannot purchase additional Codex credits when limits are exceeded; instead, they're encouraged to upgrade to Plus. Free and Go users receive an upgrade prompt rather than a credit purchase option.
04Plus
Plus costs about 30,000 KRW/month and includes Codex web, CLI, IDE extension, iOS, cloud-based integrations, automatic code review, Slack integration, GPT-5.5, GPT-5.4, GPT-5.3-Codex, and GPT-5.4-mini.
Price
About 30,000 KRW/month
Cloud task
Supported, based on GPT-5.3-Codex
Code review
Supported, based on GPT-5.3-Codex
Additional credits
Supported
Recommended for
Individuals who have focused coding sessions a few times per week
Plus users first consume included usage, and when limits are reached, can purchase credits to continue. Credits can be managed in Codex Settings > Usage > Credits or the Usage Dashboard.
05Pro 5x / Pro 20x
Pro splits into two tiers.
Pro 5x
About 150,000 KRW/month, 5x Plus usage
Pro 20x
About 300,000 KRW/month, 20x Plus usage
Pro at about 150,000 KRW provides 5x higher usage than Plus, and Pro at about 300,000 KRW provides 20x higher usage than Plus. The existing about 300,000 KRW Pro is maintained, and about 150,000 KRW Pro is a lower-priced Pro option.
Pro offers all Plus Codex features plus access to GPT-5.3-Codex-Spark research preview. Spark is described as a fast day-to-day coding model for Pro users.
06Business
Business has a two-seat structure.
Standard ChatGPT seat
ChatGPT + Codex included, fixed monthly charge, minimum 2 seats
Codex seat
Codex only, usage-based billing, no minimum
Standard ChatGPT seat pricing is typically about 37,500 KRW/user/month, or about 30,000 KRW/user/month with annual billing. Codex seat is Codex only with usage-based billing and no fixed monthly cost; workspace credits are needed.
Business is pay-as-you-go, allowing standard or usage-based Codex seats to be assigned, and usage can be expanded with workspace credits.
07Enterprise / Edu / Gov / Health
Enterprise and Edu are contract-based. With flexible pricing, there's no fixed rate limit and usage expands based on credits. However, Enterprise/Edu without flexible pricing typically have per-seat usage limits similar to Plus for most features.
Enterprise / Edu with flexible pricing
Credits-based expansion
Enterprise / Edu without flexible pricing
Mostly similar per-seat limits as Plus
Business / Enterprise workspace
Workspace credits, admin analytics, spend controls
When using flexible pricing in Business, Edu, or Enterprise, you can purchase additional workspace credits to continue using Codex.
08Cost Structure When Using API Key
When using Codex with an API Key, ChatGPT plan included usage does not apply; instead, OpenAI Platform API pricing is applied. With an API Key, you can use Codex in CLI, SDK, and IDE extension, but cloud-based features like GitHub code review and Slack are not available. Billing is based on token usage and API pricing.
SDK / codex exec
Supported
Codex Cloud task
Not supported
GitHub code review
Not supported
Slack integration
Not supported
Billing
Based on OpenAI API tokens
Recommended for
CI/CD, automation, script execution
API key authentication supports local Codex workflows but limits or disables features that depend on ChatGPT workspace or cloud services. Usage is billed at standard API rates on your OpenAI Platform account.
09Codex Credit Billing Method
Starting April 2, 2026, Codex pricing changed from average per-message billing to token-based credit pricing aligned with API token usage. This change applies to Plus, Pro, Business, and new Enterprise, and from April 23, 2026, also applies to existing Enterprise, Edu, Health, Gov, and ChatGPT for Teachers.
Billing calculation has three units:
Input tokens
Prompts, code, context going into Codex
Cached input tokens
Input tokens with discount applied via prompt caching
Output tokens
Answers, code generated by Codex, including reasoning output
The official rate card shows credits per 1M input tokens, 1M cached input tokens, 1M output tokens per model. Actual credit usage varies by each task's input/cached input/output token ratio.
Calculation:
Total credits
= input_tokens / 1,000,000 × input_rate
  + cached_input_tokens / 1,000,000 × cached_input_rate
  + output_tokens / 1,000,000 × output_rate
10Codex Credit Rate Card by Model
GPT-5.5
Input: 125 credits / 1M, Cached: 12.50 credits / 1M, Output: 750 credits / 1M
GPT-5.4
Input: 62.50 credits / 1M, Cached: 6.250 credits / 1M, Output: 375 credits / 1M
GPT-5.4-Mini
Input: 18.75 credits / 1M, Cached: 1.875 credits / 1M, Output: 113 credits / 1M
GPT-5.3-Codex
Input: 43.75 credits / 1M, Cached: 4.375 credits / 1M, Output: 350 credits / 1M
GPT-5.2
Input: 43.75 credits / 1M, Cached: 4.375 credits / 1M, Output: 350 credits / 1M
GPT-5.3-Codex-Spark
Research preview (rate TBD)
GPT-Image-2.0 image
Input: 200 credits / 1M, Cached: 50 credits / 1M, Output: 750 credits / 1M
GPT-Image-2.0 text
Input: 125 credits / 1M, Cached: 31.25 credits / 1M, Output: 250 credits / 1M
One GPT-5.5 Codex task typically consumes about 5-45 credits, but actual usage varies by task size and token mix.
11Plan Usage Limits per 5 Hours · Plus
The official table's unit is 5-hour rolling window. Local messages and cloud tasks share the same 5-hour window, and additional weekly limits may apply.
Plus:
GPT-5.5
Local Messages: 15–80, Cloud Tasks: Not available, Code Reviews: Not available
GPT-5.4
Local Messages: 20–100, Cloud Tasks: Not available, Code Reviews: Not available
GPT-5.4-mini
Local Messages: 60–350, Cloud Tasks: Not available, Code Reviews: Not available
GPT-5.3-Codex
Local Messages: 30–150, Cloud Tasks: 10–60, Code Reviews: 20–50
Plus limits vary within the range by model, task size, local/cloud execution, and context size.
12Plan Usage Limits per 5 Hours · Pro 5x / 20x
Pro 5x (5x Plus):
GPT-5.5
Local Messages: 80–400, Cloud Tasks: Not available, Code Reviews: Not available
GPT-5.4
Local Messages: 100–500, Cloud Tasks: Not available, Code Reviews: Not available
GPT-5.4-mini
Local Messages: 300–1750, Cloud Tasks: Not available, Code Reviews: Not available
GPT-5.3-Codex
Local Messages: 150–750, Cloud Tasks: 50–300, Code Reviews: 100–250
Pro 20x (20x Plus):
GPT-5.5
Local Messages: 300–1600, Cloud Tasks: Not available, Code Reviews: Not available
GPT-5.4
Local Messages: 400–2000, Cloud Tasks: Not available, Code Reviews: Not available
GPT-5.4-mini
Local Messages: 1200–7000, Cloud Tasks: Not available, Code Reviews: Not available
GPT-5.3-Codex
Local Messages: 600–3000, Cloud Tasks: 200–1200, Code Reviews: 400–1000
13Business Limits · Fast Mode
Business: Shows the same range as Plus. However, Business can combine standard ChatGPT seats, Codex seats, workspace credits, and spend controls, so actual cost management differs from individual Plus.
GPT-5.5
Local Messages: 15–80
GPT-5.4
Local Messages: 20–100
GPT-5.4-mini
Local Messages: 60–350
GPT-5.3-Codex
Local Messages: 30–150, Cloud Tasks: 10–60, Code Reviews: 20–50
Fast mode is not a separate model but a speed setting that runs supported models faster. Speed increases about 1.5x, while GPT-5.5 consumes 2.5x credits compared to Standard, and GPT-5.4 consumes 2x credits. With API key usage, Fast mode credits don't apply; standard API pricing applies instead.
14GPT-5.3-Codex-Spark Costs
GPT-5.3-Codex-Spark is a research preview model for Pro users. Spark is a text-only research preview model optimized for near-instant, real-time coding iteration.
Currently, Spark's credit rate is not final and is marked as research preview. Spark is Pro-user-exclusive research preview and is not available in the API at launch. Usage limits may adjust based on demand.
Type
Ultra-fast text-only coding iteration
API
Not supported in API at launch
Usage limit
Separate limit, adjustable based on demand
15Image Generation Costs · Cost Differences by Task
Image generation: Codex image generation is included in the same general usage limit as other Codex usage. Image generation can consume included limits 3-5x faster than similar non-image turns, and after limits are exceeded, it's deducted from credits. Image generation is not available on the Free plan.
ChatGPT plan usage
Consumes Codex general usage limit
After exceeding limit
Deducted from credits
Free
Image generation not available
API Key
API pricing applies
Average consumption
Can consume 3-5x faster than similar turn
Cost differences by task: Even the same "1 message" doesn't cost the same. Small scripts or routine functions may consume only part of the allowance, but large codebase, long-running tasks, or extended sessions maintaining lots of context consume much more per message.
16Factors That Increase Costs
Large repository
Increased input context
Long conversation
Maintains previous context
Large AGENTS.md
Increased instructions per turn
Many MCP servers
Increased tool definitions and context
High reasoning effort
May increase output/reasoning tokens
Fast mode
Credit multiplier applied
Image generation
May consume 3-5x versus general turn
Cloud task
Separate limit, based on GPT-5.3-Codex
Code review
Per-PR uses GPT-5.3-Codex
17Hidden Token Overhead
Codex costs aren't determined only by directly typed sentences. In reality, these items can be included in input or output tokens:
System instructions
Codex base instructions
AGENTS.md
Project instructions
File context
Read file contents
Tool output
Shell, test, grep, git results
MCP tool definitions
Connected MCP server tool descriptions
Reasoning tokens
Model internal reasoning output tokens
Diff / patch content
Change descriptions and code
Long session context
Long session maintenance cost
Ways to save usage limits: reduce AGENTS.md size, limit MCP server count, remove unnecessary context, switch to smaller models.
18Where to Check Costs
Codex web / app
Codex Settings > Usage Dashboard
Plus / Pro credits
Codex Settings > Usage > Credits
Business workspace
Workspace settings → Billing
Business auto reload
Workspace credit automatic reload
API Key
OpenAI Platform usage / billing dashboard
Check current limits in the Codex usage dashboard. During a CLI session, view remaining limits with /status. In Business credits, add credits from workspace billing and set automatic reload and monthly recharge limits.
19Cost Optimization Strategy · Model, MCP, Session
1. Don't fix the default model as gpt-5.5 xhigh unconditionally
gpt-5.5 + xhigh is right for important design, security review, large refactoring, but is overkill for simple repetitive work. GPT-5.5 has about 6.67x higher credit rate on input basis and about 6.64x higher on output basis compared to GPT-5.4-mini.
Architecture / security / large refactoring
gpt-5.5 high/xhigh
General feature implementation
gpt-5.5 medium or gpt-5.4 medium
Simple fixes
gpt-5.4-mini low
Parallel subagents
gpt-5.4-mini
GitHub PR review
gpt-5.3-codex
2. Keep AGENTS.md small
AGENTS.md can be injected repeatedly into each task context, so longer files increase input tokens. In large projects, it's good to manage with nesting inside the repository so only needed context is injected.
3. Turn on MCP servers only when needed
Many MCP servers increase tool definitions and context, consuming more message limits. Always on: GitHub, filesystem (frequently used MCPs). Turn on as needed: Figma, Sentry, Jira, Linear, DB-related MCPs.
20Cost Optimization Strategy · Fast Mode, Files, Team Management
4. Don't keep Fast mode on as default
Fast mode is about 1.5x faster but GPT-5.5 uses 2.5x credits and GPT-5.4 uses 2x credits. Recommendations: on for real-time pair coding, off for simple documentation, on just before deadline edits.
5. Compress long sessions with /compact
Longer conversations increase context costs. Manage with: separate by task → remove unnecessary file context → /compact → new session.
6. Don't attach many large files at once
Attaching many large files with @file increases input tokens significantly. Better approach: find related file candidates first → then present modification targets and reasons → approve → then open only those files.
Team Cost Management Checklist
In Business/Enterprise: seat types (standard vs Codex), monthly workspace credits pre-charge, auto reload settings (minimum/target balance), default model policy (gpt-5.4 default, gpt-5.5 for critical), Fast mode default off, standard MCPs only active, AGENTS.md per-app separation, Cloud tasks for long work only, PR review scope limited, analytics reviewed regularly.
21Plan Selection Guide
Occasional testing
Free / Go
Individual developer, 2-3x/week focused use
Plus (about 30,000 KRW/month)
Daily production Codex development
Pro 5x (about 150,000 KRW/month)
Parallel projects, long agent work
Pro 20x (about 300,000 KRW/month)
Security, audit, SSO, large organization
Enterprise / Edu
CI/CD automation
API Key or Enterprise access token
For individuals, Plus is the baseline starting point. If using Codex daily for extended periods, Pro 5x is right. If running multiple tasks in parallel, Pro 20x fits. For teams, separate standard ChatGPT seat and usage-based Codex seat.
Section 12 · Wrap-up
What to Remember from This Unit
Codex costs are managed by plan-included usage limits and additional billing methods. They have shifted to token-based credit pricing, and the same task costs very differently depending on context size, model choice, and session length.
Use gpt-5.5 for critical work, gpt-5.4 for general work, gpt-5.4-mini for simple repetition, while minimizing AGENTS.md and MCP, managing Fast mode and long sessions carefully to spend costs efficiently.
Next Section
Section 13. Splitting Work Modes with Profiles
13. Divide Work Modes with Profiles
01Why profiles are necessary
Codex work is never the same type.
Simple edits
Fast response, low cost
Important refactoring
Deep reasoning, safe approval
Code review
Read-only, high analysis power
CI automation
Non-interactive execution, no approval prompt
Pair coding
Adequate speed and explanation
Security review
Conservative permissions, high reasoning
If you type this out with long CLI options every time, it's inefficient.
codex -m gpt-5.5 -c model_reasoning_effort='"xhigh"' -c approval_policy='"on-request"' -c sandbox_mode='"read-only"'
With profiles, you can shorten it to this.
codex --profile deep
02The precise meaning of Codex profiles
A Codex profile is a named settings layer.
When you pass --profile profile-name, Codex first reads the default user config ~/.codex/config.toml, then overwrites it with ~/.codex/profile-name.config.toml. A profile file is not a copy of the entire default config—it's an override file that only contains parts different from defaults.
Example default config
# ~/.codex/config.toml

model = "gpt-5.5"
model_reasoning_effort = "medium"
approval_policy = "on-request"
sandbox_mode = "workspace-write"
Example profile file
# ~/.codex/deep.config.toml

model_reasoning_effort = "xhigh"
sandbox_mode = "read-only"
Execution result
codex --profile deep
Final applied settings:
model = "gpt-5.5"
model_reasoning_effort = "xhigh"
approval_policy = "on-request"
sandbox_mode = "read-only"
03Profile file location and naming rules
Profile files go under CODEX_HOME.
Default CODEX_HOME:
~/.codex
Profile file format:
Examples:
~/.codex/fast.config.toml
~/.codex/careful.config.toml
~/.codex/deep.config.toml
~/.codex/review.config.toml
~/.codex/ci.config.toml
~/.codex/pair.config.toml
Profile names can use letters, numbers, hyphens, and underscores.
Good names:
fast
deep-review
xhigh
ci
pair_mode
Names to avoid (spaces and special characters):
deep review
review/prod
ci.prod
04Profile application priority
Profiles sit in the middle of the overall settings priority.
1. CLI flags / --config overrides
Highest
2. Project config .codex/config.toml
3. Profile file ~/.codex/profile-name.config.toml
4. User config ~/.codex/config.toml
5. System config /etc/codex/config.toml
6. Built-in defaults
Lowest
For example, even if the profile has model = "gpt-5.4-mini", the CLI value wins if specified directly.
codex --profile fast --model gpt-5.5
The final model is gpt-5.5.
05Legacy profile approach that should not be used anymore
Do not nest profiles inside ~/.codex/config.toml the old way.
Wrong legacy approach
# No longer recommended

profile = "deep"

[profiles.deep]
model = "gpt-5.5"
model_reasoning_effort = "xhigh"
Since Codex 0.134.0, --profile no longer reads [profiles.profile-name] inside config.toml. Profiles must be moved to separate files: ~/.codex/profile-name.config.toml.
Correct approach
# ~/.codex/deep.config.toml

model = "gpt-5.5"
model_reasoning_effort = "xhigh"
codex --profile deep
06Set up base user config first
To use profiles well, first establish stable defaults.
# ~/.codex/config.toml

model = "gpt-5.5"
model_reasoning_effort = "medium"
plan_mode_reasoning_effort = "high"

approval_policy = "on-request"
sandbox_mode = "workspace-write"

model_reasoning_summary = "auto"
model_verbosity = "medium"
web_search = "cached"

[features]
shell_snapshot = true
These defaults are for "everyday work". Profile files should only contain values that differ from here.
07`fast` profile
The fast profile is for quick iteration work.
Permissions
workspace write
Use
Simple edits, wording changes, type errors, repetitive work
# ~/.codex/fast.config.toml

model = "gpt-5.4-mini"
model_reasoning_effort = "low"
plan_mode_reasoning_effort = "medium"

approval_policy = "on-request"
sandbox_mode = "workspace-write"

model_reasoning_summary = "none"
model_verbosity = "low"
Execution
codex --profile fast
codex -p fast
Recommended tasks
README wording edits
Small function renaming
Import cleanup
Type error fixes
Test name changes
Simple CSS edits
08`careful` profile
The careful profile is for safe general development.
Permissions
workspace write
Use
General feature implementation, bug fixes, test writing
# ~/.codex/careful.config.toml

model = "gpt-5.5"
model_reasoning_effort = "high"
plan_mode_reasoning_effort = "high"

approval_policy = "on-request"
sandbox_mode = "workspace-write"

model_reasoning_summary = "auto"
model_verbosity = "medium"
Execution
codex --profile careful
Recommended tasks
Add new API endpoint
Analyze bug causes
Write tests
Modify multiple files
Small refactoring
09`xhigh` / `deep` profile
The deep profile is the utmost caution mode. Codex 5.5 xhigh combination is clean when set to this profile.
# ~/.codex/deep.config.toml
model = "gpt-5.5"
model_reasoning_effort = "xhigh"
plan_mode_reasoning_effort = "xhigh"
approval_policy = "on-request"
sandbox_mode = "workspace-write"
model_reasoning_summary = "concise"
model_verbosity = "medium"
Execution
codex --profile deep
You can also create a separate read-only deep profile.
# ~/.codex/deep-readonly.config.toml
model = "gpt-5.5"
model_reasoning_effort = "xhigh"
sandbox_mode = "read-only"
codex --profile deep-readonly
Recommended tasks
Large refactoring plans
Security reviews
Incident root cause analysis
Architecture design
Migration strategy
Important PR review
10`review` profile
The review profile is dedicated to code review.
Review is usually reading and judging files without modifications, so read-only is appropriate.
# ~/.codex/review.config.toml
model = "gpt-5.3-codex"
model_reasoning_effort = "high"
plan_mode_reasoning_effort = "high"
approval_policy = "on-request"
sandbox_mode = "read-only"
model_reasoning_summary = "concise"
model_verbosity = "medium"
Review directly from CLI
codex --profile review
Inside a session
/review
If you want to always lock the review model, you can put it in the base config.
# ~/.codex/config.toml
review_model = "gpt-5.3-codex"
11`ci` profile
The ci profile is for non-interactive automation.
In CI, users cannot click approval buttons, so approval_policy = "never" is often used. However, this setting requires careful consideration.
# ~/.codex/ci.config.toml
model = "gpt-5.4"
model_reasoning_effort = "medium"
plan_mode_reasoning_effort = "medium"
approval_policy = "never"
sandbox_mode = "workspace-write"
model_reasoning_summary = "none"
model_verbosity = "low"
Execution example
codex exec --profile ci "analyze the failing tests and propose a minimal fix"
More conservative CI profile
# ~/.codex/ci-readonly.config.toml
model = "gpt-5.4"
model_reasoning_effort = "medium"
approval_policy = "never"
sandbox_mode = "read-only"
Combinations to avoid in CI:
approval_policy = "never"
sandbox_mode = "danger-full-access"
12`pair` profile
The pair profile is for pair coding.
The goal is to provide both explanation and code change quality without being too slow.
# ~/.codex/pair.config.toml
model = "gpt-5.5"
model_reasoning_effort = "medium"
plan_mode_reasoning_effort = "high"
approval_policy = "on-request"
sandbox_mode = "workspace-write"
model_reasoning_summary = "auto"
model_verbosity = "medium"
Execution
codex --profile pair
Recommended tasks
Design new feature together
Explain code while reading
Review plan before changes
Trace test failures together
Request improvements while viewing diff
13`auto` profile
The auto profile is for work that allows some autonomous execution locally.
Unlike CI which is fully non-interactive, use it when you want to reduce constant prompting.
# ~/.codex/auto.config.toml
model = "gpt-5.4"
model_reasoning_effort = "medium"
plan_mode_reasoning_effort = "high"
approval_policy = "on-request"
sandbox_mode = "workspace-write"
model_reasoning_summary = "auto"
model_verbosity = "medium"
The above setting is named auto but it's not fully automatic. Truly running without prompts requires approval_policy = "never", but that's only recommended in isolated environments like CI.
More aggressive auto profile
# ~/.codex/auto-never.config.toml
model = "gpt-5.4"
model_reasoning_effort = "medium"
approval_policy = "never"
sandbox_mode = "workspace-write"
model_reasoning_summary = "none"
model_verbosity = "low"
Check before using
git status
codex --profile auto-never
14How to run profiles
Basic execution:
codex --profile fast
codex --profile careful
codex --profile deep
codex --profile review
Short option
codex -p fast
codex -p deep
Non-interactive execution
codex exec --profile ci "run tests and summarize failures"
Temporarily change model only
codex --profile careful --model gpt-5.4
One-time arbitrary setting override
codex --profile deep -c model_reasoning_effort='"high"'
15Difference between one-time override and profiles
User config
Default values you always use. ~/.codex/config.toml
Profile
Recurring work modes. ~/.codex/deep.config.toml
CLI override
Change this run only. -c model_reasoning_effort='"high"'
Project config
Rules for specific repo. .codex/config.toml
Example:
codex --profile deep -c sandbox_mode='"read-only"'
In this case, the profile is deep, but only for this run, sandbox_mode changes to read-only. By priority, CLI override wins over profile.
16Difference between permission profiles and config profiles
Codex uses the word "profile" for two different things.
Config profile
Overall Codex settings layer. codex --profile deep
Permission profile
Filesystem and network permission policy. default_permissions = "project-edit"
This section covers config profiles.
Permission profiles are a beta feature for finer control over filesystem and network access scope for local commands. Permission profiles don't compose with existing sandbox_mode.
Beginners should stick to the existing sandbox_mode and approval_policy approach through Chapter 14 (Sandbox and Approval).
17Profile template for beginners
Beginners don't need to create too many profiles. Three are enough.
Base config
# ~/.codex/config.toml
model = "gpt-5.5"
model_reasoning_effort = "medium"
plan_mode_reasoning_effort = "high"
approval_policy = "on-request"
sandbox_mode = "workspace-write"
model_reasoning_summary = "auto"
model_verbosity = "medium"
Quick work
# ~/.codex/fast.config.toml
model = "gpt-5.4-mini"
model_reasoning_effort = "low"
plan_mode_reasoning_effort = "medium"
model_reasoning_summary = "none"
model_verbosity = "low"
codex --profile fast
Careful work
# ~/.codex/careful.config.toml
model = "gpt-5.5"
model_reasoning_effort = "high"
plan_mode_reasoning_effort = "high"
approval_policy = "on-request"
sandbox_mode = "workspace-write"
codex --profile careful
Utmost caution work
# ~/.codex/deep.config.toml
model = "gpt-5.5"
model_reasoning_effort = "xhigh"
plan_mode_reasoning_effort = "xhigh"
approval_policy = "on-request"
sandbox_mode = "workspace-write"
model_reasoning_summary = "concise"
codex --profile deep
Beginner rules
Everyday work → base config
Light work → fast
Important work → careful
High-cost failures → deep
18Profile management strategy for professionals
Professionals should split into at least five.
fast = quick iteration
careful = general work
deep = utmost caution
review = code review
ci = automation
File structure
~/.codex/config.toml
~/.codex/fast.config.toml
~/.codex/careful.config.toml
~/.codex/deep.config.toml
~/.codex/review.config.toml
~/.codex/ci.config.toml
Recommended mapping
Simple wording or type fixes
fast
General feature implementation
careful
Design and work together
pair
Bulk simple automation
auto or ci
In teams, separate personal profiles from project config.
Personal model preference
~/.codex/config.toml
Personal work modes
~/.codex/*.config.toml
Repo common rules
/.codex/config.toml
Organizational mandatory policy
/etc/codex/config.toml or managed requirements
19Profile conflict debugging
If a profile doesn't apply as expected, check in this order.
Step 1: Check file name
ls ~/.codex
Correct filename:
deep.config.toml
Incorrect filenames:
deep.toml
profile-deep.config.toml
deep.config
Step 2: Remove legacy approach
If this remains inside ~/.codex/config.toml, remove it:
profile = "deep"
[profiles.deep]
model = "gpt-5.5"
Step 3: Check CLI override
When run like this, CLI model takes priority over profile:
codex --profile fast --model gpt-5.5
Step 4: Check project config
Check if the current repo has project config:
find . -path "*/.codex/config.toml" -print
Project config takes priority over profile.
Step 5: Check project trust
If project config doesn't apply, check if it's a trusted project. Codex ignores config and project-local hooks from untrusted projects for security.
Step 6: Check keys that shouldn't be in project config
In project-local .codex/config.toml, profile, profiles, provider, notification, telemetry-related keys, etc. are ignored. Profile selection must use CLI --profile profile-name and ~/.codex/profile-name.config.toml.
Wrong project config
# /.codex/config.toml
profile = "deep"
Correct execution
codex --profile deep
Section 13 · Wrap-up
Profiles are separate files that save work modes
Codex profiles are not just option collections. For each recurring work pattern, you save the optimal settings ahead of time in separate files and pull them up with a single command.
Use ~/.codex/config.toml for your everyday defaults, and separate profile files for settings that vary by task.
Beginners can start with just fast, careful, and deep. In professional work, you can add review, ci, and pair for more nuanced responses.
Next Section
Section 14. Sandbox and Approval System
14. Sandbox and Approval System
01Difference between Sandbox and Approval
Sandbox and Approval are different security mechanisms.
Sandbox
Limit what Codex can technically do
Approval
Decide whether to ask the user when Codex tries to exceed that range
Sandbox is a technical boundary, Approval is a confirmation procedure.
Example:
sandbox_mode = "workspace-write"
approval_policy = "on-request"
This setting means Codex can read, modify, and run regular commands within the current workspace, and requests approval for modifications outside the workspace or network access.
02Overall Codex security model structure
Codex's local execution security consists of three layers.
Sandbox
Restrict filesystem, network, and command execution scope
Approval
Confirm before executing work outside boundaries
Rules / Permission profiles
Control specific commands, paths, and networks more finely
Codex CLI and IDE extension enforce sandbox policy via OS-level mechanisms. Defaults are: no network access, write permissions limited to the active workspace.
03Core sandbox_mode values
In config.toml, sandbox is configured with sandbox_mode.
sandbox_mode = "workspace-write"
Three supported values:
read-only
Can read files but modifications and command execution require approval
workspace-write
Can read, modify, and run regular commands within workspace
danger-full-access
Remove sandbox restrictions
04read-only mode
read-only is the most conservative mode. Codex can examine and explain files but requires approval to modify or run commands.
sandbox_mode = "read-only"
approval_policy = "on-request"
Recommended situations:
Analyzing unfamiliar codebases
Understand structure without modifications
Security review
Prevent accidental file changes
PR review
Focus on reading and judging
Checking important production repos
Minimize change risk
05read-only mode · Configuration example
Execution example:
codex --sandbox read-only --ask-for-approval on-request
Profile example:
# ~/.codex/review.config.toml
model = "gpt-5.5"
model_reasoning_effort = "high"
sandbox_mode = "read-only"
approval_policy = "on-request"
06workspace-write mode
workspace-write is the most frequently used default mode for local development. Codex can read, modify, and execute routine local commands within the current workspace. Modifications outside the workspace or network access require approval requests.
sandbox_mode = "workspace-write"
approval_policy = "on-request"
Recommended situations:
General feature implementation
File modifications needed
Bug fixes
Repeated test execution and fixes
Refactoring
Multiple file modifications possible
Documentation updates
File modifications within workspace
07workspace-write mode · Configuration example
Beginner basic recommendation:
# ~/.codex/config.toml
sandbox_mode = "workspace-write"
approval_policy = "on-request"
CLI execution:
codex --sandbox workspace-write --ask-for-approval on-request
08danger-full-access mode
danger-full-access removes sandbox restrictions. It eliminates filesystem and network boundaries, granting Codex full access. Use only when you want to give full access to Codex.
sandbox_mode = "danger-full-access"
Most dangerous combination:
sandbox_mode = "danger-full-access"
approval_policy = "never"
This combination means no sandbox, no approval request, full access allowed.
Acceptable use cases:
Disposable VM
Must be able to discard the VM itself
Docker isolated environment
Host volumes and secrets must be restricted
CI temporary runner
Permissions and network must be restricted externally
Test-only sandbox machine
No sensitive files, accounts, or tokens
Should not use as default on regular local development machines.
09approval_policy core values
Approval policy determines when Codex pauses and asks the user.
approval_policy = "on-request"
Supported values:
untrusted
Commands outside trusted set require approval
on-request
Proceed within sandbox, request approval for outside boundaries
never
No approval request, best effort within given sandbox
granular
Control surface per approval type finely
10untrusted policy
untrusted is a conservative approval policy. Codex asks before running commands not in the trusted set. Only known-safe read operations run automatically; commands that change state or trigger external execution paths require approval.
sandbox_mode = "workspace-write"
approval_policy = "untrusted"
Recommended situations:
Unfamiliar repos
Unknown what scripts do
Security-sensitive projects
Restrict command execution conservatively
External contributed code
Package script risks
Operations-related repos
Failure cost is high
11on-request policy
on-request is the most practical default. Codex basically works within sandbox, asking only when it needs to go outside. Default permissions are also workspace-write + on-request + user reviewer combination.
sandbox_mode = "workspace-write"
approval_policy = "on-request"
Recommended situations:
General development
Balance convenience and safety
Feature implementation
Can modify files within workspace
Running tests
Can auto-run regular commands
Beginner default
Pauses for risky work and asks
12on-request policy · Basic recommendation
Recommended basic configuration:
sandbox_mode = "workspace-write"
approval_policy = "on-request"
approvals_reviewer = "user"
13never policy
never is a policy that doesn't show approval prompts. Important: never doesn't mean removing sandbox—it means removing prompts. Codex still does its best only within configured sandbox constraints.
Safe example:
sandbox_mode = "read-only"
approval_policy = "never"
Meaning: Read-only possible, no approval request, no modifications or out-of-bounds work
CI example:
sandbox_mode = "workspace-write"
approval_policy = "never"
Meaning: Modifications within workspace possible, no approval request, work outside workspace fails or is restricted
Dangerous example:
sandbox_mode = "danger-full-access"
approval_policy = "never"
Should not use this combination on regular local machines.
14Granular approval policy
Granular approval controls whether to surface prompts or auto-reject per approval type.
approval_policy = { granular = {
sandbox_approval = true,
rules = true,
mcp_elicitations = true,
request_permissions = false,
skill_approval = false
} }
Controllable items:
sandbox_approval
Allow sandbox escalation approval prompt
rules
Allow approval from rules' prompt decision
mcp_elicitations
Allow MCP elicitation prompt
request_permissions
Allow request_permissions tool prompt
skill_approval
Allow skill script approval prompt
Beginners don't need granular from the start. Most cases are covered by approval_policy = "on-request".
15approvals_reviewer: user and auto_review
You can also configure who reviews approval prompts.
approvals_reviewer = "user"
Supported values:
user
User reviews directly
auto_review
Use reviewer subagent
Default:
approval_policy = "on-request"
approvals_reviewer = "user"
Auto-review example:
approval_policy = "on-request"
approvals_reviewer = "auto_review"
sandbox_mode = "workspace-write"
Important: Auto-review doesn't change sandbox boundaries—it only changes the reviewer for approval requests.
16Network access configuration
In workspace-write mode, network access is off by default. To allow it, add this setting:
sandbox_mode = "workspace-write"
[sandbox_workspace_write]
network_access = true
Recommended default:
[sandbox_workspace_write]
network_access = false
Situations where network should be enabled:
Dependency installation
npm install, pip install
External API testing
Call staging APIs
Package registry access
npm, PyPI, crates.io
Document fetch
Download external docs
Note: Network access for web_search and shell commands are different.
17Extend write scope with writable_roots
workspace-write only allows writing within the current workspace by default. For other directories, add writable_roots.
sandbox_mode = "workspace-write"
[sandbox_workspace_write]
writable_roots = [
"/Users/me/.pyenv/shims",
"/Users/me/dev/shared-package"
]
Good use examples:
Modify shared package outside monorepo
Shared package path
Need local tool shim
.pyenv/shims
Save generated output
Specific output folder
Bad use example:
[sandbox_workspace_write]
writable_roots = ["/"]
This essentially undermines the sandbox purpose significantly.
18Change permissions during session with /permissions
In Codex CLI, you can switch permission modes during a session with /permissions.
/permissions
Usage flow:
- Analyze code in read-only
- Review plan
- Switch to workspace-write with /permissions
- Modify files
- Check diff
Good pattern for beginners:
- First time seeing repo → read-only
- Decide modifications are safe → workspace-write
- Very risky work → stay in read-only
19Allow, confirm, or block specific commands with Rules
Rules determine allow, confirm, or block for specific command prefixes.
allow
Allow without prompt
prompt
Confirm before execution
Usage examples:
- I want to do git commit myself → forbidden
- Always block rm -rf → forbidden
- Confirm npm install each time → prompt
It's more appropriate to use rules for specific command prefixes (allow, prompt, forbid) than to broaden permissions.
20Permission profiles vs. existing sandbox approach
Codex also has beta permission profiles.
Existing approach:
sandbox_mode = "workspace-write"
[sandbox_workspace_write]
network_access = false
Permission profile approach:
default_permissions = ":workspace"
Warning: Do not use default_permissions together with sandbox_mode or [sandbox_workspace_write]. Use one or the other.
Beginner basis: Through Chapter 14, learning just sandbox_mode + approval_policy approach is enough. Permission profiles are advanced/beta permission models covered separately.
21Frequently used safe combinations ① · ②
1. Beginner basic combination
sandbox_mode = "workspace-write"
approval_policy = "on-request"
approvals_reviewer = "user"
Effect: Can work within workspace, modifications outside/network access require approval
2. Read-only review combination
sandbox_mode = "read-only"
approval_policy = "on-request"
Effect: Analysis possible, modifications or command execution require approval
Recommended: Code review, security analysis, first-time repo, production code checking
22Frequently used safe combinations ③ · ④
3. Quiet read-only CI
sandbox_mode = "read-only"
approval_policy = "never"
Effect: Read-only, no approval prompt, no modifications
4. Auto-modifying CI
sandbox_mode = "workspace-write"
approval_policy = "never"
Effect: Can modify within workspace, no approval prompt, workspace-outside work restricted
Recommended conditions: CI runner isolated, secret exposure limited, changes reviewed via PR diff
23Frequently used safe combinations ⑤
5. Conservative professional combination
sandbox_mode = "workspace-write"
approval_policy = "untrusted"
Effect: File modifications possible, untrusted commands require approval
24Dangerous combinations
Danger 1. full access + never
sandbox_mode = "danger-full-access"
approval_policy = "never"
Risk: No filesystem restriction, no network restriction, no approval
Danger 2. network access always enabled
sandbox_mode = "workspace-write"
[sandbox_workspace_write]
network_access = true
Risk: Increased possibility of prompt injection via external docs, package scripts, API responses
25Dangerous combinations · Continued
Danger 3. writable root set too broadly
[sandbox_workspace_write]
writable_roots = ["/"]
Risk: workspace-write protection meaning mostly disappears
Instead add only needed folders narrowly:
[sandbox_workspace_write]
writable_roots = ["/Users/me/dev/shared-package"]
Danger 4. Full access with many host secrets in CI
sandbox_mode = "danger-full-access"
approval_policy = "never"
Risk: Increased exposure possibility for CI secrets, deploy keys, cloud tokens, package tokens
In CI, default to workspace-write or read-only, and restrict network and secret access at runner level.
26Recommended configuration for beginners
Beginners should start with this configuration.
# ~/.codex/config.toml
sandbox_mode = "workspace-write"
approval_policy = "on-request"
approvals_reviewer = "user"
[sandbox_workspace_write]
network_access = false
What each setting means:
workspace-write
Can modify files in current project
on-request
Asks for risky or out-of-scope work
user
User judges approval directly
network_access = false
Block external network for shell commands
For unfamiliar repos, use a read-only profile:
# ~/.codex/readonly.config.toml
sandbox_mode = "read-only"
approval_policy = "on-request"
approvals_reviewer = "user"
Execution: codex --profile readonly
27Recommended profiles for professionals
For general development
# ~/.codex/dev.config.toml
model = "gpt-5.5"
model_reasoning_effort = "medium"
sandbox_mode = "workspace-write"
approval_policy = "on-request"
approvals_reviewer = "user"
[sandbox_workspace_write]
network_access = false
Execution: codex --profile dev
For deep analysis
# ~/.codex/deep-readonly.config.toml
model = "gpt-5.5"
model_reasoning_effort = "xhigh"
plan_mode_reasoning_effort = "xhigh"
sandbox_mode = "read-only"
approval_policy = "on-request"
approvals_reviewer = "user"
Execution: codex --profile deep-readonly
28Recommended profiles for professionals · Continued
For careful modifications
# ~/.codex/deep-edit.config.toml
model = "gpt-5.5"
model_reasoning_effort = "xhigh"
plan_mode_reasoning_effort = "xhigh"
sandbox_mode = "workspace-write"
approval_policy = "on-request"
approvals_reviewer = "user"
[sandbox_workspace_write]
network_access = false
Execution: codex --profile deep-edit
For network-enabled work
# ~/.codex/net.config.toml
model = "gpt-5.5"
model_reasoning_effort = "high"
sandbox_mode = "workspace-write"
approval_policy = "on-request"
approvals_reviewer = "user"
[sandbox_workspace_write]
network_access = true
Execution: codex --profile net
Do not use this profile as your default.
29Sandbox and approval in CI/CD
In CI/CD, humans cannot click approval buttons, so approval_policy = "never" is often used. However, maintain sandbox.
Read-only CI:
# ~/.codex/ci-readonly.config.toml
sandbox_mode = "read-only"
approval_policy = "never"
Auto-modifying CI:
# ~/.codex/ci-edit.config.toml
sandbox_mode = "workspace-write"
approval_policy = "never"
[sandbox_workspace_write]
network_access = false
Execution:
codex exec --profile ci-readonly "review this diff and report risks"
codex exec --profile ci-edit "fix lint errors only"
CI settings to avoid:
sandbox_mode = "danger-full-access"
approval_policy = "never"
Only review this combination exceptionally if the CI runner is strongly isolated and secrets and network are restricted externally.
30Troubleshooting checklist
1. Codex cannot modify files
Check: sandbox_mode = "read-only"
Fix: sandbox_mode = "workspace-write" + approval_policy = "on-request"
2. Cannot modify files outside workspace
Check: sandbox_mode = "workspace-write"
Fix: Add writable_roots in [sandbox_workspace_write]
3. npm install or pip install fails
Check: network_access = false
Fix: network_access = true (enable only when needed)
4. Approval prompt doesn't appear at all
Check: approval_policy = "never"
Fix: approval_policy = "on-request"
5. Approval prompts appear too frequently
Check: sandbox_mode = "read-only" + approval_policy = "untrusted"
Fix: sandbox_mode = "workspace-write" + approval_policy = "on-request"
6. Project settings not applying
Check: Is the project trusted state? Is .codex/config.toml in current repo? Is CLI override higher priority covering it?
7. .git or .codex doesn't modify
Recommendation: Run git commit yourself, let Codex handle diff generation and testing only
Section 14 · Wrap-up
Chapter 14 Core Summary
Sandbox defines what you can do.
sandbox_mode = "read-only"sandbox_mode = "workspace-write"sandbox_mode = "danger-full-access"
Approval defines when to ask.
approval_policy = "untrusted"approval_policy = "on-request"approval_policy = "never"
Remember:
read-only = for analysis / workspace-write = for general development / danger-full-access = isolated externally only / untrusted = conservative confirmation / on-request = basic recommendation / never = CI/automation only
Next Section
Section 15. How to Use AGENTS.md
15. How to Use AGENTS.md
01What is AGENTS.md
AGENTS.md is a Markdown file that tells Codex your project's work rules.
If humans have README.md, AI coding agents have AGENTS.md.
README.md
Project explanation for humans
AGENTS.md
Work instructions for AI agents
According to official Codex documentation, AGENTS.md is durable project guidance that moves with the repository and applies before Codex starts work.
02Why AGENTS.md is needed
AGENTS.md saves rules you'd repeat constantly.
Instead of saying this every time:
This project uses pnpm.
Run tests with pnpm test.
Update docs when changing API.
Never read or modify .env files.
Check lint and typecheck before PR.
You leave it once in the repository root. Official Best Practices documentation explains that good AGENTS.md should contain repo layout, execution method, build/test/lint commands, engineering convention, PR expectations, constraints, do-not rules, and verification standards.
03How Codex reads AGENTS.md
Codex creates an instruction chain on startup. Discovery order is:
Global scope
${CODEX_HOME}/AGENTS.override.md or ${CODEX_HOME}/AGENTS.md
Project scope
AGENTS.override.md, AGENTS.md, fallback files from project root to current work directory
Merge order
Merge from root toward current directory
Priority
Files closer to current directory merge later, so are stronger
Default CODEX_HOME is ~/.codex. Codex merges ~/.codex/AGENTS.md → repo/AGENTS.md → repo/apps/web/AGENTS.md in order.
04Global AGENTS.md
Global AGENTS.md applies to all projects—your personal baseline instructions.
Location: ~/.codex/AGENTS.md
Example:
# ~/.codex/AGENTS.md
## Working agreements
- Respond in English.
- Present a simple plan before code changes.
- Always ask before deleting important files or major refactoring.
- Explain why before adding new production dependencies and suggest alternatives.
Good for global file: Response language, explanation style, approval preferences, personal habits, preferred package manager
Not good for global file: Specific repo test commands, specific team coding conventions, specific service deployment procedures
05Project AGENTS.md
Project AGENTS.md sits in the repo root—shared team instructions.
Location: repo-root/AGENTS.md
Example structure:
- Project overview — purpose and tech stack
- Commands — install, dev server, lint, test, build
- Repository rules — file layout, API structure, doc update criteria
- Safety — protect env vars, API keys, deploy commands
Official documentation explains that repository-level AGENTS.md tells Codex project rules while inheriting global defaults.
06Nested AGENTS.md and the "closer is stronger" principle
Large repos or monorepos shouldn't stop at root.
Example structure:
repo/
AGENTS.md
apps/
web/
AGENTS.md
admin/
AGENTS.md
services/
payments/
AGENTS.md
When Codex starts in services/payments, it reads in this order: ~/.codex/AGENTS.md → repo/AGENTS.md → repo/services/payments/AGENTS.md. Files closer to current directory merge later and override earlier ones.
07AGENTS.override.md
AGENTS.override.md takes priority over regular AGENTS.md in the same directory.
When both exist in same dir: Codex uses AGENTS.override.md, ignoring AGENTS.md.
Temporary experiment
Add experiment rules with AGENTS.override.md
Exception for specific subproject
Use nested override
Personal temporary full override
~/.codex/AGENTS.override.md
Suspend team rules temporarily
Override explicitly
Warning: AGENTS.override.md is powerful. If you created it temporarily, remove it after work.
08Configure fallback filename settings
If your team already uses other instruction files, you can make Codex read those too.
Configuration example:
# ~/.codex/config.toml
project_doc_fallback_filenames = ["TEAM_GUIDE.md", ".agents.md"]
project_doc_max_bytes = 65536
With this, Codex searches each directory in this order: AGENTS.override.md → AGENTS.md → TEAM_GUIDE.md → .agents.md
09project_doc_max_bytes and instruction size limits
Codex stops adding files when instruction chain total reaches project_doc_max_bytes. Default is 32 KiB.
Configuration example:
# ~/.codex/config.toml
project_doc_max_bytes = 65536
But blindly increasing size isn't the answer.
Context increases
More instructions enter each task
Cost increases
Input tokens increase
Conflicts increase
Old and new rules mix
Instruction may be ignored
Core rules buried in length
Official Best Practices also recommend keeping main file concise, and splitting planning, code review, architecture into task-specific markdown.
10Create draft with /init
In Codex CLI, you can create a starter AGENTS.md with /init.
/init
Official Best Practices explain that /init slash command scaffolds a starter AGENTS.md, and you should edit the result to match your team's actual build, test, review, and ship practices.
Recommended flow:
- Run Codex at repo root
- Execute /init
- Review generated AGENTS.md
- Edit with actual commands and rules
- Team review then commit
11Basic template
Most straightforward template structure:
Project overview
Purpose, key tech stack, important directories
Commands
Install, dev server, test, lint, typecheck, build
Repository layout
Main directories and their roles
Coding conventions
Code style, doc updates, dependency policy
Testing rules
Adding tests, scope, final verification
Safety rules
Env vars, credentials, deployment protection
PR expectations
Change summary, test results, risk disclosure
12Direct coding style
Keep coding style short and concrete.
Good example:
## Coding conventions
- Avoid any in TypeScript; include reason as comment if needed.
- React components use named export.
- Don't put business logic directly in API route handlers; separate into src/domain.
- Prioritize Tailwind utility for CSS; extract repeated patterns to components.
- Follow style of existing files first.
Bad example: "Write good code", "Make it clean", "Keep it maintainable" is too abstract. Codex needs rules it can actually judge.
13Direct testing, build, lint commands
Codex needs exact commands for verification after work.
Good example:
## Commands
- Install dependencies: pnpm install
- Run unit tests: pnpm test
- Run a single test file: pnpm test -- path/to/file.test.ts
- Run lint: pnpm lint
- Run type checks: pnpm typecheck
- Build production bundle: pnpm build
Monorepo example:
- Web app dev: pnpm --filter web dev
- Web app tests: pnpm --filter web test
- API tests: pnpm --filter api test
- All checks: pnpm turbo run lint test typecheck
14Explicitly state forbidden actions
Explicitly write what Codex should not do.
Basic do-not list:
## Do not
- Do not run deployment commands.
- Do not rotate, print, or modify secrets.
- Do not edit .env* files.
- Do not rewrite migration history.
- Do not delete user data or test fixtures unless explicitly requested.
- Do not introduce new production dependencies without explaining why.
- Do not make broad formatting-only changes in unrelated files.
Or more strongly:
## High-risk actions
Ask for explicit confirmation before:
- Running database migrations
- Deleting files
- Changing authentication or authorization logic
- Modifying payment, billing, or money movement code
- Adding dependencies
- Changing CI/CD configuration
AGENTS.md is behavior guidance, not a technical enforcement mechanism.
15Security, secrets, and data guidance
Always be specific about security rules.
Example:
## Security and secrets
- Do not read, print, copy, or modify .env, .env.*, private keys, certificates, or credential files.
- If a task requires secrets, stop and ask the user.
- Never paste tokens, API keys, cookies, or credentials into logs or responses.
- Treat production data as sensitive.
- Do not make network calls to production services unless explicitly requested.
Data project example:
- Do not modify files in data/raw/.
- Write processed data to data/processed/.
- Write reports to reports/.
- Do not include personally identifiable information in generated examples.
16Write PR review guidance
If your team uses Codex as a reviewer, write review criteria separately.
Simple approach:
## Review expectations
When reviewing code:
- Focus on correctness, security, test coverage, and maintainability.
- Prefer actionable findings over style opinions.
- Include file paths and concrete examples.
- Mention missing tests when behavior changes.
- Do not approve changes that fail typecheck or tests.
Separate-file approach: Add "Follow docs/code_review.md when reviewing pull requests" to AGENTS.md, and Codex can follow those guidelines during review.
17Split AGENTS.md in monorepos
In monorepos, keep root small and put details in subfolders.
Recommended structure:
repo/
AGENTS.md
apps/
web/
AGENTS.md
mobile/
AGENTS.md
services/
api/
AGENTS.md
payments/
AGENTS.md
packages/
ui/
AGENTS.md
Root covers repository-wide rules and layout; each subfolder handles its module's specific rules. Closest file wins, so subprojects get tailored guidance.
18Use with multiple AI coding tools
AGENTS.md is not Codex-only—it's an open format for multiple AI coding tools.
If you have existing files:
Existing file
How to handle
CLAUDE.md
Move core rules to AGENTS.md
.cursorrules
Integrate project rules into AGENTS.md
.github/copilot-instructions.md
Common rules to AGENTS.md, GitHub-only rules keep separate
CONTRIBUTING.md
Keep human guidance, move agent execution rules to AGENTS.md
README.md
Keep intro and quickstart, move AI work rules to AGENTS.md
Migration: rename existing file to AGENTS.md and create symbolic link for backward compatibility.
19Difference between AGENTS.md, config.toml, Rules, and Skills
Four confusing concepts must be distinguished.
AGENTS.md
Project work guidance (test commands, code style, forbidden actions)
config.toml
Codex runtime settings (model, reasoning, sandbox, approval, MCP)
Rules
Command allow/confirm/block (forbid rm -rf, confirm npm install)
Skills
Repeated workflow packages (PR review skill, test-writing skill)
Distinction guide: What should I follow? → AGENTS.md | Which model/permissions? → config.toml | Which commands block? → Rules | How to package workflows? → Skills
20Good AGENTS.md example
Good AGENTS.md structure:
## Project overview
TypeScript monorepo using pnpm workspaces...
## Commands
- Install: pnpm install
- Tests: pnpm test (or pnpm --filter web test)
## Coding conventions
- Use TypeScript strict types
- Keep business logic out of route handlers
## Safety rules
- Do not read or modify .env* files
## PR expectations
- Summarize changed files, mention tests run, list risks
Why this example is good: Commands are actually executable | Forbidden actions are clear | Test criteria exist | File structure disclosed | Action rules outnumber abstract statements
21Bad AGENTS.md example
Bad example:
## Rules
- Be smart.
- Write clean code.
- Make it scalable.
- Use best practices.
- Always improve everything.
- Never make mistakes.
Too abstract
No actual judgment criteria
No verification commands
Codex doesn't know what to run
No scope limit
Can trigger unrelated refactoring
No forbidden actions
Can't stop risky work
Worse pattern: "Always refactor", "Fix everything you see", "Run any needed commands"—this causes unnecessary large changes and dependency updates.
22Maintenance approach
AGENTS.md is not write-once. Update when:
Codex repeats same mistake
Add rule
Test command changes
Update Commands
New package added
Update Repository layout
PR feedback repeats
Add Review expectations
Security issue found
Strengthen Safety rules
File grows too long
Split into sub-AGENTS.md or separate docs
Real maintenance routine: Codex makes same mistake twice → Fix root cause with short rule → Add to AGENTS.md → See effect on next task → Separate to sub-docs when too long
23Troubleshooting checklist
1. Codex doesn't seem to read AGENTS.md
codex --ask-for-approval never "Summarize the current instructions."
2. Wrong guidance applies
Check: ~/.codex/AGENTS.override.md, repo/AGENTS.override.md, override in subdirs. Rename or remove as needed.
3. Subfolder guidance not applying
codex --cd services/payments "Show which instruction files are active."
4. Fallback file ignored
Check: project_doc_fallback_filenames configured, start new session.
5. Guidance gets cut off
Fix: Increase project_doc_max_bytes or shorten root, split by subfolder.
Section 15 · Wrap-up
What to remember from this section
AGENTS.md tells Codex your project's work rules.
Basic location: ~/.codex/AGENTS.md (personal) → repo/AGENTS.md (team) → repo/subdir/AGENTS.md (subdirectory)
Core template sections: Project overview, Commands, Repository layout, Coding conventions, Testing rules, Safety rules, PR expectations
Keep it short, be concrete, make it executable, manage by repeated mistakes.
Include in AGENTS.md: Project structure, execution commands, test/lint/build commands, coding conventions, forbidden actions, security rules, PR review criteria
Don't include: Overly abstract language, outdated commands, personal preferences not fitting all repos, secrets or credentials, security policies that should be technically enforced
Next Section
Section 16. Hooks
16. Hooks
01What Are Hooks?
Hooks are an extension system that automatically runs user scripts at specific points during Codex execution.
Simply put:
Official documentation describes hooks as an extension framework for injecting deterministic scripts into the Codex lifecycle. For example, you can check if an API key is attached to a prompt, log conversation contents, run validation scripts at the end of a turn, or inject additional context from specific directories.
At the moment Codex tries to do something
→ hook executes
→ can allow, block, warn, or inject additional context
If AGENTS.md is "guidelines to follow", hooks are "automatic checks that run at predetermined times".
02When Hooks Are Needed
Hooks are suitable for these situations.
Block dangerous commands
Automatically block commands like rm -rf, git push, deploy
Prevent secret leaks
Check if API keys appear in prompts or commands
Enforce team policies
Restrict use of specific files, directories, commands
Auto validation
Notify if lint/test is needed when work ends
logging / analytics
Log session start, prompt submission, tool usage
directory-specific context
Inject additional work rules in specific directories
enterprise policy
Administrators can enforce common hooks
Writing "don't do this" in AGENTS.md is guidance, but blocking it with hooks is execution control. For important policies, it's safer to use hooks, sandbox, approval, and rules together rather than relying on AGENTS.md alone.
03Hooks Are Enabled by Default
Hooks are enabled by default. To disable, set [features].hooks = false in config.toml.
Enable again:
[features]
hooks = true
Organization administrators can also force hooks off in requirements.toml.
[features]
hooks = false
04Hook File Locations
Codex looks for hooks next to the active config layer. The four most commonly used locations in practice are:
~/.codex/hooks.json
~/.codex/config.toml
<repo>/.codex/hooks.json
<repo>/.codex/config.toml
~/.codex/hooks.json
Personal global hooks
~/.codex/config.toml
Inline hooks in personal config
<repo>/.codex/hooks.json
Project-specific hooks
<repo>/.codex/config.toml
Inline hooks in project config
Project-local hooks are loaded only when the project .codex/ layer is in a trusted state.
05hooks.json Method and config.toml Inline Method
Hooks can be configured in two ways.
First: hooks.json file
{
"hooks": {
"PreToolUse": [
{
"matcher": "^Bash$",
"hooks": [
{
"type": "command",
"command": "python3 .codex/hooks/pre_tool_use_policy.py",
"timeout": 30,
"statusMessage": "Checking Bash command"
}
]
}
]
}
}
06config.toml Inline Method
Second is the inline approach in config.toml.
[[hooks.PreToolUse]]
matcher = "^Bash$"
[[hooks.PreToolUse.hooks]]
type = "command"
command = '/usr/bin/python3 "$(git rev-parse --show-toplevel)/.codex/hooks/pre_tool_use_policy.py"'
timeout = 30
statusMessage = "Checking Bash command"
Recommendation:
hooks.json
When there are many hooks or the team manages hooks separately
inline [hooks]
When keeping config and hook settings in one file simply
07Hook Configuration Structure
Hook configuration has three levels.
Event
→ Matcher group
→ Hook handler
Examples:
PreToolUse
Which lifecycle event to run on
matcher
Which tool, trigger, or source to react to
hooks
List of actual handlers to run
type = "command"
Current handler type being run
command
Shell command to execute
timeout
Maximum execution time, in seconds
statusMessage
Status message to display in UI
08Matcher Pattern
matcher is a regex string that determines when a hook runs. "*", "", or omitting the matcher matches all occurrences of that event.
Commonly used matchers:
Bash
^Bash$
^apply_patch$
Edit|Write
mcp__filesystem__read_file
mcp__filesystem__.*
startup|resume|clear|compact
manual|auto
Matcher targets by event:
PermissionRequest
tool name
PreCompact / PostCompact
manual or auto
SessionStart
startup, resume, clear, compact
SubagentStart / SubagentStop
subagent type
09Hook Trust Review and /hooks
Non-managed command hooks must be reviewed and trusted by the user before execution. Codex records trust based on the current hash of the hook definition, so if hook content changes, it becomes a review target again.
Managing hooks from CLI:
/hooks
You can do the following in /hooks:
Check hook source
Review new or modified hooks
Trust hooks
Disable individual non-managed hooks
Managed hooks come from management sources like system, MDM, cloud, or requirements.toml. These hooks are policy-marked as trusted and cannot be disabled by users from the hook browser.
10Full Lifecycle Event List
Currently, the config reference examples these lifecycle hook events:
SessionStart
After session start, resume, clear, compact
UserPromptSubmit
Right before user prompt is sent to the model
PreToolUse
Right before tool execution
PermissionRequest
Right before Codex shows an approval prompt
PostToolUse
After tool execution
PreCompact
Right before conversation compact
PostCompact
Right after conversation compact
SubagentStart
When subagent starts
SubagentStop
When subagent stops
11SessionStart
SessionStart runs when a session starts.
Matcher targets:
startup
resume
clear
compact
Input includes source. If you print plain text to stdout, it becomes additional developer context. JSON output can provide additionalContext.
Use cases: Inject team rules at session start, provide additional context per work directory, insert recent work notes summary
12UserPromptSubmit
UserPromptSubmit runs right before the user prompt is passed to the model.
Input includes the prompt submitted by the user. This event currently doesn't use matchers and configured matchers are ignored. Plain text stdout becomes additional developer context, and you can also block the prompt itself with decision: "block".
Use cases: Check if API keys are in the prompt, block high-risk requests like production DB deletion, inject additional guidance context based on prompt content
13UserPromptSubmit Block Example
Block output example:
{
"decision": "block",
"reason": "Prompt appears to contain a secret. Remove it before continuing."
}
You can also pass block reason via exit code 2 and stderr.
14PreToolUse
PreToolUse runs right before supported tools like Bash, apply_patch, MCP tools are executed.
Input includes tool_name, tool_use_id, tool_input. For Bash and apply_patch, use tool_input.command.
Use cases: Block dangerous Bash commands, block specific file modifications, restrict MCP tool calls, inject additional context before command execution, rewrite supported tool inputs
15PreToolUse Block Output
Block output example:
{
"hookSpecificOutput": {
"hookEventName": "PreToolUse",
"permissionDecision": "deny",
"permissionDecisionReason": "Destructive command blocked by hook."
}
}
Supported tool calls can be rewritten with permissionDecision: "allow" and updatedInput.
16PermissionRequest
PermissionRequest runs right before Codex requests approval from the user.
For example, it runs when shell escalation or managed-network approval is needed. It doesn't run for commands that don't need approval. This hook can allow, deny, or pass the request to normal approval flow without deciding.
Approval output:
{
"hookSpecificOutput": {
"hookEventName": "PermissionRequest",
"decision": {
"behavior": "allow"
}
}
}
17PermissionRequest Denial Output
Denial output:
{
"hookSpecificOutput": {
"hookEventName": "PermissionRequest",
"decision": {
"behavior": "deny",
"message": "Blocked by repository policy."
}
}
}
When multiple hooks return a decision, deny wins. If there's no deny and at least one allow, the approval prompt doesn't show and proceeds.
18PostToolUse
PostToolUse runs after tool execution.
It runs after Bash, apply_patch, MCP tool calls, and even when a Bash command ends with non-zero status. However, you cannot undo the side effects of an already-executed tool.
Use cases: Inspect command output, turn test failure results into model-visible feedback, detect changes to generated files, warn after forbidden file changes
Important limitation: PostToolUse cannot undo already-executed work. Use PreToolUse if blocking is your goal.
19PreCompact / PostCompact
PreCompact runs right before conversation compact. PostCompact runs right after compact. Matcher targets are manual or auto.
Use cases: Save important TODOs before compact, check summary quality after compact, update memo files in long sessions
If PreCompact hook returns continue: false, it can stop before compact. If PostCompact hook returns continue: false, it can stop after compact.
20SubagentStart / SubagentStop
SubagentStart runs when a subagent starts. SubagentStop runs when a subagent stops.
In SubagentStart, plain text stdout can become additional developer context for the subagent. SubagentStop expects JSON stdout on exit 0, and plain text output is invalid.
Use cases: Inject additional instructions per subagent, provide separate security standards to review subagent, trigger additional execution if subagent results are insufficient
21Stop
Stop runs when a turn ends.
Matcher is currently not used. Exit 0 expects JSON stdout and plain text output is invalid. decision: "block" doesn't reject the turn but auto-generates a continuation prompt for Codex to keep going.
Use cases: Force additional check if tests didn't run, enforce checklist before work ends, inspect last assistant message, force continued writing if required report format is missing
22Stop Hook Caution
Stop hooks can create infinite continuation loops. You must check input fields like stop_hook_active to limit repetition.
Official hook input includes stop_hook_active, letting you check if that turn was already continued by a Stop hook.
23Hook Input JSON Structure
All command hooks receive a single JSON object via stdin. Common fields are:
session_id
Current Codex session id
transcript_path
Session transcript path (string or null)
cwd
Session working directory
hook_event_name
Current hook event name
permission_mode
Current permission mode
turn_id
Codex turn id provided in turn-scoped hooks
24Reading Hook Input (Python)
Reading input in a Python hook:
#!/usr/bin/env python3
import json
import sys
payload = json.load(sys.stdin)
event = payload.get("hook_event_name")
cwd = payload.get("cwd")
model = payload.get("model")
25Hook Output JSON Structure
Several events support common output fields.
{
"continue": true,
"stopReason": "optional",
"systemMessage": "optional",
"suppressOutput": false
}
General success: exit 0 + no stdout
Block or continuation: exit 2 + print reason to stderr, or output event-specific JSON to stdout
26Hook Output Caution
Actual support range differs per event.
PreToolUse
continue: false not currently supported
PermissionRequest
updatedInput, updatedPermissions, interrupt are future reserved
PostToolUse
Cannot undo side effects
Stop
JSON stdout required, plain text invalid
SubagentStop
JSON stdout required, plain text invalid
27Practical Example: Block Dangerous Bash Commands
Goal: Auto-block commands like rm -rf, git push, deploy, kubectl delete, terraform apply.
.codex/hooks.json:
{
"hooks": {
"PreToolUse": [
{
"matcher": "^Bash$",
"hooks": [
{
"type": "command",
"command": "/usr/bin/python3 \"$(git rev-parse --show-toplevel)/.codex/hooks/block_dangerous_bash.py\"",
"timeout": 10,
"statusMessage": "Checking Bash safety policy"
}
]
}
]
}
}
28Practical Example: block_dangerous_bash.py
.codex/hooks/block_dangerous_bash.py:
#!/usr/bin/env python3
import json
import re
import sys
payload = json.load(sys.stdin)
tool_input = payload.get("tool_input") or {}
command = tool_input.get("command", "")
dangerous_patterns = [
r"\brm\s+-rf\b",
r"\bgit\s+push\b",
r"\bkubectl\s+delete\b",
r"\bterraform\s+apply\b",
]
29Practical Example: Check for Secrets in Prompt
.codex/hooks.json:
{
"hooks": {
"UserPromptSubmit": [
{
"hooks": [
{
"type": "command",
"command": "/usr/bin/python3 \"$(git rev-parse --show-toplevel)/.codex/hooks/check_prompt_secret.py\"",
"timeout": 10,
"statusMessage": "Checking prompt for secrets"
}
]
}
]
}
}
Input includes the prompt submitted by the user. UserPromptSubmit runs right before the prompt is sent to the model.
30Practical Example: Encourage Testing at Work End
The Stop hook runs when a turn ends. You can make Codex verify again if tests are needed.
.codex/hooks.json:
{
"hooks": {
"Stop": [
{
"hooks": [
{
"type": "command",
"command": "/usr/bin/python3 \"$(git rev-parse --show-toplevel)/.codex/hooks/stop_require_tests.py\"",
"timeout": 10,
"statusMessage": "Checking completion criteria"
}
]
}
]
}
}
31Plugin-bundled Hooks
Plugins can also include lifecycle hooks.
Default plugin hook location:
hooks/hooks.json
Or you can specify hook path in .codex-plugin/plugin.json.
These environment variables are provided to plugin hook commands:
PLUGIN_ROOT
Installed plugin root
PLUGIN_DATA
Plugin's writable data directory
CLAUDE_PLUGIN_ROOT
Compatibility plugin root
CLAUDE_PLUGIN_DATA
Compatibility plugin data
32Managed Hooks and requirements.toml
Organization administrators can enforce managed hooks in requirements.toml.
Note: Codex does not deploy scripts in managed_dir. The organization's MDM or device-management system must install and update scripts.
Managed hooks come from sources like system, MDM, cloud, or requirements.toml, are policy-trusted, and cannot be disabled by users from the hook browser.
33Hook Security Caution (1)
1. Hooks execute local commands
Hook commands are executed in the session's cwd.
Pattern to avoid:
{
"type": "command",
"command": "curl https://example.com/install.sh | sh"
}
34Hook Security Caution (2)
2. Project-local hooks don't run until trust review
Malicious repos can plant .codex/hooks.json, so Codex doesn't execute non-managed hooks right away and requires review/trust procedures.
Recommendation: Review full hook command in /hooks, check absolute paths and script content, look for suspicious network calls, trust after review
35Hook Security Caution (3-4)
3. Multiple matching hooks all execute
If matching hooks exist in multiple files, all run. Don't assume multiple security hooks guarantee a specific order.
4. PostToolUse is not undo
PostToolUse can inspect tool execution after the fact, but cannot revert the side effects of already-executed commands. Use PreToolUse for blocking.
36Hook Security Caution (5-7)
5. Don't rely on transcript format
Hook input's transcript_path is for convenience. Transcript format is not a stable interface for hooks and may change.
6. Don't put secrets in hook scripts
Don't hardcode API_KEY; read from environment variables with os.environ.get().
7. Use short timeouts
Default timeout is 600 seconds if omitted. Long-running hooks slow down Codex workflows. "timeout": 10 is recommended.
37Troubleshooting (1-2)
1. Hook doesn't run
Check: Is [features] hooks = false in config.toml? Or check if /hooks shows trust is needed.
2. Project hook is ignored
Cause: Project is untrusted. Project-local hooks load only when project .codex/ layer is trusted. Check project trust status in /hooks and restart the session.
38Troubleshooting (3-5)
3. Hook seems to run twice
Cause: hooks.json and config.toml inline hooks exist simultaneously, user hook and project hook match simultaneously, or plugin hook also matches. Solution: Use either hooks.json or inline [hooks] per layer.
4. Other hook runs even though PreToolUse blocked
Normal behavior. Multiple matching command hooks on the same event start concurrently, so important blocking logic should be in one hook.
39Troubleshooting (6-7)
5. Command already ran even though PostToolUse blocked
Normal behavior. PostToolUse is after-tool hook, so move command pre-execution blocking to PreToolUse.
6. Stop hook loops infinitely
Cause: Stop hook keeps returning decision: block. Solution: Use if payload.get("stop_hook_active"): sys.exit(0) to prevent infinite loops.
40Command Won't Run on Windows
Use commandWindows or TOML alias command_windows.
[[hooks.PreToolUse.hooks]]
type = "command"
command = "python3 .codex/hooks/check.py"
command_windows = 'py -3 .codex\hooks\check.py'
timeout = 10
Section 16 · Wrap-up
What to Remember from This Unit
Hooks are a system that runs command scripts at specific points in the Codex lifecycle.
Key locations: ~/.codex/hooks.json, ~/.codex/config.toml, <repo>/.codex/hooks.json, <repo>/.codex/config.toml
The most important principles are block with PreToolUse, post-execution check with PostToolUse, work-end validation with Stop.
Beginners need only learn three: UserPromptSubmit (prompt inspection), PreToolUse (pre-execution blocking), PostToolUse (post-execution inspection).
Next Section
Section 17. MCP: Model Context Protocol
17. MCP: Model Context Protocol
01What Is MCP?
MCP is a standard protocol for AI applications to connect to external tools, data sources, and workflows.
Simply put:
MCP = Codex's standard way to connect to external tools
Through MCP, Codex can:
GitHub
View and manage PRs, issues, repository info
Browser / Playwright
Control and inspect browsers
Docs MCP
Search latest developer documentation
Internal DB / API
Query internal systems or run workflows
02What MCP Does in Codex
In Codex, MCP is an extension layer that adds external context and tools beyond basic built-in tools.
Codex built-in abilities:
Read files
Modify files
Run shell commands
Review diffs
Run tests
Abilities extended by MCP:
Manipulate GitHub PRs/issues
Read Figma designs
Check Sentry errors
Open browsers and take screenshots
Search external documentation
Query internal systems
03MCP Basics: Host, Client, Server
The MCP standard consists of three main components.
Host
AI application. Here, Codex
Client
Connector inside Host that connects to MCP servers
Server
External system providing tools and context
From Codex perspective:
Codex = Host
Codex internal MCP connection = Client
GitHub/Figma/Sentry/Context7 MCP = Server
04MCP Transport Supported by Codex
There are two main types of MCP servers Codex supports.
STDIO
Run MCP server process as local command
Streamable HTTP
Connect to MCP server at URL via HTTP
Distinction:
STDIO MCP = run server process on my computer
Streamable HTTP = connect to external or local MCP server via URL
05MCP Configuration Location
MCP configuration goes in config.toml.
Default location:
~/.codex/config.toml
Per-project location:
/.codex/config.toml
Note: Project MCP settings in .codex/config.toml apply only in trusted projects.
Untrusted projects skip the project-scoped .codex/ layer.
06Add MCP Servers via CLI
You can add MCP servers via CLI.
Basic form:
codex mcp add --
With environment variables:
codex mcp add --env VAR1=VALUE1 --env VAR2=VALUE2 --
Example:
codex mcp add context7 -- npx -y @upstash/context7-mcp
Check and help:
/mcp
codex mcp --help
07Configure MCP Servers in config.toml
Fine-tuned configuration goes in config.toml.
Basic structure:
[mcp_servers.]
...
Example:
# ~/.codex/config.toml
[mcp_servers.context7]
command = "npx"
args = ["-y", "@upstash/context7-mcp"]
enabled = true
startup_timeout_sec = 20
tool_timeout_sec = 60
08STDIO MCP Server Configuration
STDIO servers are MCP servers run as local commands.
Basic example:
[mcp_servers.context7]
command = "npx"
args = ["-y", "@upstash/context7-mcp"]
Commonly used fields in STDIO:
command
Command to run MCP server
args
Arguments to pass to command
env
Environment variables to pass directly to server
env_vars
Environment variables to allow/forward from current environment
cwd
Working directory to start server in
startup_timeout_sec
Server startup timeout
tool_timeout_sec
Tool execution timeout
enabled
Server enabled/disabled
09STDIO Environment Variable Example
Example of setting environment variables.
[mcp_servers.mytool]
command = "node"
args = ["server.js"]
cwd = "/Users/me/dev/my-mcp-server"
env_vars = ["MY_LOCAL_TOKEN"]
[mcp_servers.mytool.env]
NODE_ENV = "production"
env_vars accepts plain variable name or { name = "...", source = "local" | "remote" } object.
String entry uses local source by default; source = "remote" is used only in executor-backed remote stdio.
10Streamable HTTP MCP Server Configuration
Streamable HTTP servers are MCP servers accessed via URL.
Basic example:
[mcp_servers.figma]
url = "https://mcp.figma.com/mcp"
bearer_token_env_var = "FIGMA_OAUTH_TOKEN"
HTTP header example:
[mcp_servers.company_docs]
url = "https://mcp.company.internal/mcp"
bearer_token_env_var = "COMPANY_MCP_TOKEN"
[mcp_servers.company_docs.http_headers]
X-Workspace = "engineering"
[mcp_servers.company_docs.env_http_headers]
X-User-Token = "COMPANY_USER_TOKEN"
11HTTP Field Meanings
Fields for Streamable HTTP servers:
bearer_token_env_var
Environment variable name to read bearer token from
http_headers
Static headers written directly in config
env_http_headers
Read header values from environment variables
It's safer not to write secrets directly in http_headers, but use bearer_token_env_var or env_http_headers instead.
12Bearer Token and HTTP Header Configuration
Bearer token approach: put token in environment variable and config only references the variable name.
Set environment variable:
export FIGMA_OAUTH_TOKEN="..."
Config setting:
[mcp_servers.figma]
url = "https://mcp.figma.com/mcp"
bearer_token_env_var = "FIGMA_OAUTH_TOKEN"
Bad example (writing token directly):
[mcp_servers.figma.http_headers]
Authorization = "Bearer actual_token_value"
Why: Even if config.toml is accidentally committed, the token value itself is safe.
13OAuth MCP Server Login
MCP servers supporting OAuth log in via CLI.
codex mcp login
OAuth callback configuration:
mcp_oauth_callback_port = 5555
mcp_oauth_callback_url = "https://devbox.example.internal/callback"
If not set, Codex uses an ephemeral port.
OAuth credential storage method:
mcp_oauth_credentials_store = "auto"
Possible values: auto, file, keyring
14OAuth Scope Configuration
You can restrict permissions by specifying OAuth scopes.
Example:
[mcp_servers.github]
url = "https://example.com/mcp"
scopes = ["repo:read", "issues:read"]
mcp_servers.<id>.scopes defines OAuth scopes to request during that MCP server authentication.
It's safe to add write scope only when necessary.
15MCP Tool Allowlist / Denylist
When an MCP server provides many tools, it's good to enable only needed ones.
Allowlist:
[mcp_servers.chrome_devtools]
url = "http://localhost:3000/mcp"
enabled_tools = ["open", "screenshot"]
Denylist:
[mcp_servers.chrome_devtools]
url = "http://localhost:3000/mcp"
enabled_tools = ["open", "screenshot", "evaluate"]
disabled_tools = ["evaluate"]
disabled_tools applies after enabled_tools.
16Tool Allowlist Field Meanings
Tool control fields:
enabled_tools
Allowlist of tools to use from this server
disabled_tools
Denylist to disable again after allowlist applies
enabled = false
Keep config but disable server
17MCP Tool Approval Mode
You can set approval policy per MCP tool.
Server default:
[mcp_servers.chrome_devtools]
url = "http://localhost:3000/mcp"
default_tools_approval_mode = "prompt"
Override specific tool:
[mcp_servers.chrome_devtools.tools.open]
approval_mode = "approve"
Value meanings:
auto
Codex handles based on tool nature and policy
prompt
Ask user before tool execution
approve
Approve without prompt
18Approval Mode Practical Example
To auto-approve read-only tools only:
[mcp_servers.docs]
command = "npx"
args = ["-y", "@upstash/context7-mcp"]
default_tools_approval_mode = "prompt"
[mcp_servers.docs.tools.search]
approval_mode = "approve"
[mcp_servers.docs.tools.read]
approval_mode = "approve"
Basic principle: Keep write/delete risky tools as prompt.
19Read-Only MCP Configuration Method
Codex MCP configuration doesn't have a single universal read_only = true option applying to all servers.
To operate close to read-only, combine these four things:
Restrict OAuth scopes
Request read-only scopes only
enabled_tools
Allowlist only read tools
disabled_tools
Block write/delete/update tools
default_tools_approval_mode = "prompt"
Check risky tools each time
20Read-Only MCP Example
GitHub read-only example:
[mcp_servers.github]
url = "https://example-github-mcp.company/mcp"
scopes = ["repo:read", "issues:read"]
enabled_tools = ["repos/list", "pull_requests/read", "issues/read"]
disabled_tools = ["repos/delete", "pull_requests/merge", "issues/write"]
default_tools_approval_mode = "prompt"
Key: Read-only MCP is created with server auth permission + tool allowlist + approval mode.
21MCP Server Instructions
MCP servers can return instructions field during initialization.
Codex reads this instructions as server-wide guidance and uses it with that server's tools.
Example:
This server provides read-only access to internal API documentation.
Use search_docs before read_doc.
Do not call write or admin tools.
Rate limit: at most 5 requests per minute.
Good content for server instructions:
Tool usage order
Search first, then read
Restrictions
Don't use write tools
rate limit
Request limit per minute
Data sensitivity
Don't output customer info
Auth scope
read-only access
First 512 characters are important for Codex to decide server use, so write self-contained.
22Plugin-Provided MCP Servers
Plugins can include MCP servers too.
Example:
[plugins."sample@test".mcp_servers.sample]
enabled = true
default_tools_approval_mode = "prompt"
enabled_tools = ["read", "search"]
[plugins."sample@test".mcp_servers.sample.tools.search]
approval_mode = "approve"
Distinction:
Regular MCP
[mcp_servers.<id>]
Plugin MCP
[plugins.<plugin>.mcp_servers.<server>]
Transport configuration
User sets directly vs plugin manifest defines
User management
User sets command/url directly vs enabled/tool policy only
23Run Codex Itself as MCP Server
Codex can also run itself as an MCP server for other agents or tools to use.
codex mcp-server
Use cases:
- Other agents call Codex like a tool
- Use Codex as subexecutor in multi-agent workflows
- CI/CD orchestrators call Codex tasks via MCP
Beginners don't need this feature right away. Usually "connecting MCP servers to Codex" comes first, and "exposing Codex itself as MCP server" is advanced automation.
24How MCP Affects Token Cost
MCP servers are convenient but can increase cost and context usage.
Cost-increasing factors:
More MCP servers
Tool definitions and instructions included in context
More tools
Model must pick from more tool descriptions
Long server instructions
Context increases per session
Large tool output
Tool results enter conversation context
Multiple MCPs simultaneously
Increased context pollution risk
25Cost Optimization
To reduce costs, configure like this:
Disable unnecessary servers:
[mcp_servers.big_server]
enabled = false
Allow only needed tools:
[mcp_servers.github]
enabled_tools = ["pull_requests/read", "issues/read"]
disabled_tools = ["pull_requests/merge", "issues/write"]
Recommendation:
- Always-used MCPs enabled by default
- Occasional MCPs set to
enabled = false
- Large servers minimized with
enabled_tools
- Risky tools left as
prompt
26Recommended MCPs for Beginners
Recommended order for beginners:
1st priority
OpenAI Docs / Context7 — for doc search, relatively safe
2nd priority
GitHub read-only — useful for PR/issue context
3rd priority
Figma read-only — useful for frontend work
4th priority
Sentry read-only — useful for error analysis
5th priority
Browser / Playwright — powerful but needs permission management
Beginner basics:
- Start with doc search MCP
- Connect MCPs with write/delete/admin tools later
27GitHub MCP
GitHub MCP is useful for giving Codex GitHub API context like repositories, PRs, issues.
Recommended uses:
PR analysis
Check PR description, comments, changed files
issue triage
Summarize issues, suggest label candidates
release note
Organize by merged PRs
review support
Check GitHub thread context
Risks:
PR merge
Actual changes if misexecuted
issue/comment write
Creates public record
repo setting changes
Risky if permissions are broad
token scope excess
Exposes unnecessary write permission
28GitHub Read-Only Example
GitHub MCP safe configuration example:
[mcp_servers.github]
url = "https://example-github-mcp.company/mcp"
scopes = ["repo:read", "issues:read"]
enabled_tools = ["repos/list", "pull_requests/read", "issues/read"]
default_tools_approval_mode = "prompt"
29Figma MCP
Figma MCP is useful for reading design files and reflecting them in implementation.
Recommended uses:
Design analysis
Check frames, components, spacing
UI implementation
Write React components based on Figma
Design QA
Check implementation vs design differences
asset check
Reference colors, typography, layout
Basic example:
[mcp_servers.figma]
url = "https://mcp.figma.com/mcp"
bearer_token_env_var = "FIGMA_OAUTH_TOKEN"
Recommended policy:
[mcp_servers.figma]
url = "https://mcp.figma.com/mcp"
bearer_token_env_var = "FIGMA_OAUTH_TOKEN"
default_tools_approval_mode = "prompt"
Figma is safe to operate read-focused.
30Sentry MCP
Sentry MCP is useful for providing production error, stack trace, issue context to Codex.
Recommended uses:
Error root cause analysis
Track code location by stack trace
regression check
Compare recent deployment with error increase
issue summary
Turn Sentry issue into development task
test candidate derivation
Suggest regression prevention tests
Note: Sentry may contain sensitive data like user info, URLs, request body, token fragments.
31Sentry MCP Configuration
Recommended configuration:
[mcp_servers.sentry]
url = "https://example-sentry-mcp.company/mcp"
bearer_token_env_var = "SENTRY_MCP_TOKEN"
enabled_tools = ["issues/search", "issues/read", "events/read"]
default_tools_approval_mode = "prompt"
32Browser / Playwright / Chrome DevTools MCP
Browser MCPs are useful for opening and inspecting web apps in real browsers.
Recommended uses:
UI test
Open page, click, screenshot
debugging
Check console errors
1. Don't write token directly in config
2. Keep write tools as prompt by default
3. Turn off unnecessary tools
4. Don't keep many MCP servers on all the time
5. Trust project MCPs only in trusted projects
6. Minimize OAuth scope
Add write scope only when necessary.
7. Specify startup timeout and tool timeout
Beginners should start with doc search MCP (Context7), then gradually add GitHub, Figma, Sentry, Browser as read-only, which is safe.
More attached MCPs make Codex more powerful, but context cost and security risk grow too. Always enable only needed servers, narrow tools with allowlist, and keep write tools as prompt.